The Finish-ish Line

IMG_0067

When we threw down the gauntlet on ourselves on 24 Nov 2018, the challenge was to stop laying about and put in extra shifts at the coalface to get the final occupancy permit on our house five month later. D-day was in the calendar: 24 April 2019.

So did we do it? Kind of, mostly, yes. But it was a rocky ride.

IMG_1196

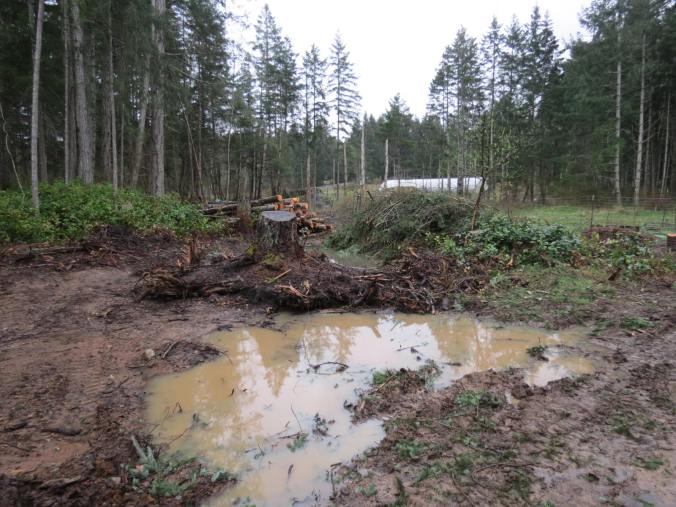
Yes, that’s our powerline on the ground with a tree on top

With winter came a few spanners in the works. The first being a nine-day power outage over Christmas when a massive mid-day windstorm left three quarters of a million people on Vancouver Island without Netflix and toppled a massive tree on our power line. For us it was a most Victorian Christmas.

However, by far the hardest blow was the passing of my dad, Wilf West, following a stroke in January. A lot of what I know about building rests on a deep foundation attributable to my dad. Not so much the specific nuts and bolts but rather the steeped-in-your-blood deep memory that anything can be built with enough thought. Being a book guy [though admittedly I considered becoming a machinist], I’d never built a house before, but having grown up with free run of Wilf’s workshop and living in a construction site when my dad decided to double the size of our house in the 80s, it seemed natural that I should later build my own house.

chimney.jpg

Wilf building the chimney on our Calgary house c. 1976

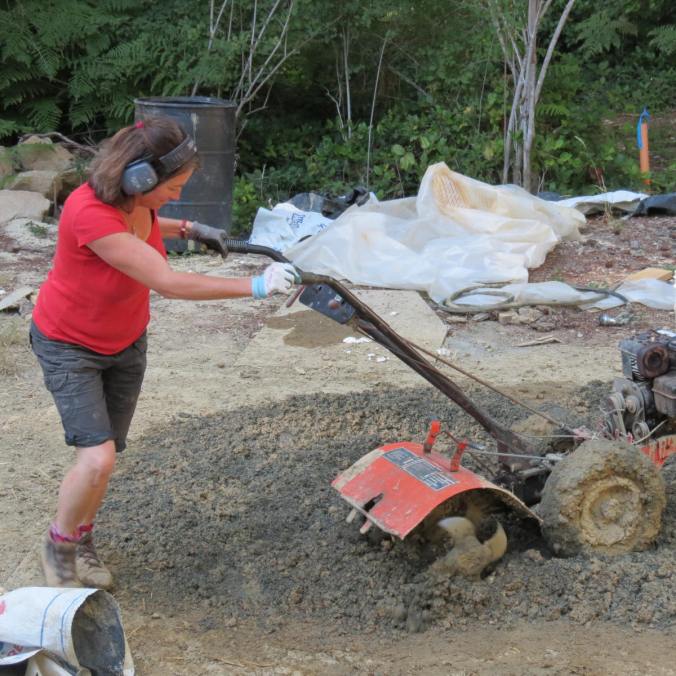
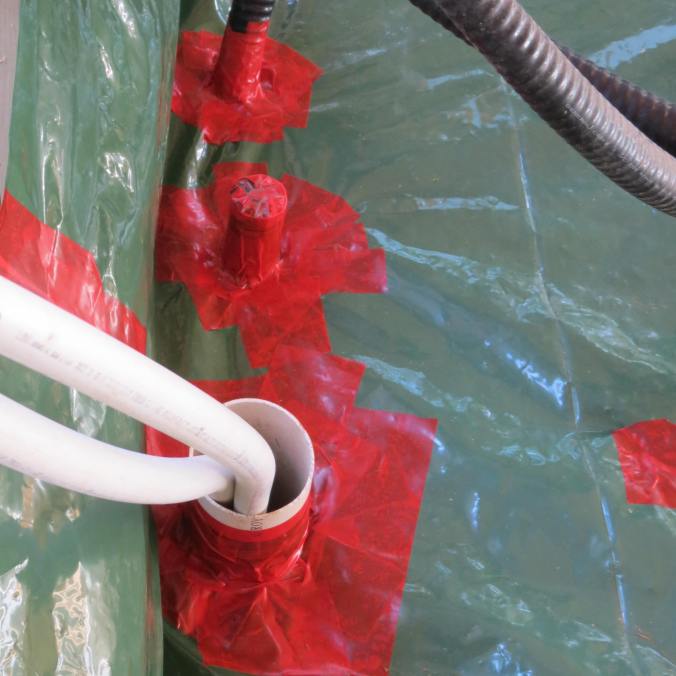
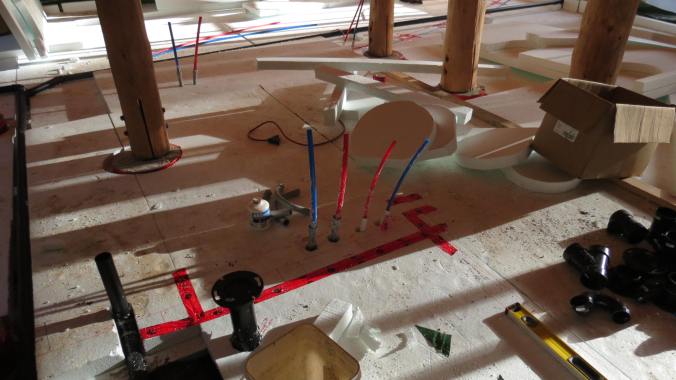
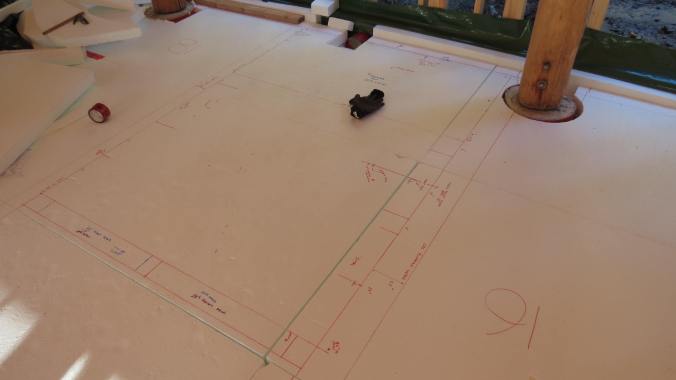
From day one my dad took a huge interest in our project and over several years he and my mum pitched in with some heavy lifting whenever they visited. He taught me to survey and helped me map our house site, build our power shed, and raise the first house wall. He and my mum also precisely taped our subfloor vapour barrier, kneeling on rock for three straight days, while I cleverly absconded to New Mexico for a work trip. My dad also helped lay tonnes of cob flooring, plaster walls, prepare for roof insulating, and he sanded some of our custom fir windowsill slabs. I’m devastated that he never got to see the house completed, but I can say without question that our house stands because of his life long role modelling.

***

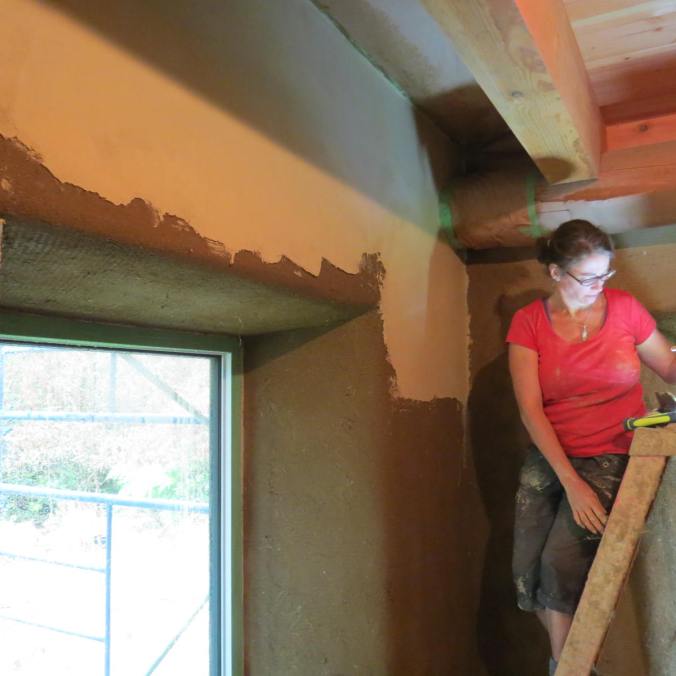
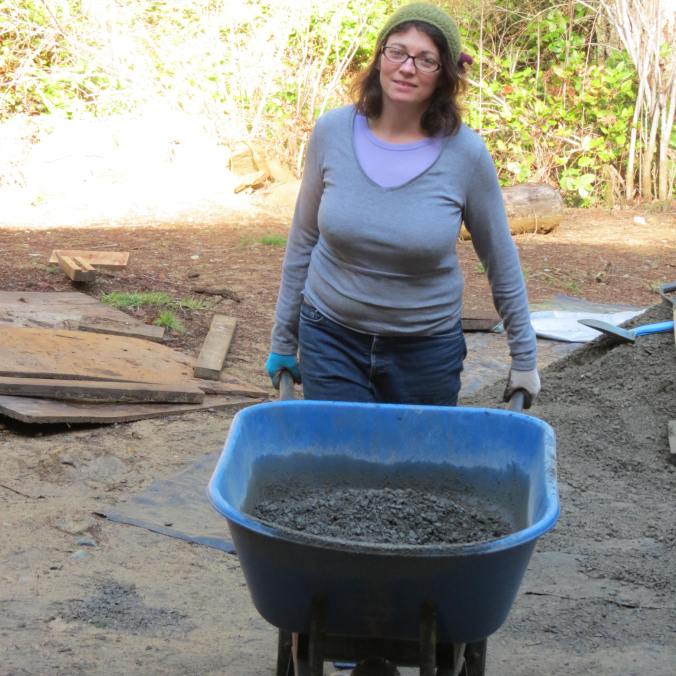
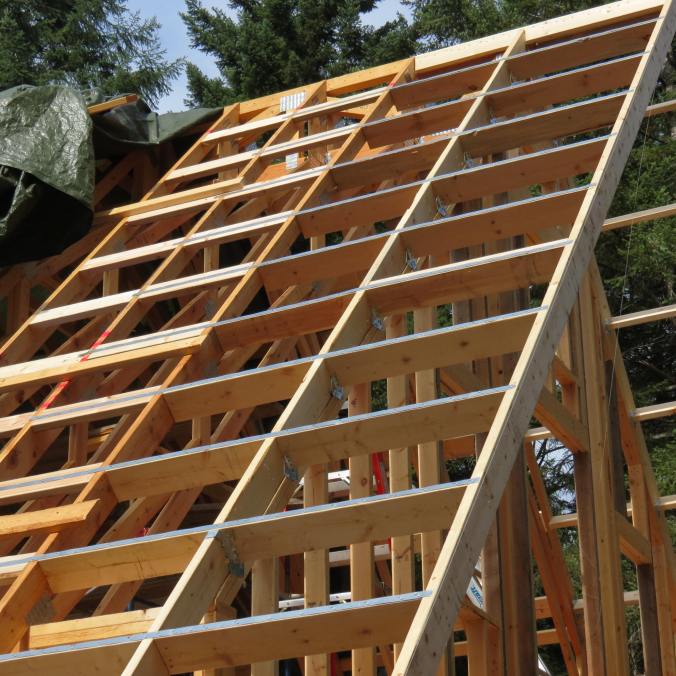
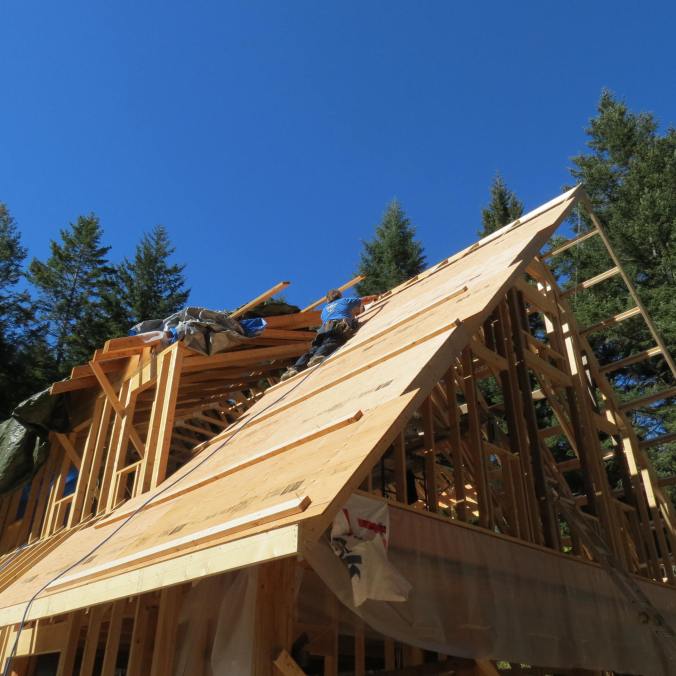
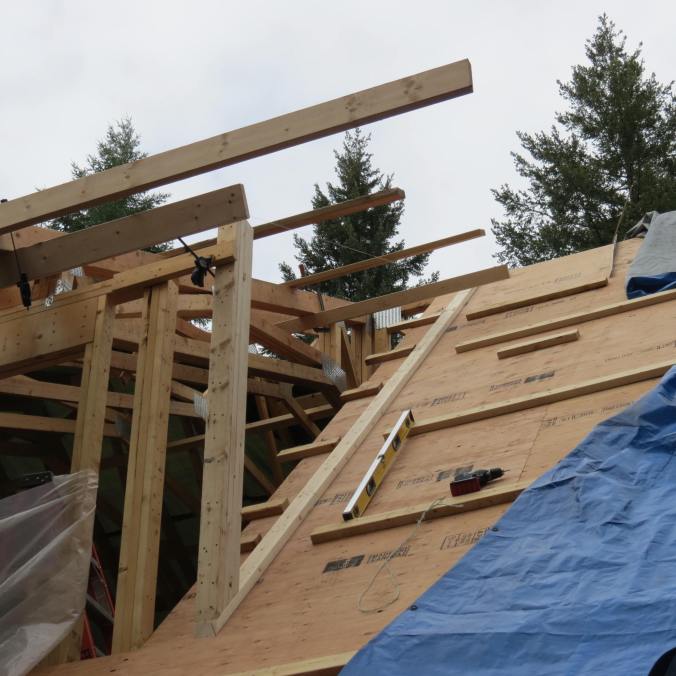
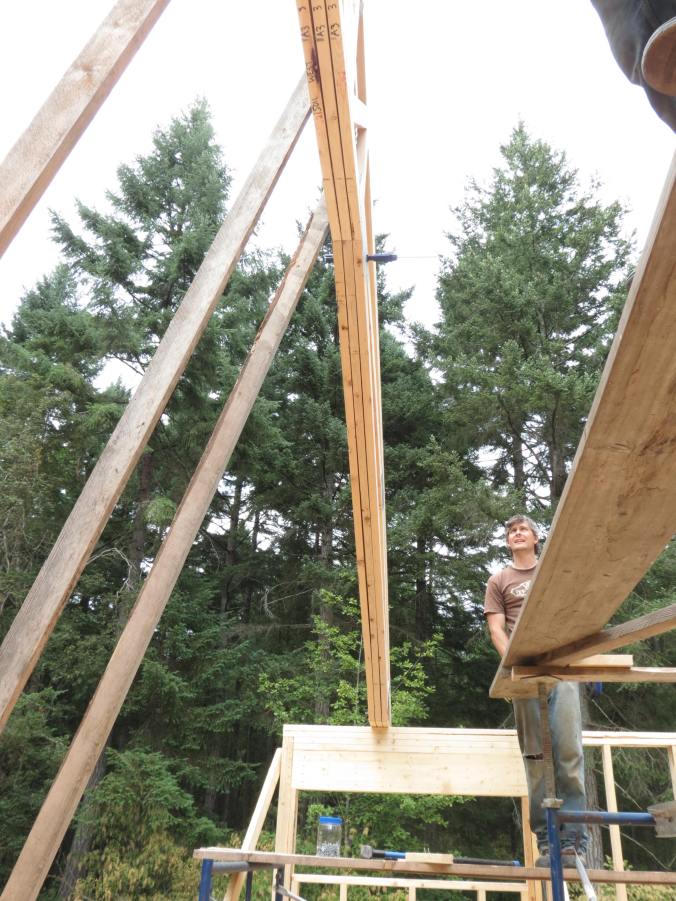
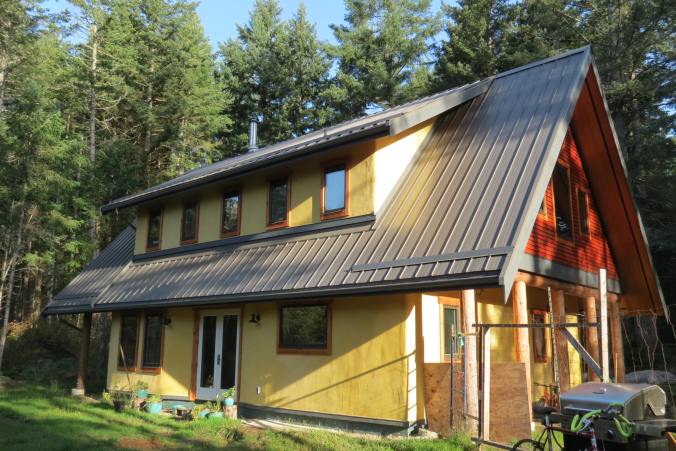
By mid-spring we were in a mad dash to the finish line ticking off dozens of jobs including final exterior lime plastering, exterior gable siding, tongue and groove soffits, exterior window casings, final upstairs earthen floors, storm drain, stair railings, final electrical work, commissioning the heat pump, and taking down scaffolding.

The final house inspection by the Nanaimo Regional District building inspector was on May 3, however it took a couple of more weeks to secure the occupancy permit as we had to replace the glazing in a stair bottom window with tempered glass so the inspector could sleep at night.

IMG_0014

‘The Sharn’

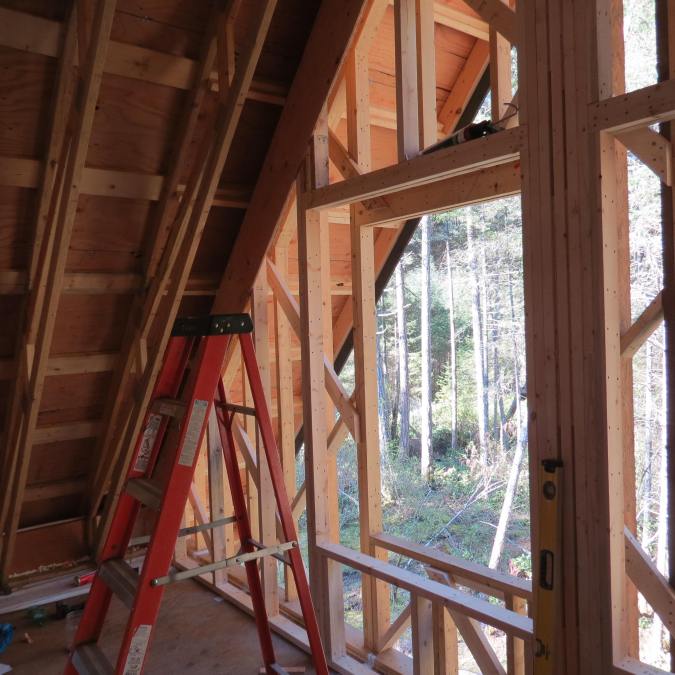
With the occupancy permit firmly in hand I immediately put down tools on the house and started on a structure in our garden area that we refer to as ‘The Sharn’ – more than a shed and less than a barn. It’s a multipurpose structure about 44’ long and 18’ wide [13.5 X 8.8m]. The south facing roof is sloped at 29 degrees, which at our latitude is the optimal angle for summertime solar photovoltaic generation so the roof doubles as a rack for our 16 panel, 4kW grid-tied PV system. One end is a massive glorified wheelbarrow carpark, and will eventually have a vegetable wash station, tool racks and a place for a hammock between the posts. The other end is a fully insulated, heated, and rodent proof storage building for tools, chicken feed, several large chest freezers for berries, fruit and veg, plus shelves for preserved foods and wine. The PV system went live on July 16 and to date has generated about  1000 kW hours, some of which has been used on site and some exported to the BC Hydro grid.

IMG_1608

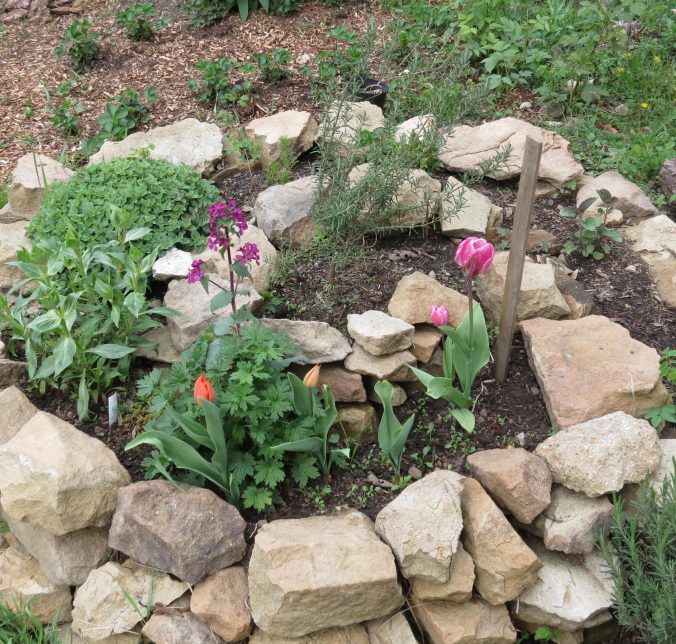
Berms for fruit and nut trees in mid-plant

Earlier in the spring we also took some time to build substantial earth berms and planted out about two dozen apple, pear, hazelnut, and sweet chestnut trees. These are the first of dozens, perhaps hundreds, of fruit and nut trees that will form the backbone of a perennial food system designed to provide resiliency and food security as climate change really starts to bite. Despite teaching full time, Karen still managed to put in about 1000 feet [300 m] of garden beds and our 99-hen heritage flock produced roughly 10,000 eggs.

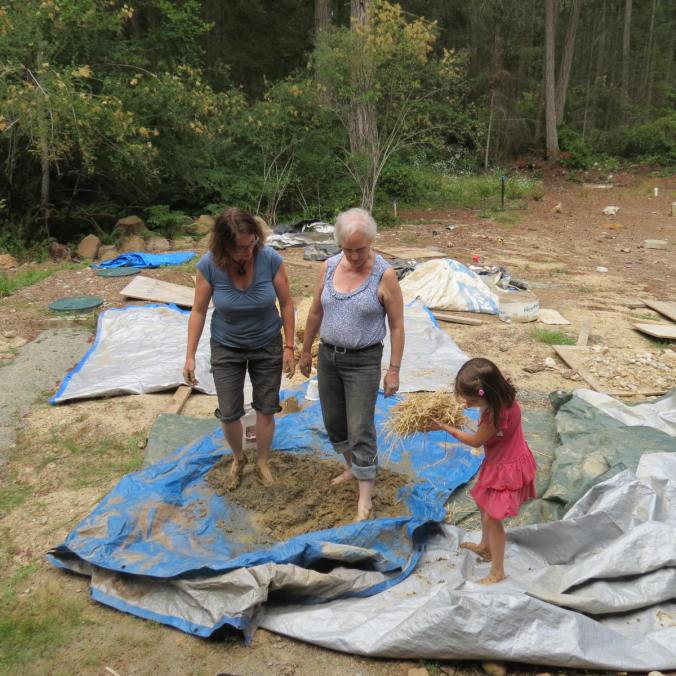
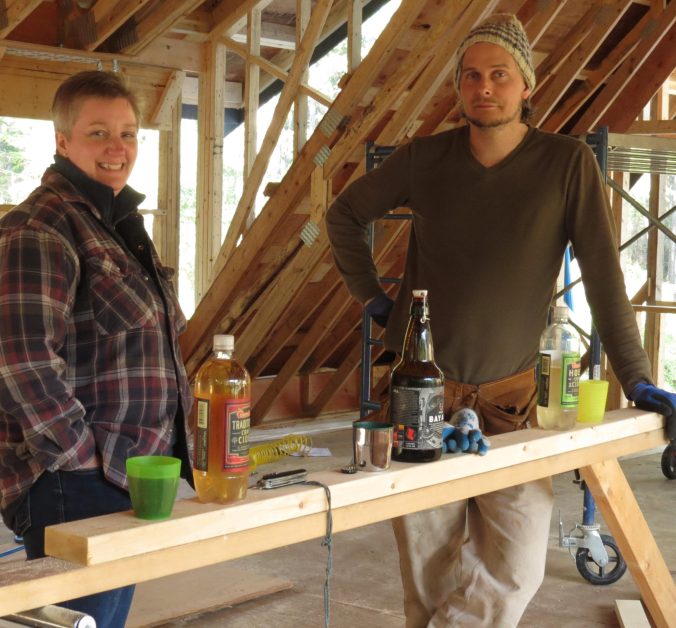
Most importantly though, despite the marathon dawn till dusk hammer swinging and mud slinging, we still managed to party. In mid-in August, almost exactly six years to the day we bought land while living in a van and shitting in the woods,  we finally took time out to host a housewarming party to thank the legions of people who pitched in one way or another to build our house and budding resilient microfarm. Ultimately this project is as much about community as it is about low-carbon, natural building, energy efficiency, and food growing. When we washed up on shores of this rock we knew not a single person and six years later we have a community to thank for the rich, abundant place we call home. Please take a moment to have a look at the Honour Roll down below the photos – you may well be on it!

With electrons now zipping though the PV panels, I threw up the the largest woodshed on Gabriola – 36’ X 10’ [11 x 3 m] – and a two-bay post and beam structure for manure and compost in the garden. In November, I’ll be erecting a rodent proof feed storage building so we can order organic chicken feed in bulk from the BC mainland as there’s currently no bulk organic feed supplier on Vancouver Island.

Despite best intentions, the house still has a bit of cosmetic work remaining, including interior trim work plus the library shelves to house the multiple volumes of Das Kapital, dozens of rare Earthscan collectibles, the entire Sustainable Building Essentials series, my brewing books, and a dog-eared copy of The Rum Diary.

Baseboards or not, the beds are comfy, the shower is hot, and the toilets flush. So we are open to visitors so let us know when you are coming. We have 50 bottles of blackberry wine stashed that need drinking and we can have eggs for breakfast. Lots, and lots of eggs. And this time round I won’t make you lift anything heavy.

IMG_1544

Cedar siding over a rainscreen gap and lime-clay wall

img_1598.jpg

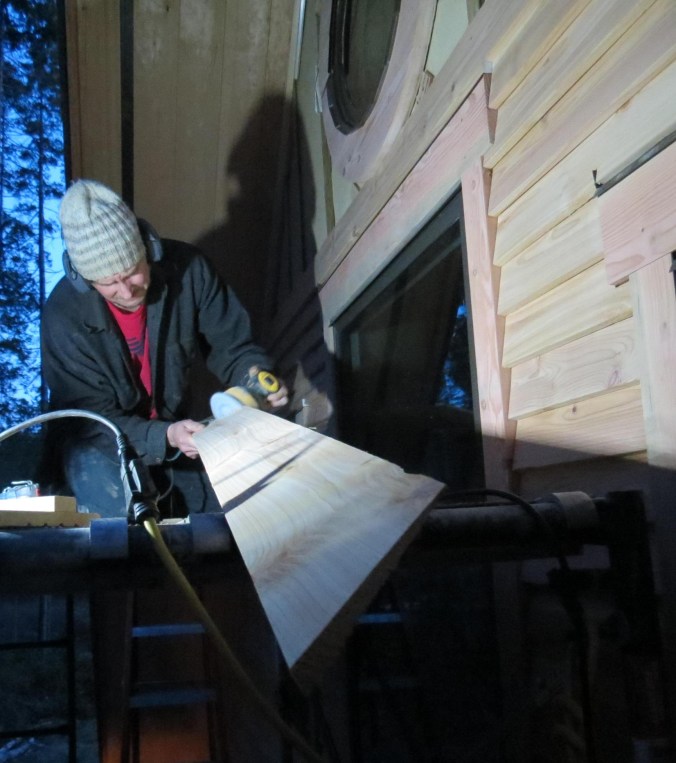
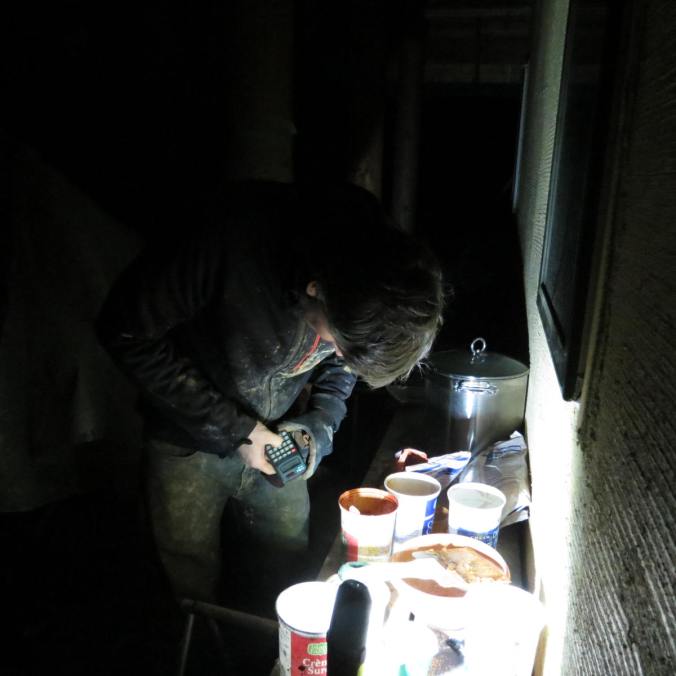
It always ends in the dark

IMG_1621

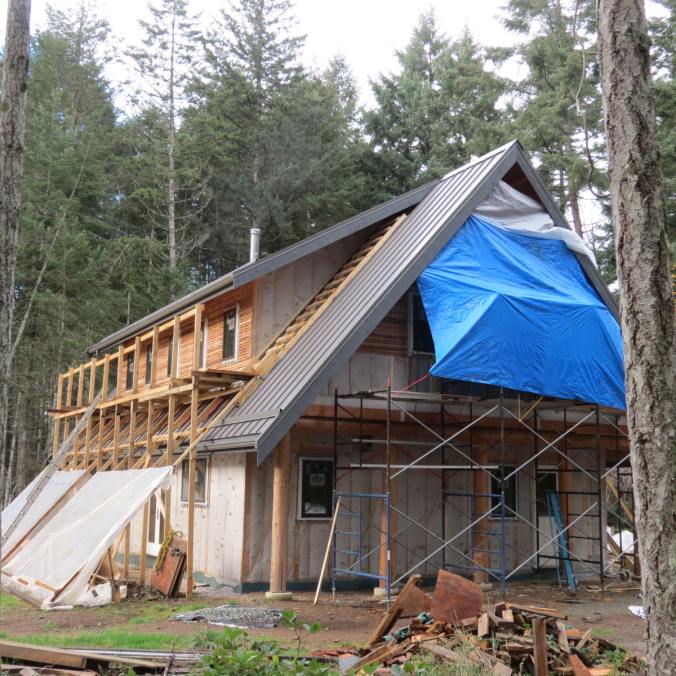
East gable sided and lime plaster on the south side

IMG_1604

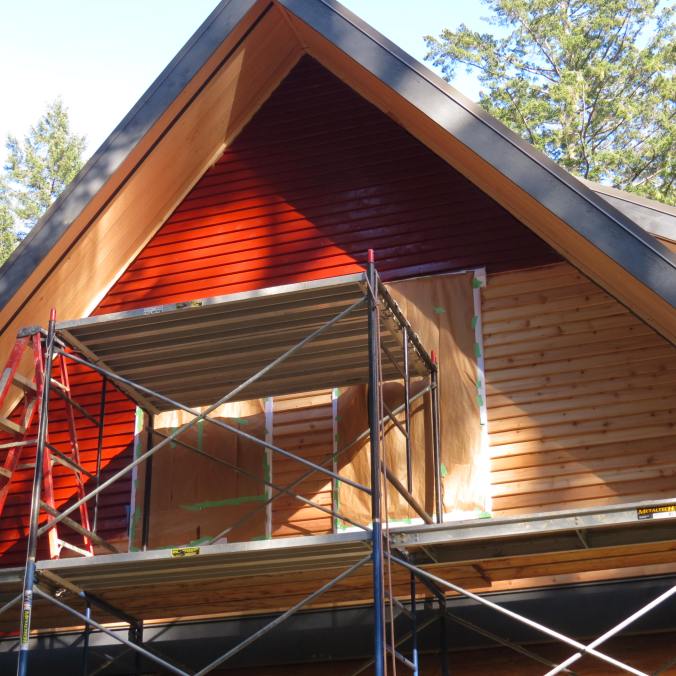
Pine tar from Sweden tinted with oxide from the ancient Falun mine

IMG_1618

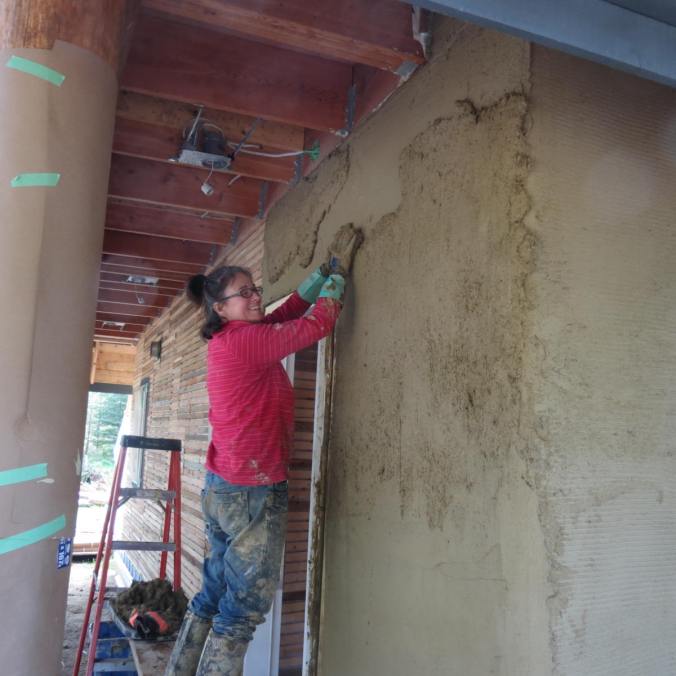
Lime plaster sneaking around to the west side

img_1695.jpg

Be still my beating builder’s heart

img_1698.jpg

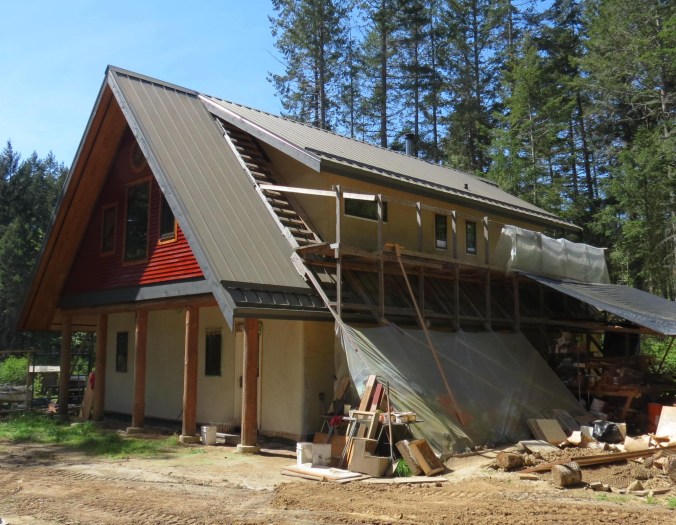
The north side took a bit longer

IMG_1540

Dodgy fresh egg market trader hanging about our farmstand

IMG_1523

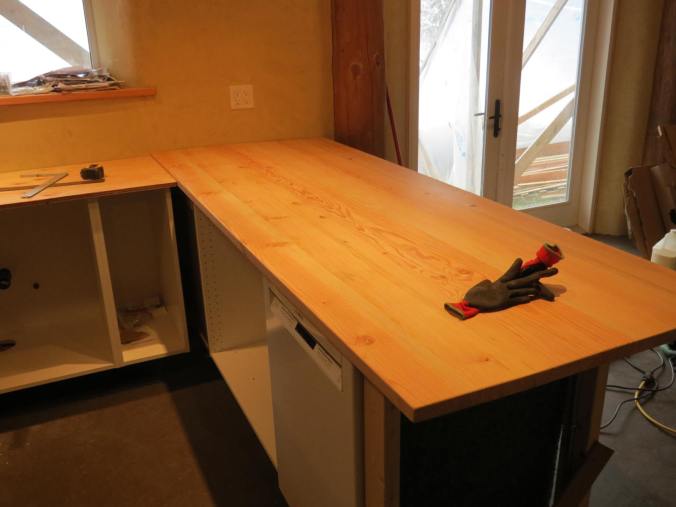
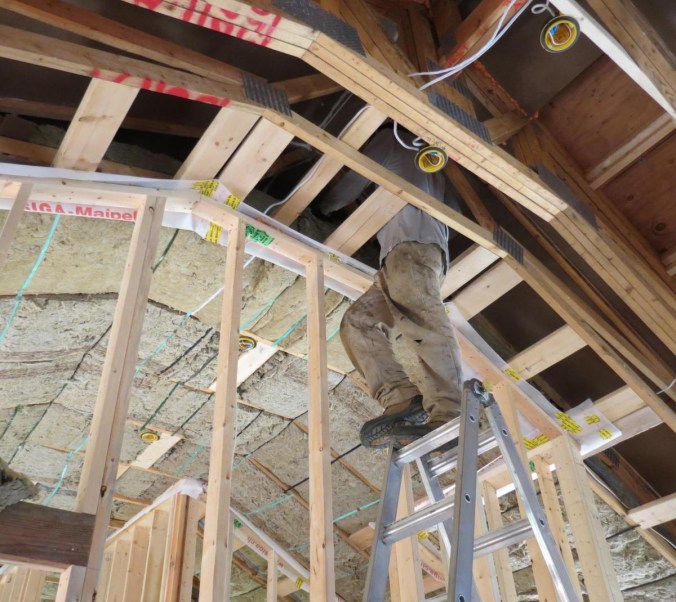
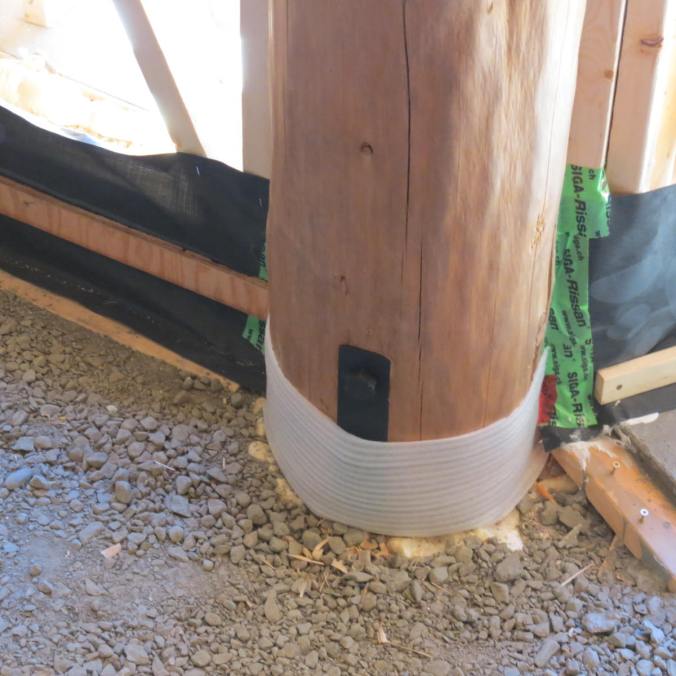
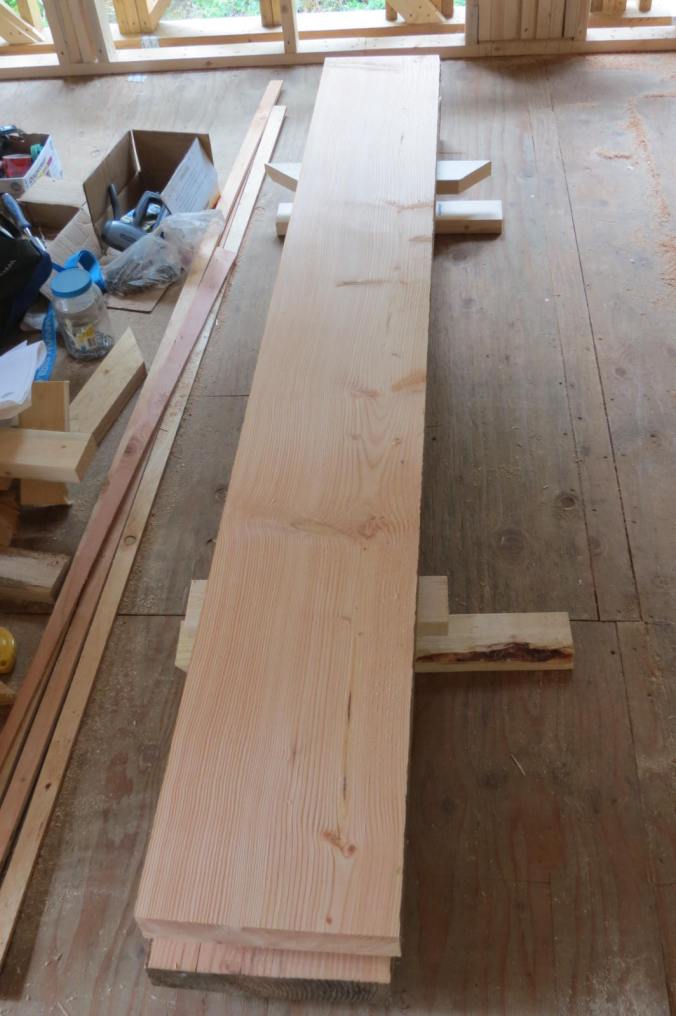
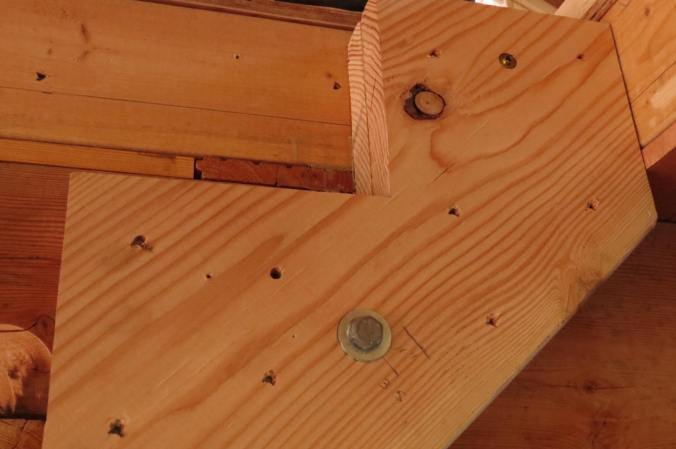
Installing the stair top fir newel posts so they never move no matter how many 8 year old climbers pile on

img_1528.jpg

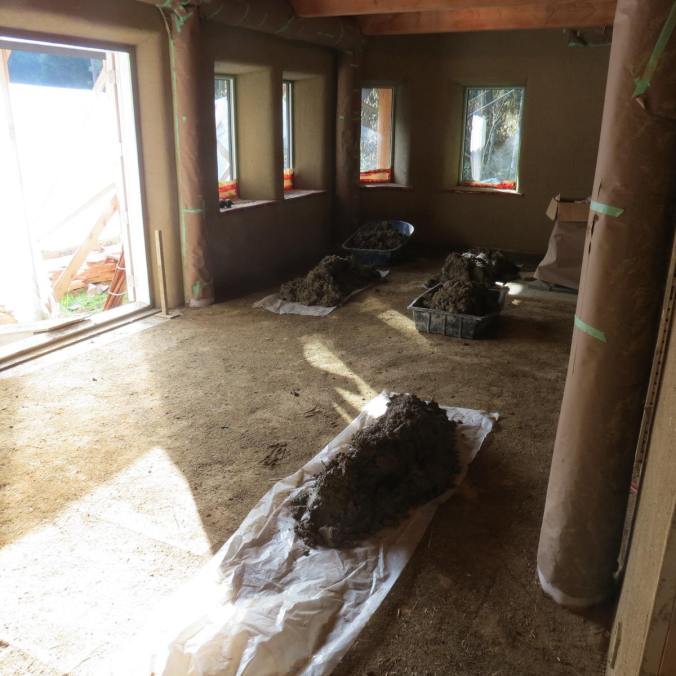
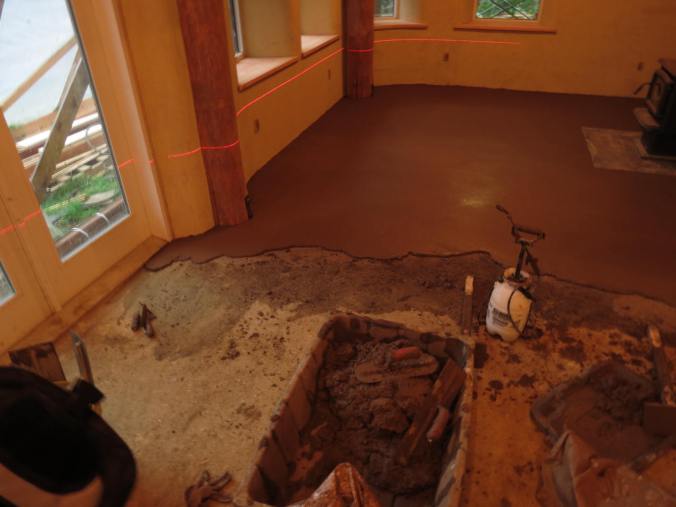
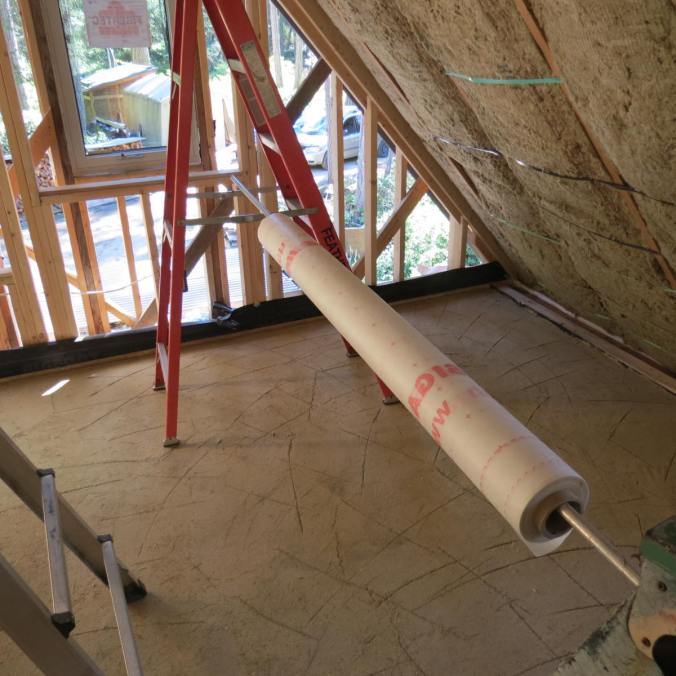
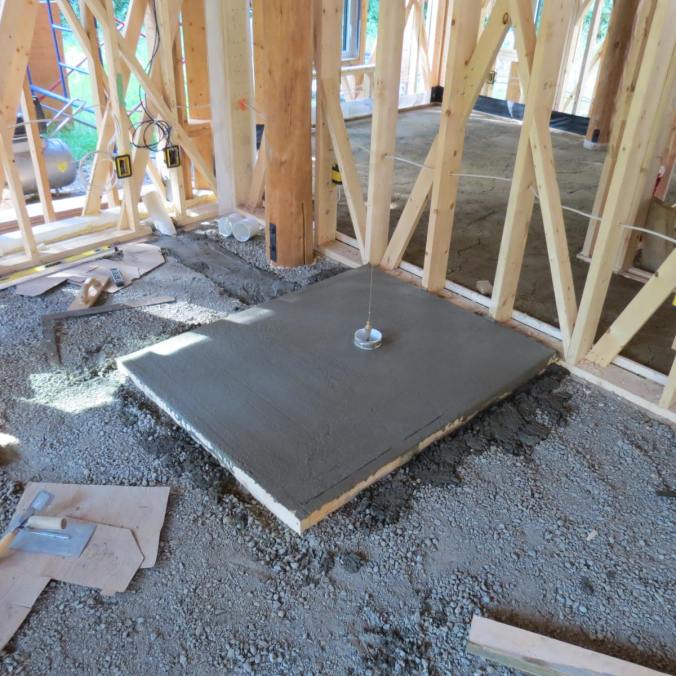
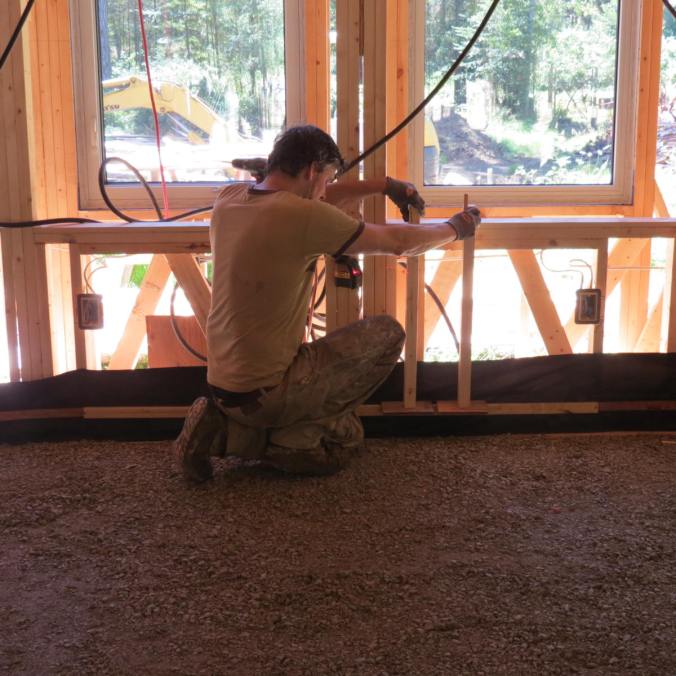
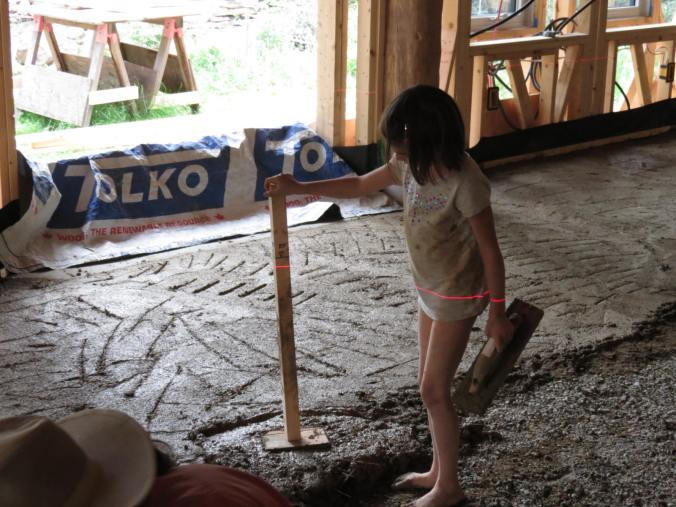
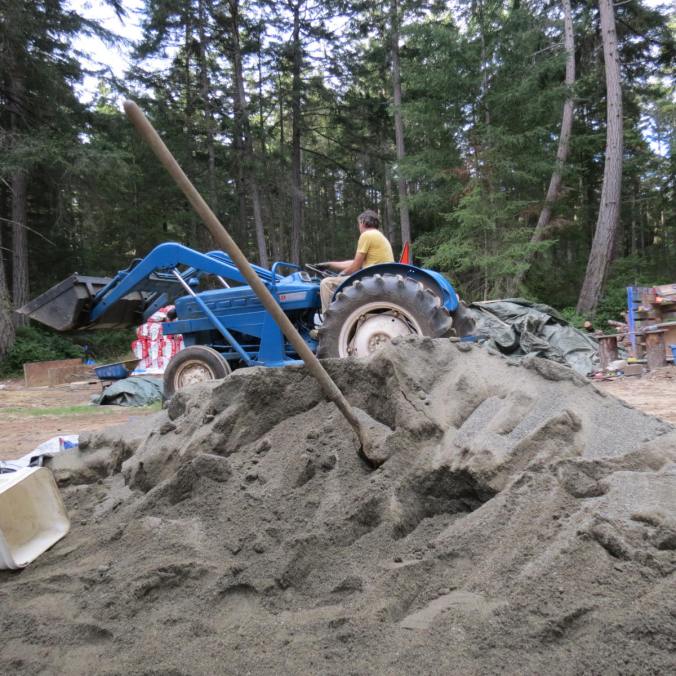
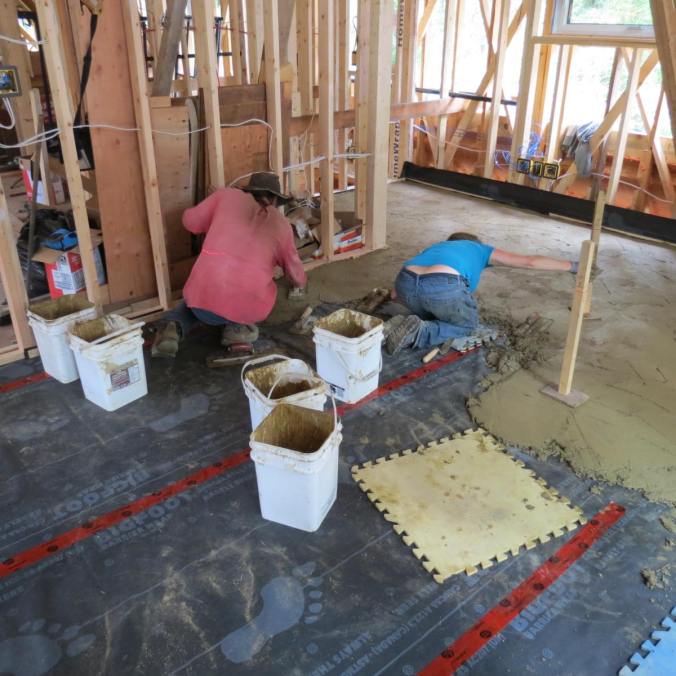
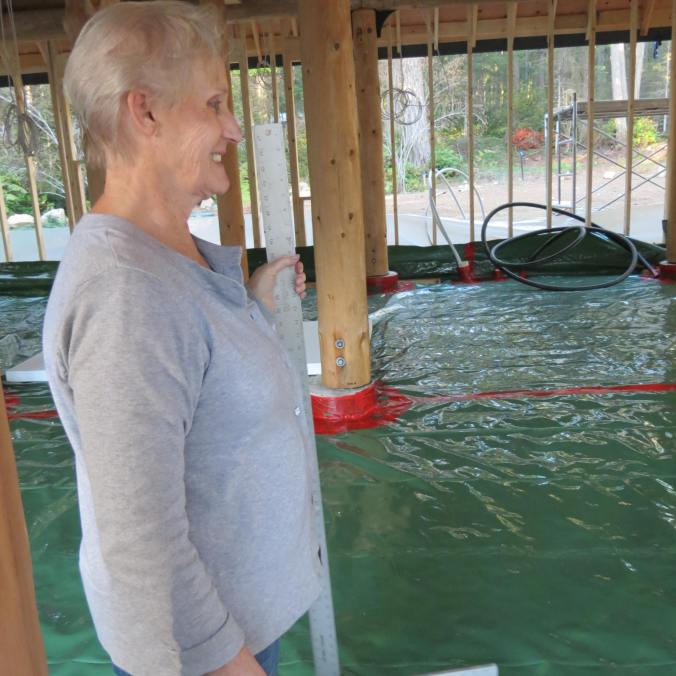
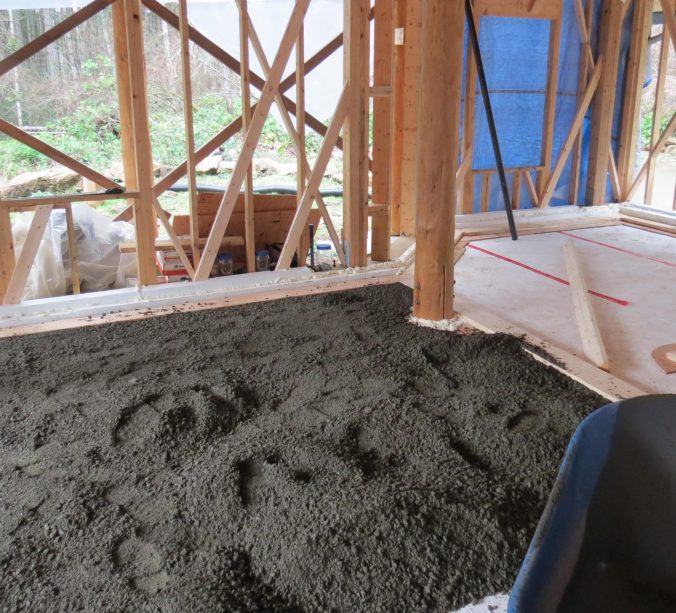
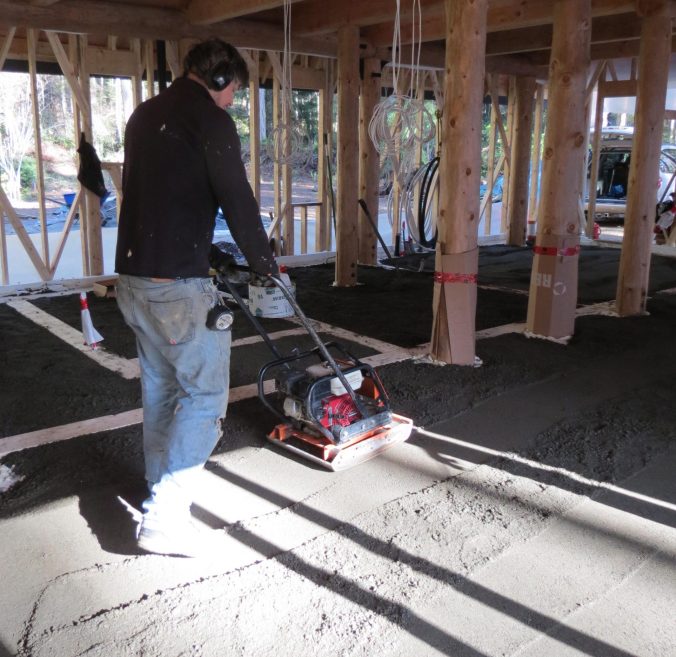
Laying the upstairs earthen sub-floor

IMG_1623

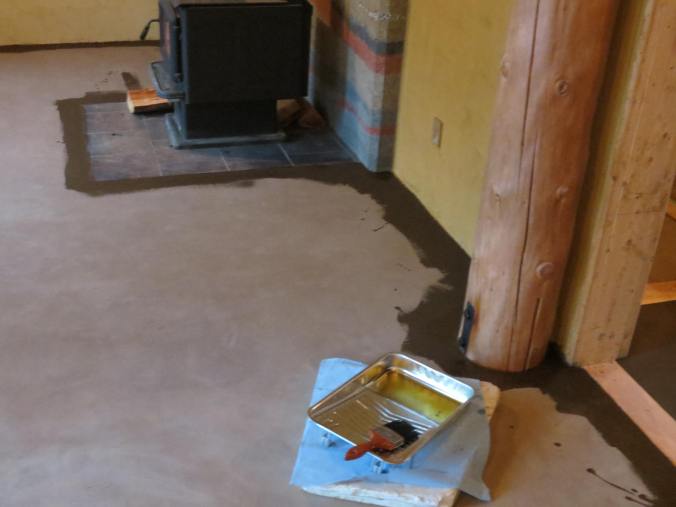
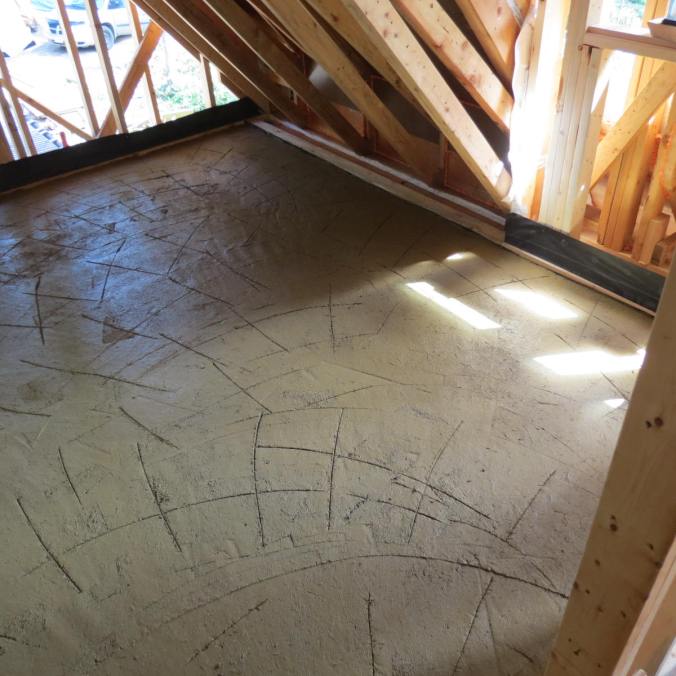
And the final earthen floor

img_1684.jpg

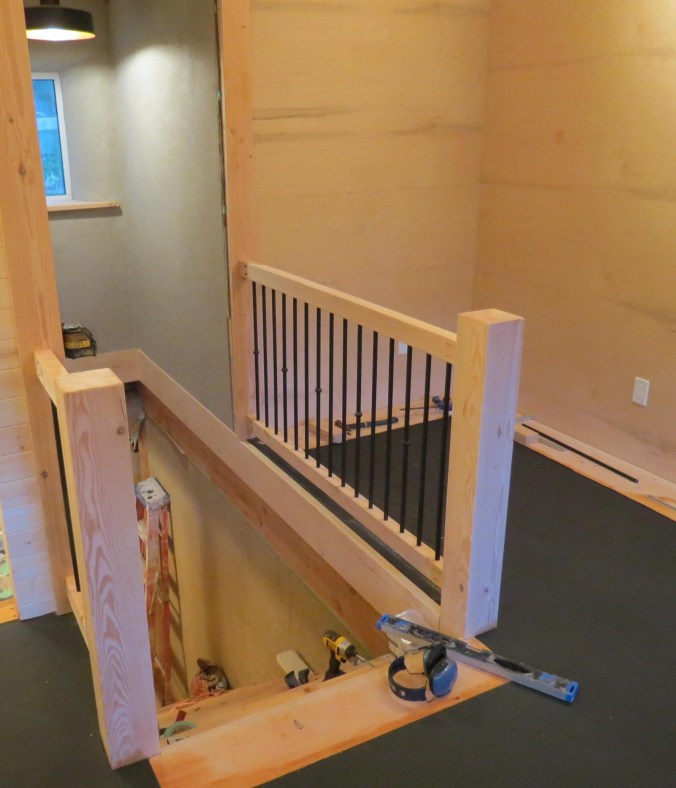
Finishing the stair railings. Floor slabs on the right will be the base of the library bookshelves

IMG_1622

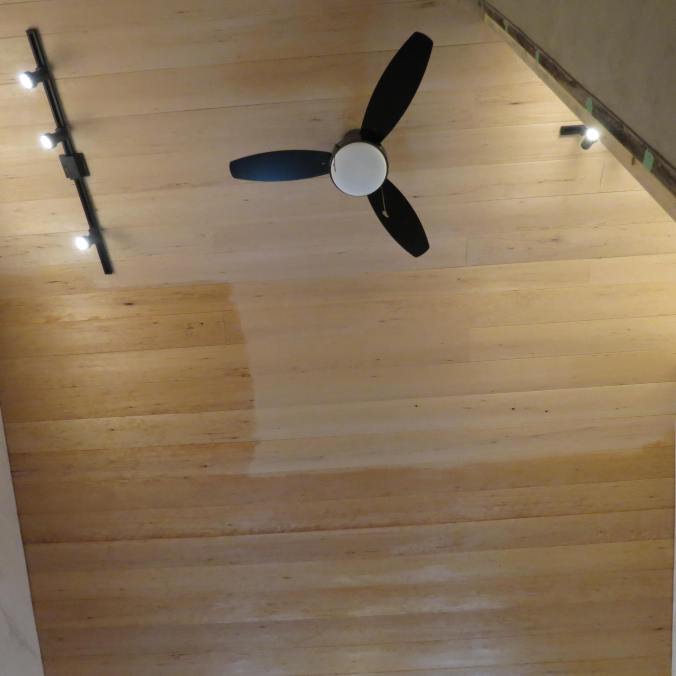
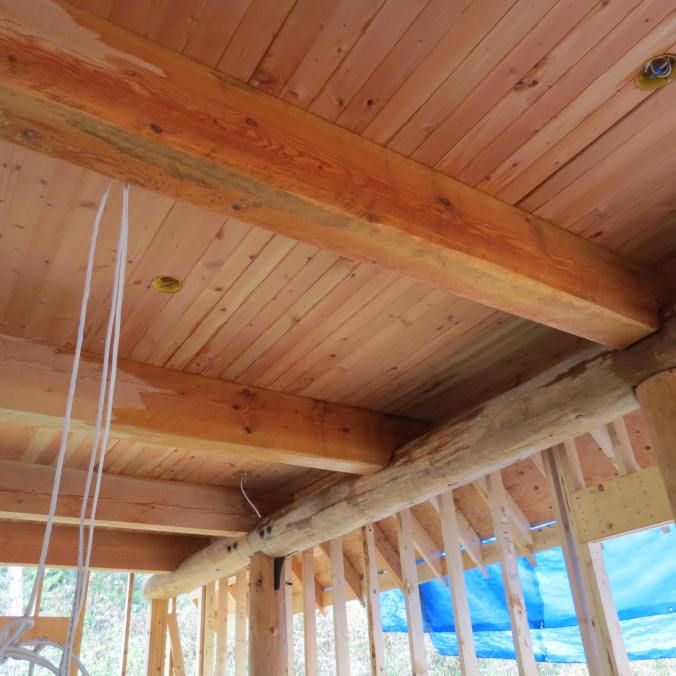
Linseed oil on the library T&G hemlock ceiling

img_1669.jpg

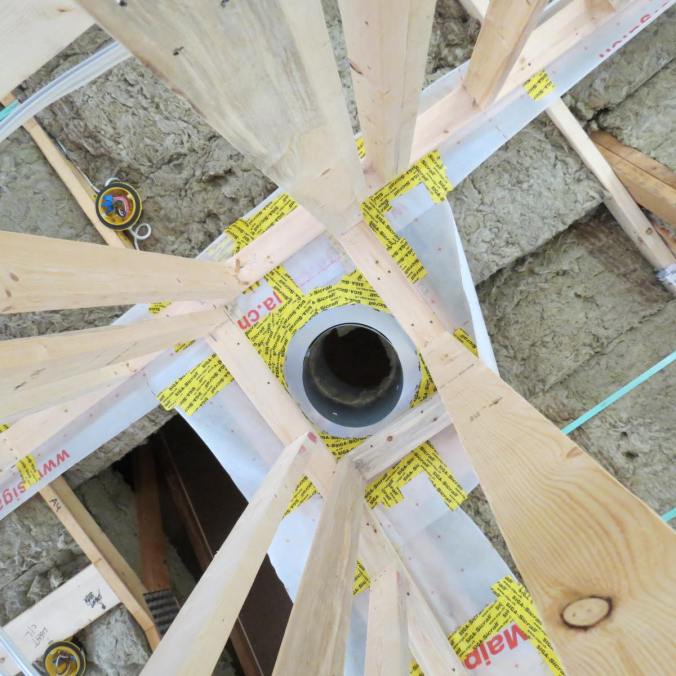
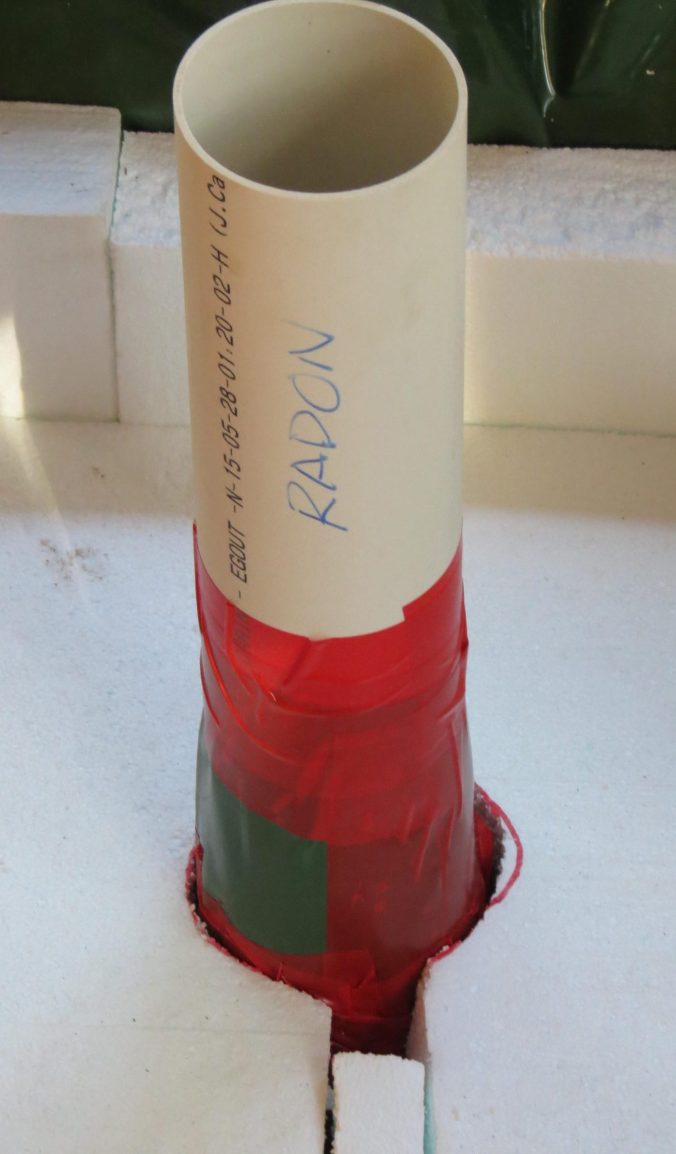
Installing the storm drain for the roof downspouts

IMG_1706

The Glass Guy [his real name] installing the tempered glass into the stair bottom window to satisfy the inspector, who likes to read the BC Building Code before bed

IMG_0016

The garden came along quite nicely

img_0180.jpg

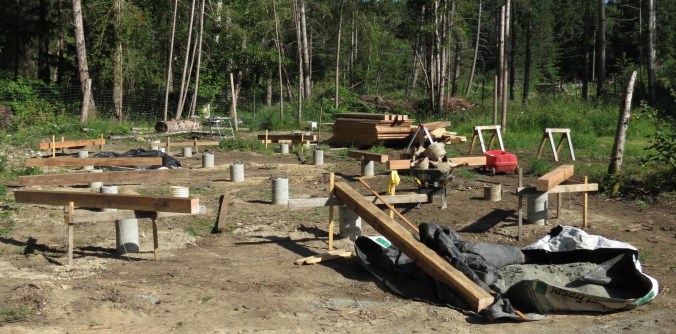
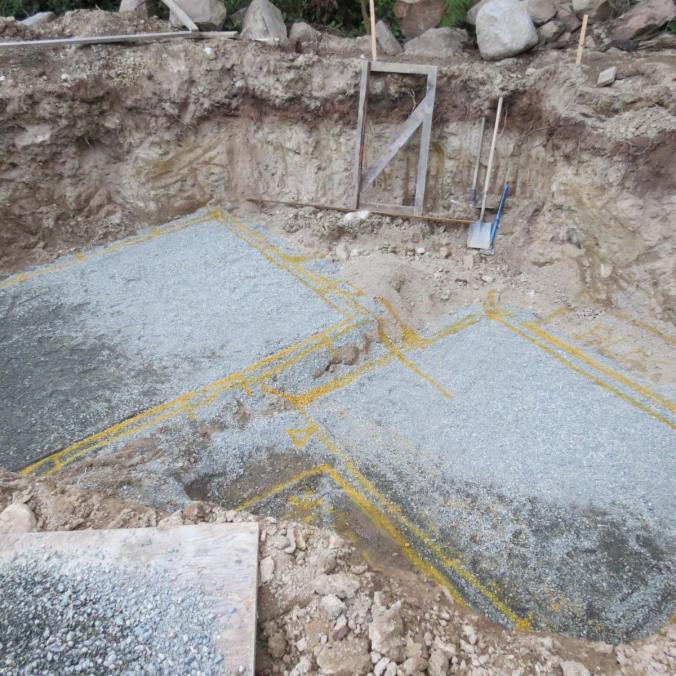
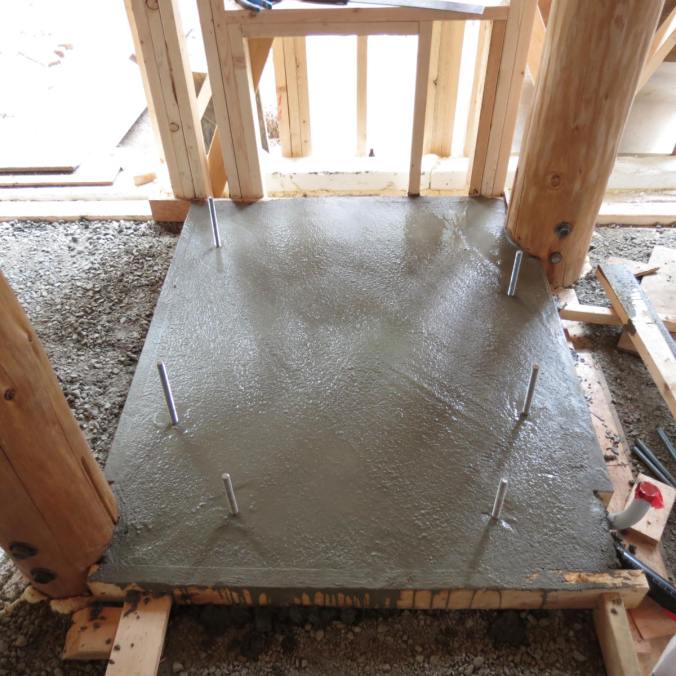
Foundation piers for ‘The Sharn’

IMG_0273

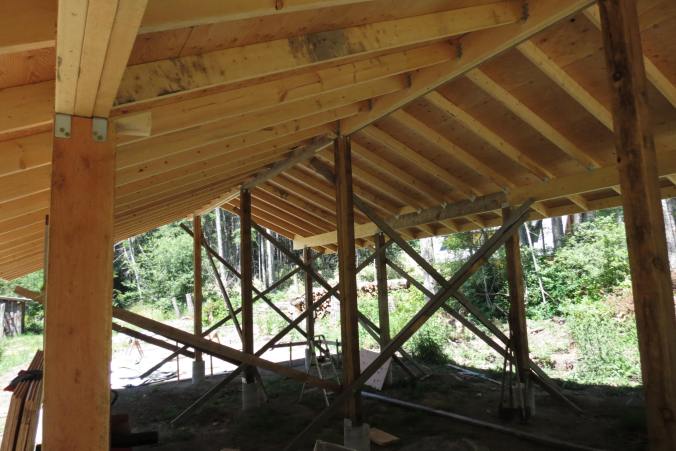
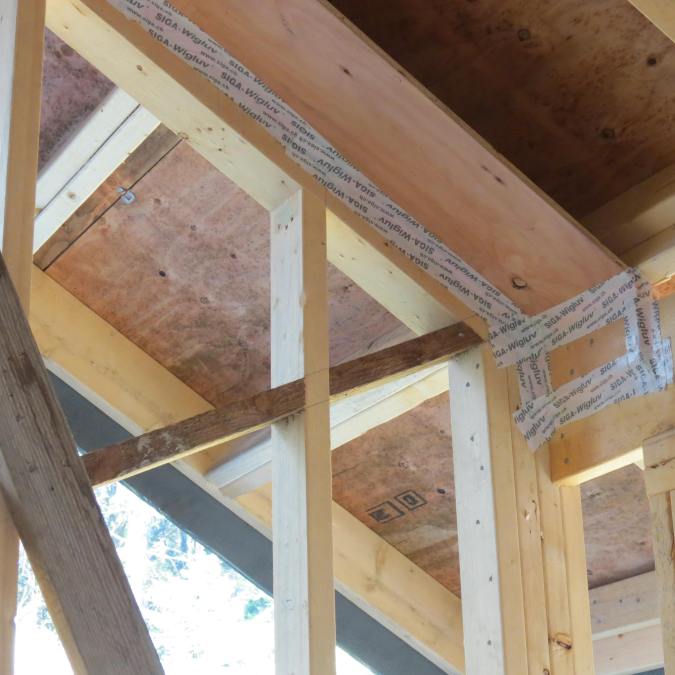
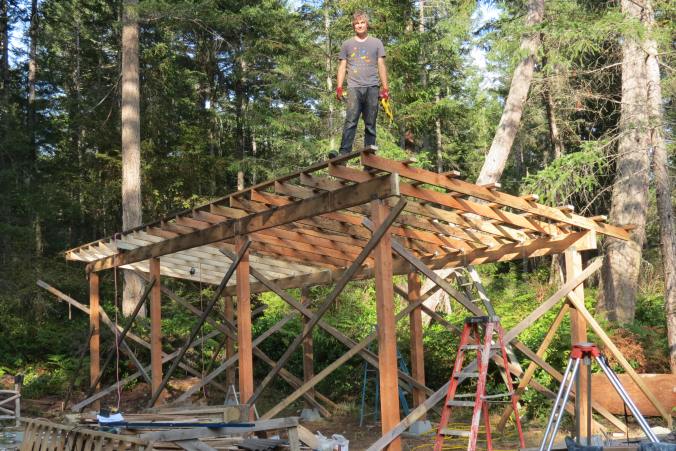
The Sharn fir post and beam

IMG_0274

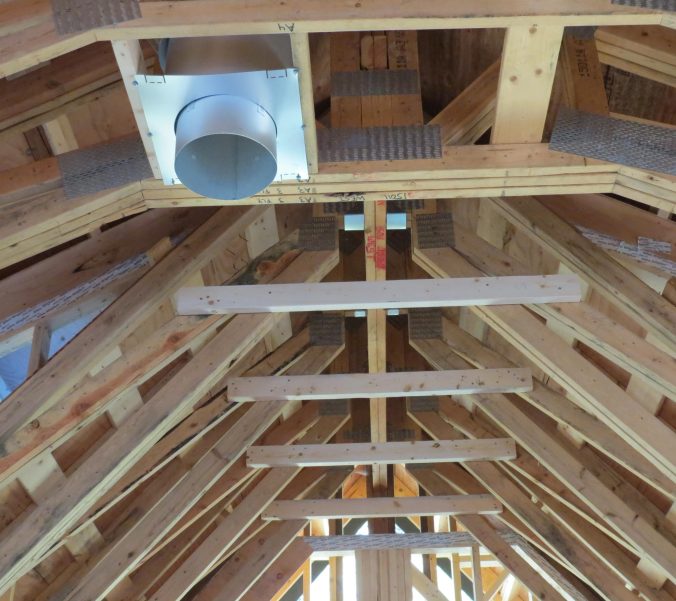
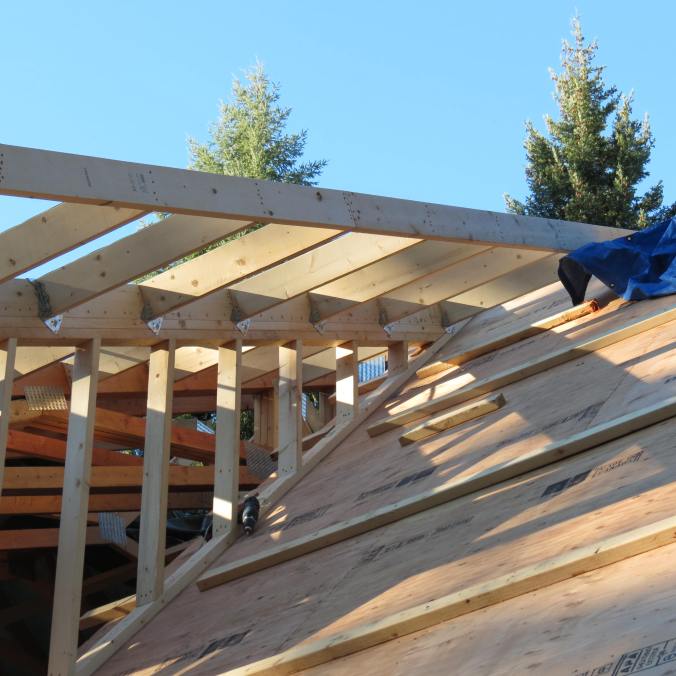
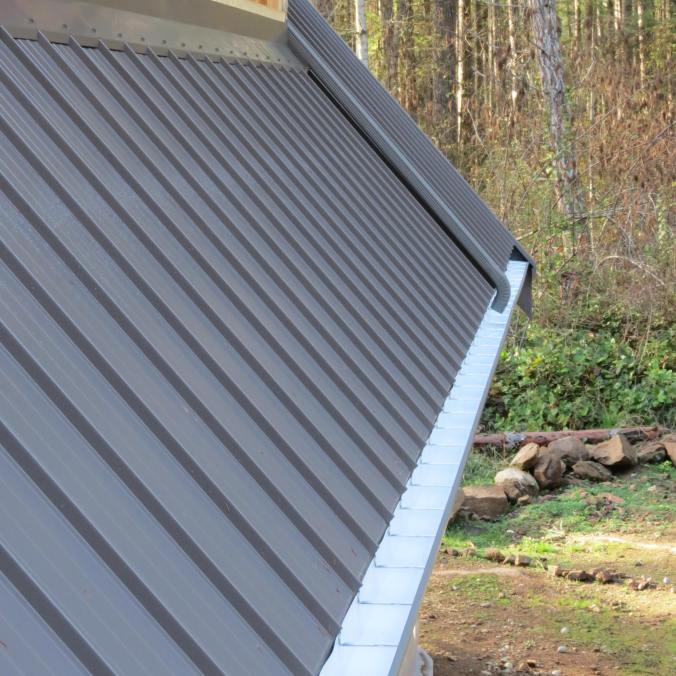
Sharn clerestory roof design with 29 degree south slope

IMG_0282

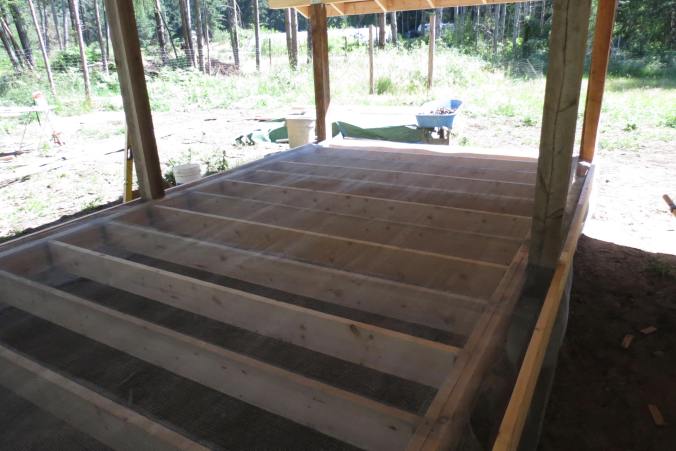
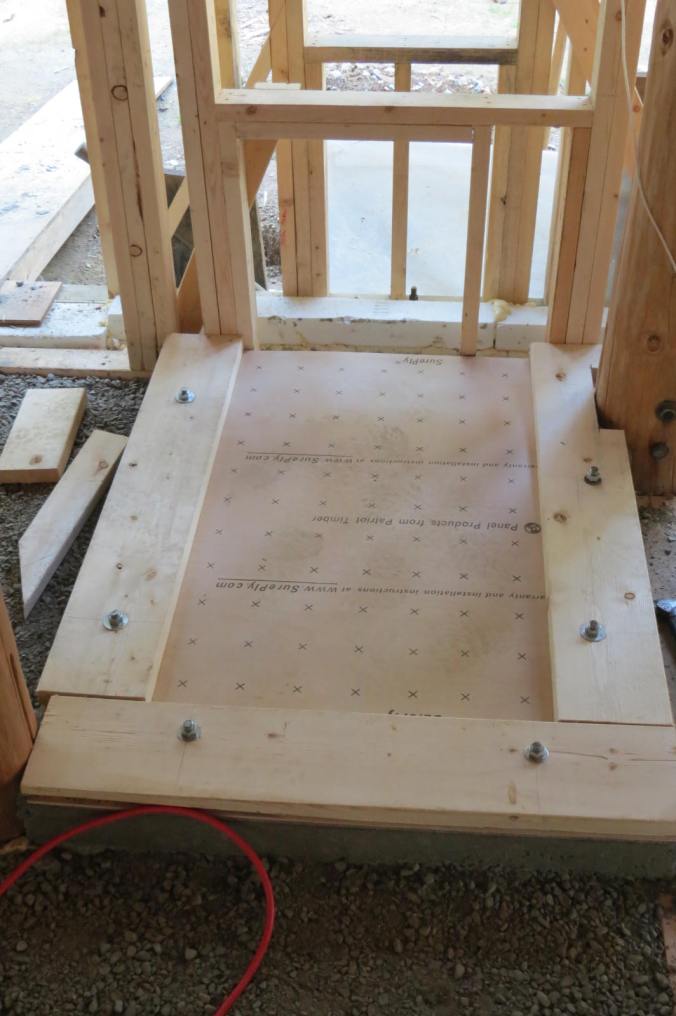
Rodent proof wire mesh under the floor

img_0014.jpg

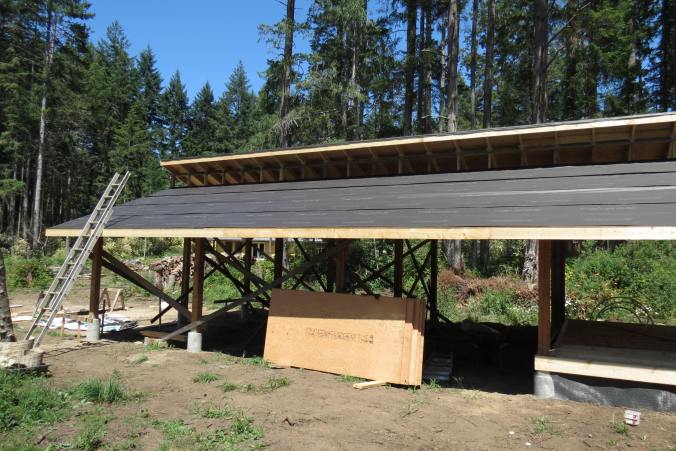
4kW PV system on the roof and closed up east end to house my country wine

IMG_0002

The post and beam woodshed. It’ll hold 18 cords / 65 cubic metres of firewood. Enough to keep us going until into the 2030s

IMG_0070

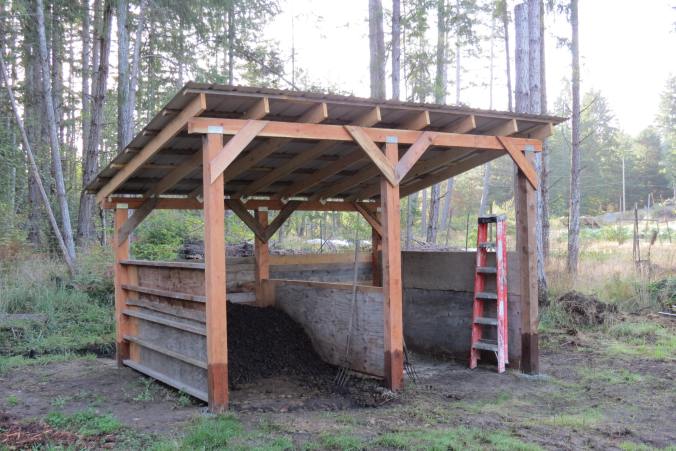
The compost shed with its first steaming pile

IMG_0072

‘The Sharn,’ PV array, and the house in the background

IMG_0171

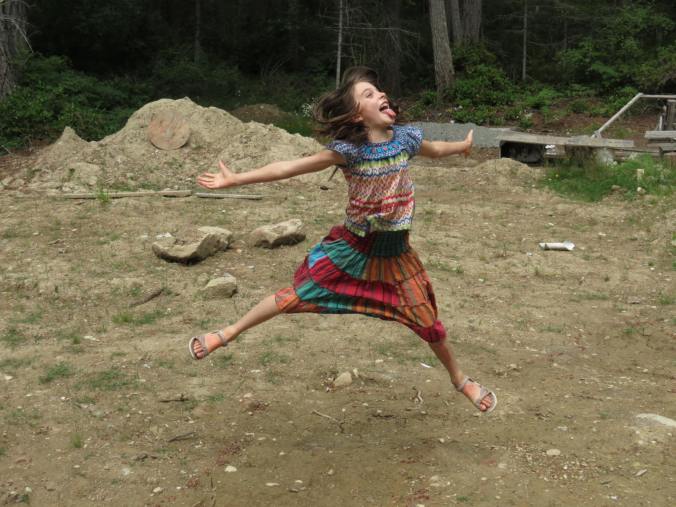
Mia hanging with her mate Chocolate Brown

The House Build Honour Roll 

Drawings and Engineering

Cindy McCaugherty – Raincoast Homes – putting our outlandish ideas into house plans

Kris Dick – Building Alternatives – engineering

Septic

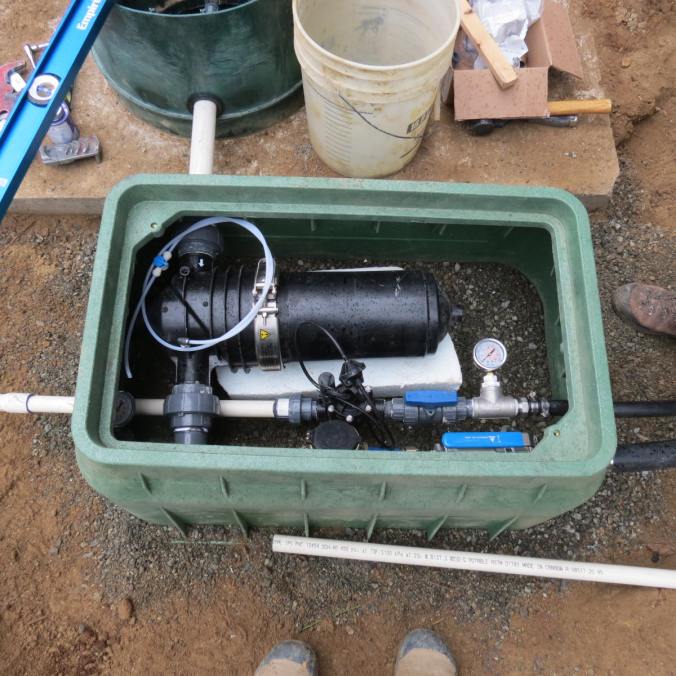
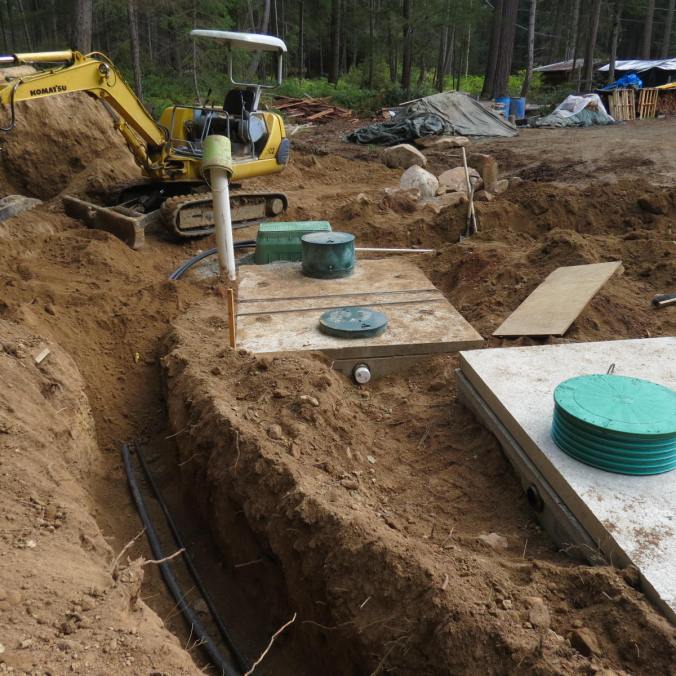
Ian Ralston – Traxx Developments – septic design and commissioning

Howard Hells – septic headworks assembly

Trades

Electrical – Ted Ramey, Ramey Systems including apprentices Charlie and Rob, Jess, and Harvey

Plumbing – Scotty’s Plumbing

Excavating and site clearing – Thor Simrose

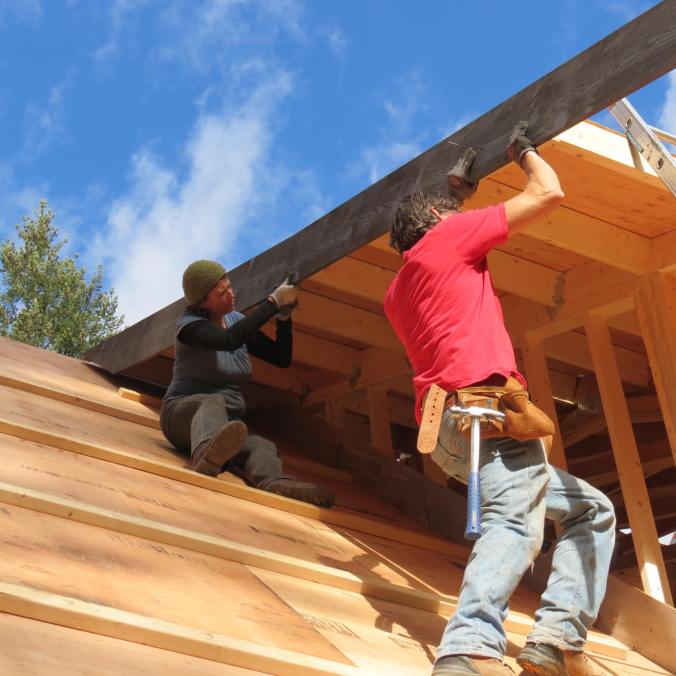
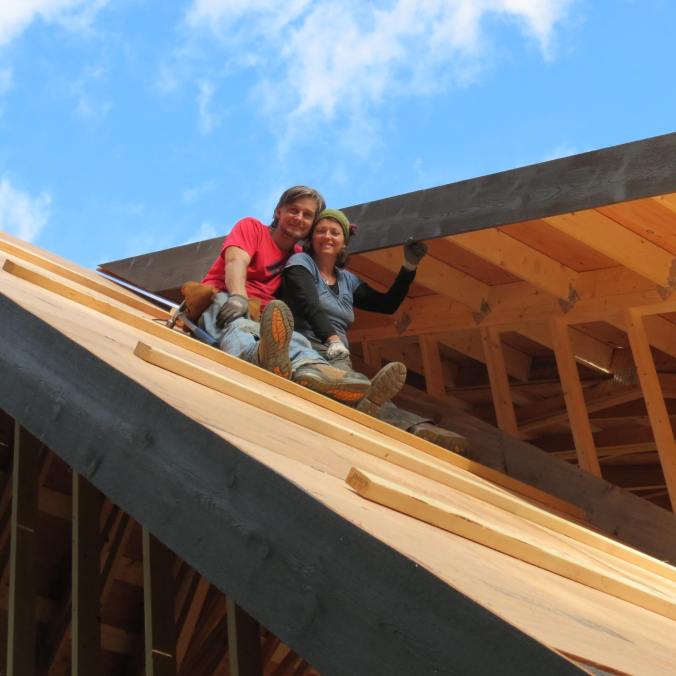
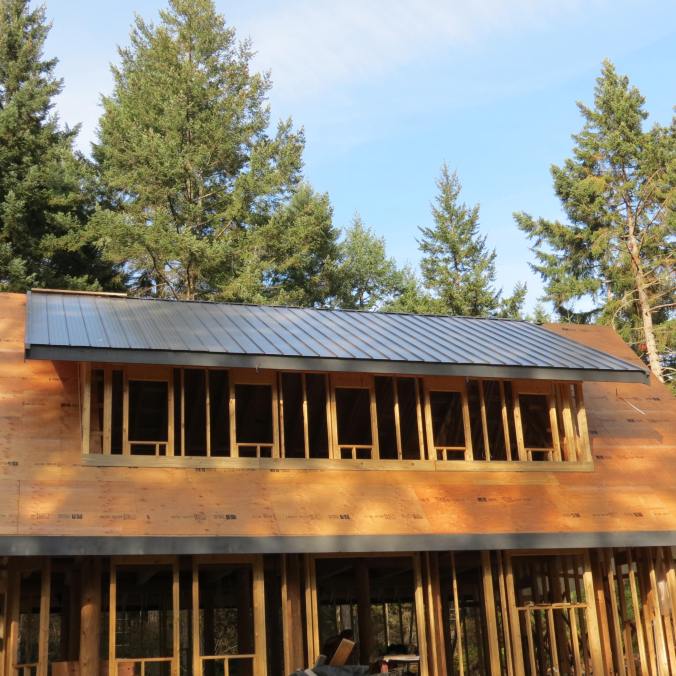
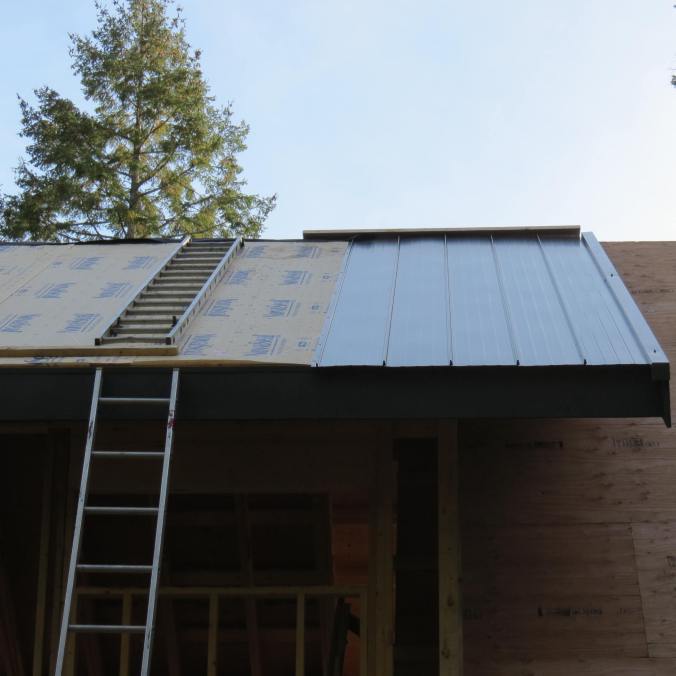
Roof – Stevo’s Roofing

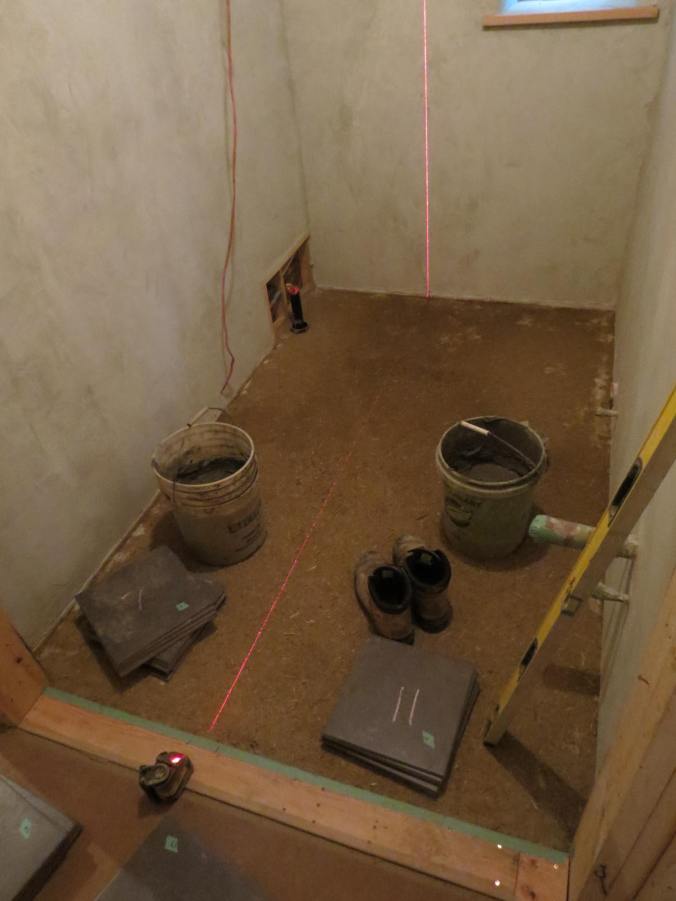
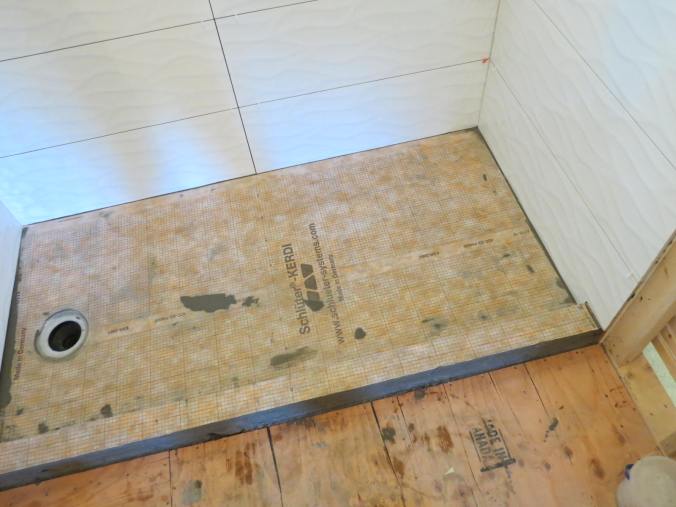
Steve Finney – upstairs shower construction and upstairs bathroom floor tiling

Materials

Arbutus Building Supply – the whole crew

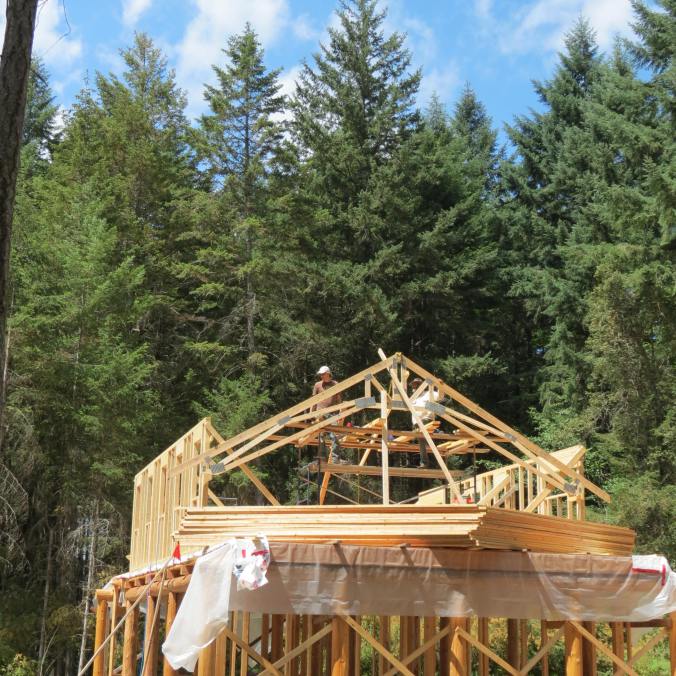
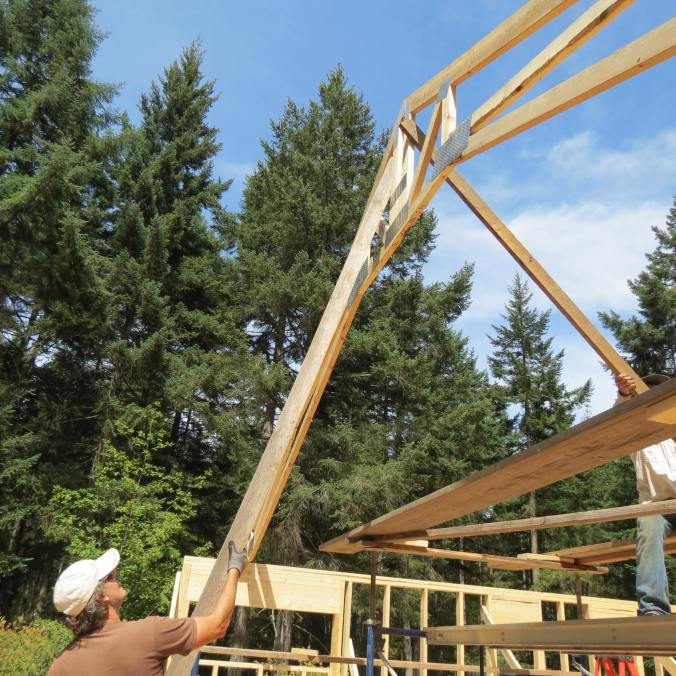
Hi-tec – roof trusses

Longhouse Cedar – fir and hemlock T&G

Finish clay – Vancouver Island Potters’ Supply

The Heavy Lifters – Special Thanks

These people went above and beyond and for that we will always be grateful.

John Switzer – for endless help over the years including but not limited to form construction, concrete pour, excavating, lifting and installation of all the heavy timbers, truss lifting, wall plastering, earthen floor laying, insulation moving, window moving, lending me his excavator for all manner of work including building the septic field, ideas, advice, tools, machines plus food growing training for Karen, chicken brooding, and much, much more.

Wilf West – inspiration to build, early tool training, precision, power shed construction, wall construction, sub-floor vapour barrier, earthen floors, wall plastering, window sill slab sanding.

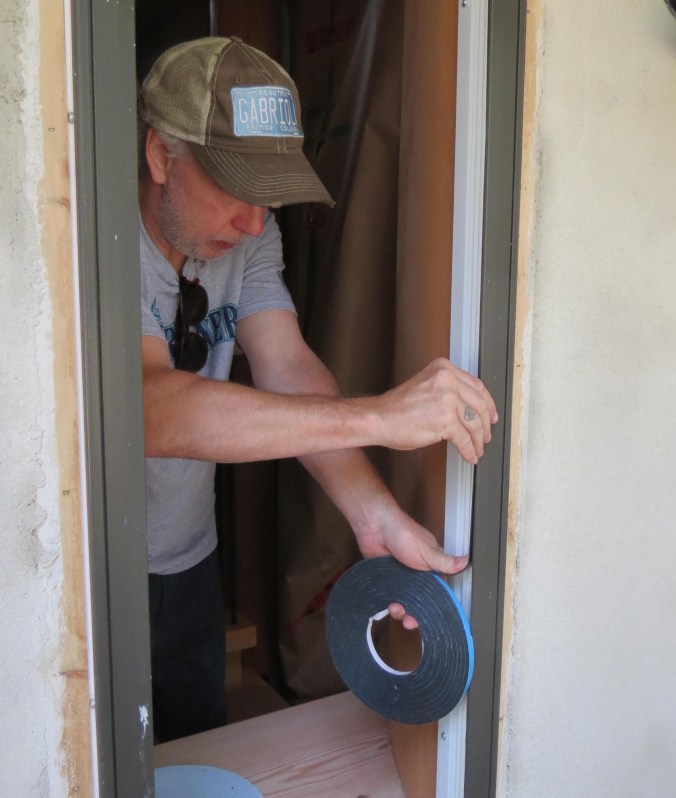
Dorothy West – precision, window and door air sealing, sub-floor vapour barrier, earthen floors, wall plastering, childcare, feeding the concrete pour team.

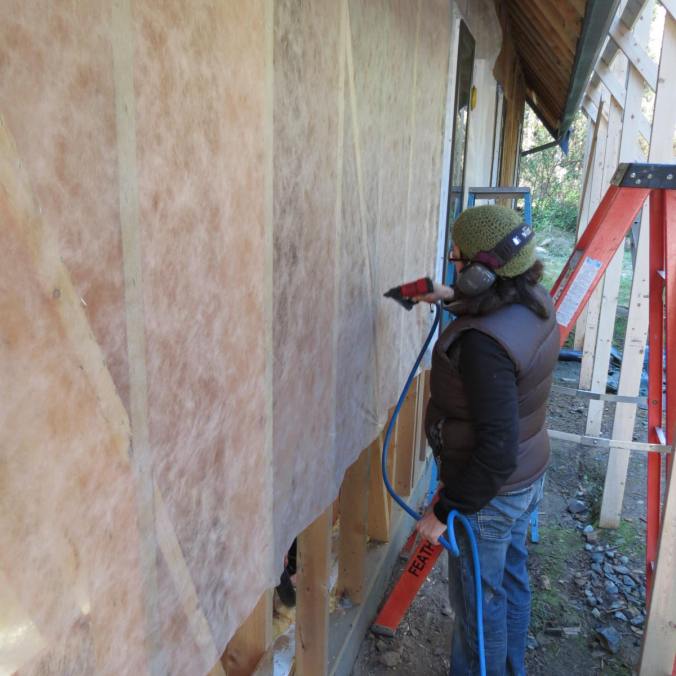
Mia MacDonald-West – earthen floor, handing me screws, gluing insulation fabric to studs, being an amazing construction site kid and spending countless days playing in a construction site winter and summer.

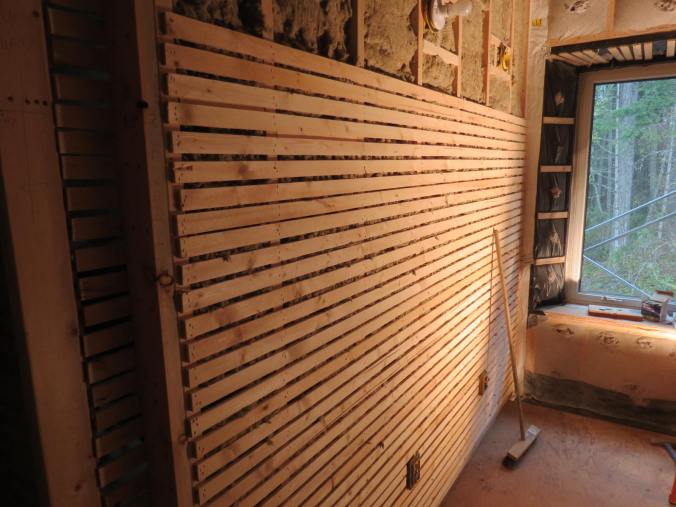
Kevan Heughan – masses and masses of wall plastering, days and days of septic field trench digging, and miles of lath ripping  – you are a machine.

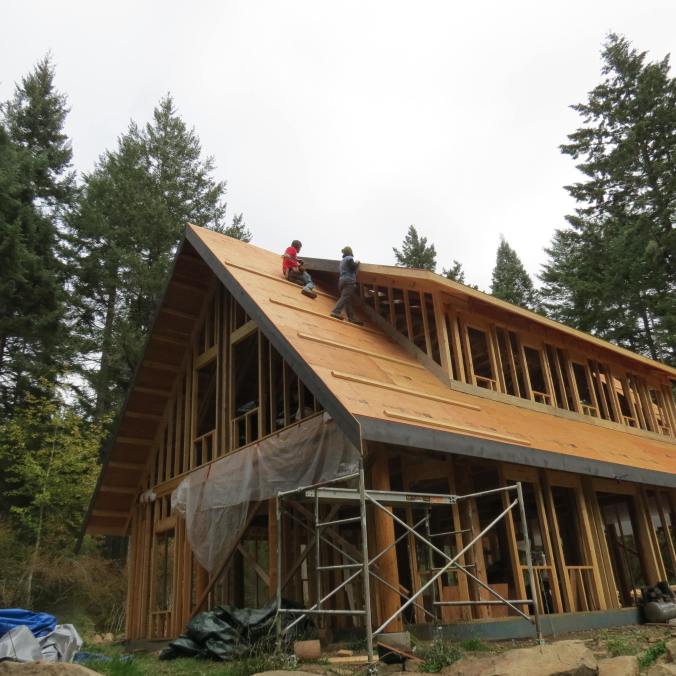
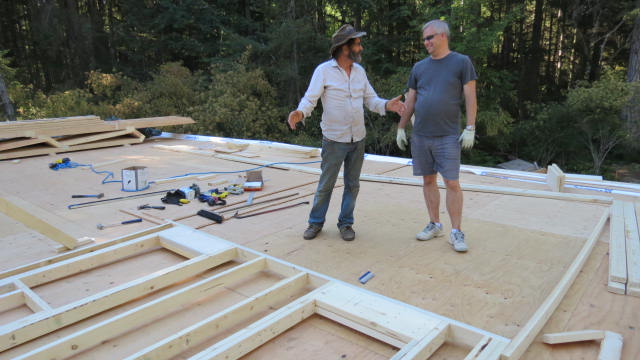
Chris Sauer – for taking time out of his own house build for the truly epic 112 sheet plywood roof installation, ripping lath [and his finger].

The Many Other Helpers

Ben Abrams – heat pump refrigeration lines

Tom Archdekin – tree felling

Gord Baird – advice on heating system,

Penelope Bahr – idea, tools and equipment, inspiration

Elisha Bandel – tools, surface plane, excavator loan, advice

Nadine Bariteau – bathtub moving, wall plastering, earthen countertop repair, gable staining

Blaine Borley – timber drilling jib bushing fabrication

Chris Boulsby and Sustainable Gabriola, heat pump supply

Darcy Boulton – wall plastering, tools

Rose Boulton – lots of childcare

Fin Bradbrooke – septic field trenching

Shay Brazier – laying out the string lines for the foundation, advice on PV system and heating system options

Shawn Colbourne – door pick-up

Liam Colbourne – septic field trenching

Sukita Reay Crimmel – the Queen of Earthen Floors – floor construction advice in person and in her book Earthen Floors

Bob Crozier, Knotty Pines – heat pump commissioning

Alex Dewar – concrete pour, advice, materials

Fabrication Unlimited – flitch plate fabrication

Peter Forde – east gable wall top plate layout and installation

Jen Feigin – plastering advice

Becky Furnell – advice, ideas, materials

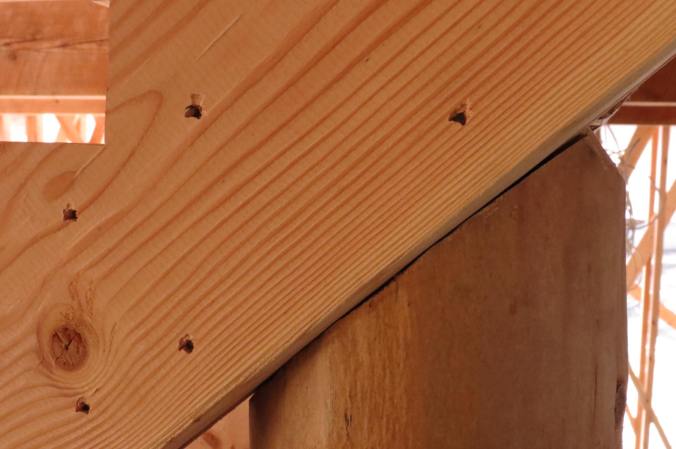
Darren Gray – beam sanding and installation

Polly Heath – advice and inspiration

James Henderson – plastering advice including clay-lime recipe

Trevor Hendricks – brokering our land purchase, form inspection and suggestions, window unloading,

Mike Henry – plastering advice and earthen floor oil mix

Genevieve Hicks – concrete pour, wall plastering

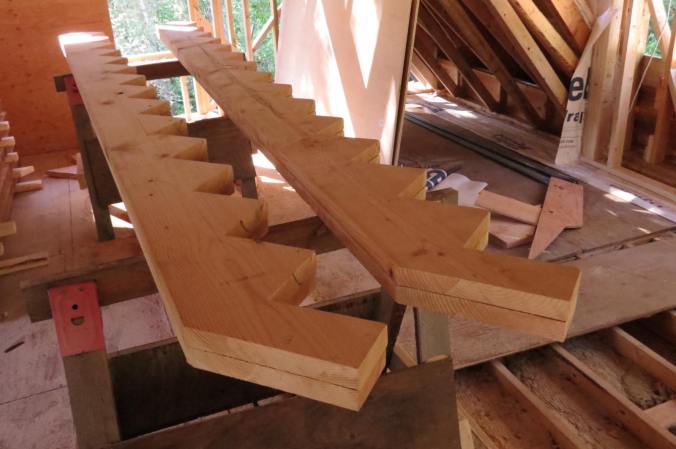
Ben Jenkins – stair tread planning (with Ash), stair landing installation, window installation, moving heavy stuff

Kathleen Kane – ideas and advice, tools, material supply and pick-up, wall plastering

Linnet Kartar – house siting

Helen Keevy – wall plastering

Yarrow Koontz – house siting, wall plastering

Trish Leather – organizing our house rental and lots of childcare

Mark and Kathy Leather – house rental

Corey Mabbutt – tree felling

Cherie MacDonald – erection of ‘a wall’ and childcare

Tammy MacDonald– facia board staining and installation

Jen MacFarlane – truss lifting, bathtub moving, wall plastering, earthen countertop repair, gable staining

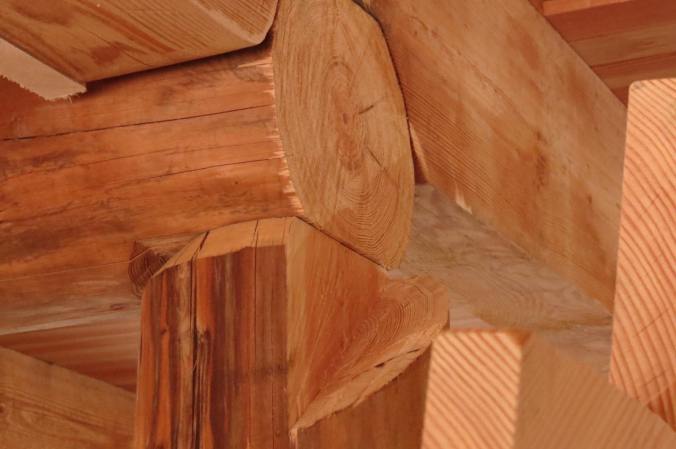
Chris Magwood – plastering advice, general advice, finish plaster coat recipe, inspiration for the roundwood beams

Bill at Marine Fabrication and Machine – post tie down and connectors fabrication

Simon Matijasevic – lath pick-up, advice and ideas

Steve McAdam – timber grading

Bill McCaugherty – advice

Michael Mehta and Gab Energy – PV system organizing

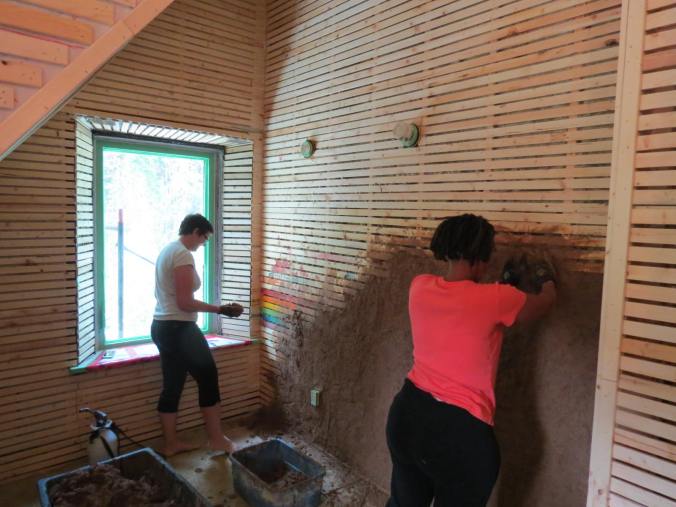
The Mud Girls – inspiration and training with cob

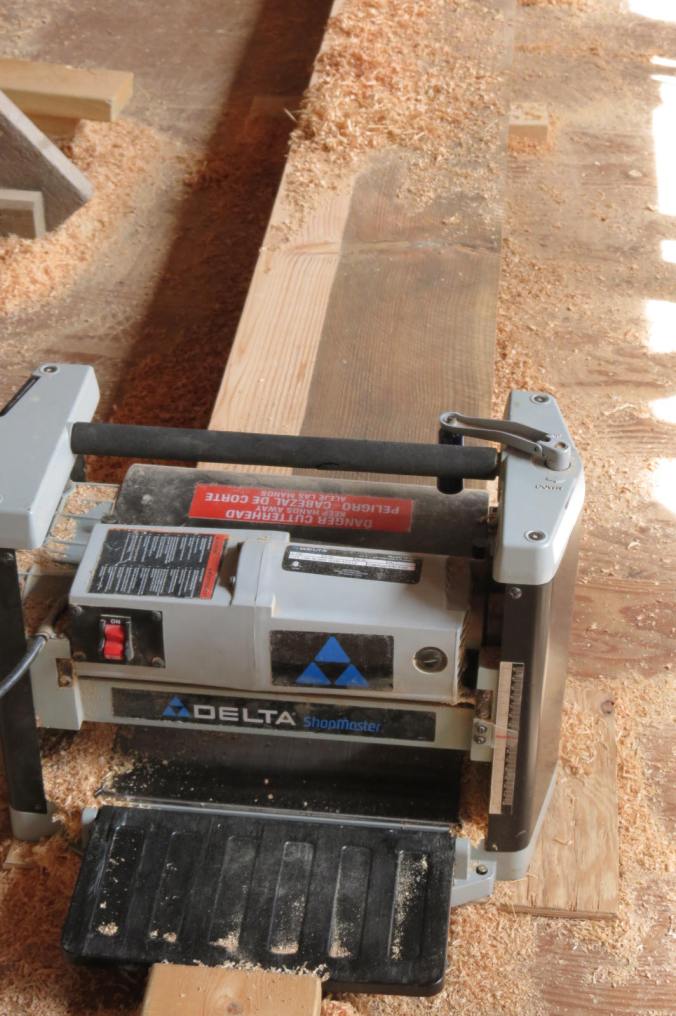
Ash – stair tread planing

Isaac – septic field trenching

Max Oleksyn – gable belly boards installation and window lath

Mary-lou Pacione – erection of ‘a wall’

Pat Prosser – gable wall stud cutting and construction

Andrew Prosser – foundation forms and concrete pour

Jacob Deva Racusin – plastering advice, including clay-lime recipe

Leo Reeves – septic field trenching

Melody Scroggins and Darren – door hardware and bathtub pick-up

Jo Spivak – truss lifting

Krista Spivak – truss lifting

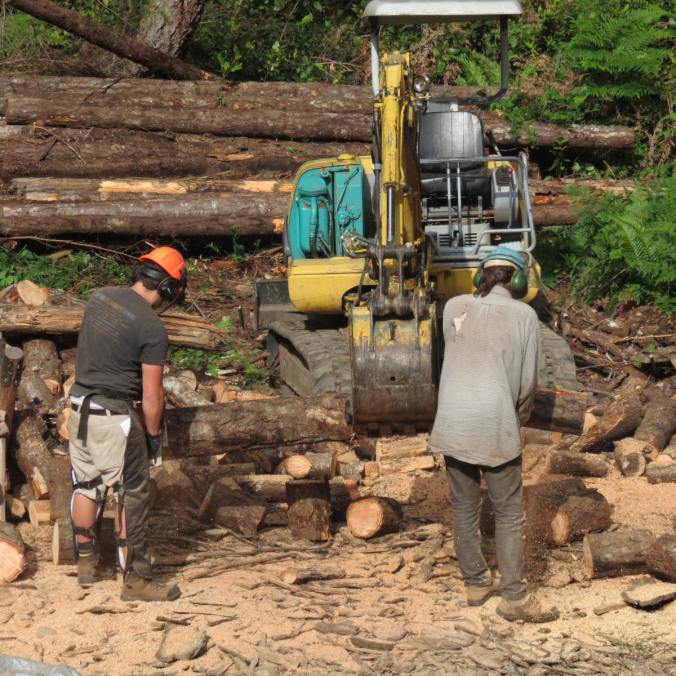
Nate Seigers – timber milling

Drew Staniland – house siting, concrete pour, wall plastering, tools

James Thomson – floor construction advice in his book Earthen Floors

Thomas Uhlig – lots of childcare

Ed West – dormer wall construction

Steve Wilford – PV system installation and garden shed wiring with apprentice Stewart

So, are you in your house yet?

Without a doubt this is the most asked question I get from the far reaches of Asia, America, NZ, and Oxford.

It’s a valid question given that we’ve been building for four years, have a daughter, day jobs, a quarter acre garden, have installed hundreds of metres of fencing, drainage ditches and have large piles of logs, rocks and soil that are in continuous motion. Plus, last spring Karen did a university math course and we recently added a massive chicken coop and 100 laying hens to our budding micro-farm [more on that in the next post]. But enough self-inflation, hedging, and lame excuses. The answer to the question is yes, sort of, but not entirely. Since May 6, we’ve been legally slumbering in the monastic environs of the ground floor of our house, while upstairs it’s still a dusty Sagrada Familia.

Since it’s been a year since I posted an update, I’m going to favour economy over wit and give you a top-level summary of Sept 2017-Nov 2018 in the form of a photo essay below, followed by the inevitable bulleted list of work. Sure, I could wax on lyrically for pages about where our shit goes when we flush the toilet or earthen floor oils and the Brinell hardness test [which really is interesting]. But I’ll leave that for a one on one over pints.

Despite upcoming Christmas partying, our aim is to have the final inspection on the whole house done in April 2019, exactly five months from today. I reckon we have about 80 days of work left so some 15-20 days per month give or take. This should be just about doable if we keep hard at the coalface. I also need to build a farm stand before our chickens start to lay in Feb but that’s merely a weekend job [famous last words].

The critical path to final house inspection involves:

  • Final upstairs wall plaster
  • Final upstairs earthen floors
  • Build stairway railings
  • Install toilet and sink
  • Build and install interior doors
  • Final electrical work upstairs [mostly lights and plug sockets]
  • Exterior roof soffits
  • Gable end cedar siding
  • Final lime-sand plaster
  • Take down all scaffolding
  • Storm drain system
  • Final heat pump installation
  • South patio door landing to meet Code requirements.

Assuming we get it done, Casa de Mac-West will be open for layabouts from far and near starting late spring 2019 so start planning your holidays!

IMG_8573

Massive holes for the septic and pump tanks. It took me a week to shoot elevations and then dig these with my neighbour’s small excavator

IMG_8581

Craning in the 6,000 litre septic tank

IMG_8585

Securing the septic pump tank to concrete blocks so it won’t float in the ground during the winter when the water table comes up

IMG_8611

Head works of the septic system

IMG_8624

Septic waste line in the trench to the septic drip field from the 4000 litre pump tank

IMG_8634

70 metres from the house is the septic drip line field manifold. The septic drip lines run about 30m to the right through the forest to a similar manifold at the other end of the drip field, with a return line for flushing the system.

IMG_8532

Large cob turds waiting to be laid in the main room floor

IMG_9005

Laying the final lounge earthen floor

IMG_9013

Tiling the mudroom floor right over a rough cob base

IMG_9188

Swedish Allback boiled linseed oil and Finico tung oil for oiling the earthen floor

IMG_9194

Putting on the first coat of oil

IMG_9198

The main room oiled, hardened, and ready for a light sanding and waxing

IMG_9216

Waxing the hardened, sanded earthen floor with German Osmo PolyX floor wax

IMG_9096

Taking time out for a Christmas holiday winter walk

IMG_9206

Preparing to tile the main floor loo

IMG_9232

Karen doing the Ikea thing

IMG_9414

Space for the all important dishwasher

IMG_9421

The Douglas fir breakfast bar countertop knocked together from our site-cut lumber

IMG_9438

Prepping the kitchen counter for laying the cob top

IMG_9452

Sink area ready for cob

IMG_9463

Laying the cob on the counter

IMG_9501

A side counter top made from Douglas fir 2×4 off cuts

IMG_9577

Appliances in. Yes, that whole thing on the left is a fridge. It holds massive amounts of garden veg [and beer] and only uses about 350kWh per year. Best of all I don’t have to bend down to see into the back corner. A few steps to the left in the mudroom we have a large chest deep freeze.

IMG_9578

The finished kitchen. It will never be this clean again.

IMG_9581

Chuffed!

IMG_9589

Bathroom sink cabinet we made from our site-cut fir

IMG_9562

Putting up a fir pocket door for the loo

IMG_9593

Meanwhile, out in our power shed, here’s the three filter and UV water purification system

IMG_9598

Outside work needing doing

IMG_9597

Over 50 excavator loads to move all of those branches in the pile on the left

IMG_9628

One evening I decided to install a Roman brush drain across the slope below our house to cut off sub-surface winter water flow. Once buried it’s invisible. Will it work?

IMG_9530

Upstairs when we moving into the ground floor – lots of work to do.

IMG_9851

But then we did a bit of this. Check out that Hemlock tongue and groove ceiling.

IMG_9610

And some of this

IMG_0053

And this [including recruiting Helen and Fumi from the UK!]

IMG_0799

And we got to this – final office wall plaster


IMG_0296

Shower wall tile and pan awaiting tile by Gabriola’s Tile Steve

IMG_9627

Building a raised blueberry bed in the garden. With the machine, probably 100ml of diesel and an hour we dug the trench, filled it with alder, and buried it ready for planting. By any reckoning that’s judicious use of fossil fuels.

IMG_9829

A few of Karen’s strawberries

IMG_9711

Waterlines and power line to the future shed site near the garden

IMG_9751

I took some time out to make bows and arrows and give Mia and her friends archery lessons

IMG_9892

What do you reckon Mia, will we get there?


Sept 2017-Nov 2018 – Blow-by-Blow

  • I installed an entirely new septic system after the first system failed [and we almost ended up in court with the installer] – no need to pick that scab
  • Ground floor interior wall plaster
  • Tiled the mudroom, bathroom and front entrance floors
  • Jan 2018, took the local authority building inspector to task to get a conditional occupancy permit for the ground floor, which involved a very long checklist of hoops to jump through: the final engineer’s report, final electrical, installing a ‘bulkhead’ to separate the upstairs and downstairs, replace some windows with tempered glass, strip off plaster and tile around the tub, and final inspection of the downstairs.
  • Final earthen floor layers, oiling and waxing
  • Installed kitchen cabinets and appliances and built custom earthen and Douglas fir kitchen countertops
  • Final electrical – plug sockets, lights etc.
  • Built a bathroom pocket door, bathroom cabinet and fir cradle for our salvaged cast iron tub
  • Packed up our rental house
  • Final downstairs inspection and Conditional Occupancy Permit – issued 11 April 2018
  • 6 May 2018 – we moved in!
  • Hemlock tongue and groove wood on the entire upstairs ceiling
  • Lathed upstairs interior walls.
  • Karen planted about 300 metres of veg and we planted 30 metres of blueberries in raised beds
  • Made custom Douglas fir window slabs for a dozen upstairs windows.
  • Cut a waterline and powerline trench 60 metres from our power shed to the future location of our garden shed-barn / wash station / photovoltaic site near the garden [to be built spring 2019].
  • Moved many tonnes of logs, tree stumps, branches and cleared the area between the house and garden for eventual creation of a perennial food forest
  • Upstairs interior rough wall plaster
  • Sheathed upstairs library walls
  • Upstairs shower construction and tile
  • Finished plaster in upstairs office
  • Finished earthen floor in the upstairs office
  • Panelled bathroom walls
  • Bought 100 heritage breed chicks to brood upstairs in Mia’s room and at our neighbour’s house
  • Built a 240 square foot / 22 m2 chicken coop complete with a gravity powered rainwater system
  • Installed 660 feet / 200 metres of deer fencing to complete a 2 acre / 0.80 hectare deer-free enclosure for food growing
  • Completed a farm business plan and applied for farm status for BC taxation
  • Surveyed and dug new drainage trenching and bucked up and stacked six cords of firewood
  • Built upstairs bathroom cabinet

100,000 Staples and 26 Tonnes of Plaster and Still Counting


Back in the day before drywall, also known as plasterboard in the UK or the brand ‘sheetrock’ in the US, interior walls of most houses were lath and plaster. Lath is simply wood strips nailed across wall studs and separated by about a finger space. When plastered over, the plaster oozes through the space and keys into the lath, hooking over the back.

It’s a building method descended from wattle and daub, found in many ancient buildings in the British Isles and European continent, which used sticks and thick cob plaster. My old 1890s flat in Shepherd’s Bush, London, had lath and plaster walls which were exposed when the landlord gutted the place. There’s a good chance the lath was old growth Douglas Fir from the British Columbia coast, which became a major lumber supplier to the UK during the Victoria building boom.

In the post-War period, people stopped building with lath and plaster, favouring the uniformity and speed of standardized sheet goods such as drywall on the inside and plywood on the outside. Time=labour=money while construction waste is externalized to the biosphere so nobody builds commercially with lath and plaster anymore.

Fortunately, we’re building a home with a two-century time horizon not a cookie-cutter commodity to flip or a fly-by-night house built to be chucked in a landfill site like a disposable coffee cup. So, after the big insulation blow we spent a month or three ripping lath, toasting at least one Bosch [all brand no quality action] table saw, and then air stapling it over the entire house inside and out. We even incorporated some old growth Doug Fir lath salvaged from the old 1927 Gabriola Island north end school house, (later the Women’s Institute) when it was renovated into the Gabriola Arts and Heritage Centre in 2016-17.

Once caged in lath, we then began what turned into month long job of applying the ¾” / 20mm exterior base coat of plaster. This is a lime-stabilized earthen plaster consisting of clay dug out of a hole near the garden, coarse sand, a small amount of lime putty and chopped straw. Cheers to Chris Magwood, Jen Feigin, Jacob Deva Racusin, James Henderson and Mike Henry for advice on the mix.

In all we laid on 207 cubic feet / 5.9 cubic metres, or about 11,000 kg, of plaster, one handful at a time. Over this will go a thin earth-lime layer and then a final lime-sand layer. On the inside the base layer is a pure clay-sand-straw mix. The main floor walls sucked up about 282 cubic feet / 8 cubic metres, or about 15,000 kg of plaster. I’m guessing that by the time we’re done there will be about 40-45 tonnes of plaster on the house, inside and out. The final interior surface is a thin finish coat of tinted clay-sand-horse manure plaster. All this heavy lifting was done with the help of many other hands including Kevan and John, who put in many hours, my parents and Karen’s mum and others.

So why lath and plaster you may rightly ask? There are many reasons. We wanted to avoid high carbon sheet goods, especially drywall, which is made from mined gypsum, and the toxic chemicals that go into OSB, plywood, drywall and commercially manufactured drywall mud. Plaster has also allowed us to avoided using an excessive amount of plastic-based vapour barriers and tapes. In terms of performance and good building science, with plaster on both the interior and exterior we’ve created a building envelope that is air-tight and yet vapour open, thus enabling the walls to dry to the inside or outside should moisture find its way into the walls, which is all but inevitable in any house. This ability to dry is one element that separates durable buildings with centuries-long life spans from disposable modern structures often infested with black mould and rot.

We also like the idea of building using as many low-carbon, site-sourced and local materials as possible, which could return to the earth. Lastly, while hard work, plastering is both fun and highly satisfying. The result is a beautiful hand-sculpted wall filled with the texture and joy of the humans who made it.

It’s hard to say that about drywall.

IMG_6617

Starting to lathe the outside


IMG_7151

Karen ripping lath

IMG_7899

Sifting site clay

IMG_7900

Making clay slip

IMG_7903

Chopping straw

IMG_7806

Precious lime putty

IMG_7811

North wall earth-lime base coat

IMG_7814

Northwest corner with lathe ready to plaster

IMG_7832

Laying it on

IMG_7852

East wall base coat

IMG_7894

Upper north base coat

IMG_8199

Plaster keying through the backside of lath

IMG_8279

Paintings about to be forever encased in plaster, oh and a pepper

IMG_7906

West side

IMG_7994

Yeah, she’s a climber

IMG_7149

Salvaged old growth Doug fir lath from the old Gabriola north end school house

IMG_8836

Lovely

IMG_8348

Karen and mum going the lounge base coat

IMG_8436

It’s so wee and Japanese

IMG_8483

Lower bedroom finish coat

IMG_8480

Oh yeah, that’s some finish coat

IMG_8831

Plaster colour samples

IMG_8850

If you’ve had a newborn you know what this is. Or it’s plaster.

IMG_8848

Lounge wall.

IMG_8858

When not to do plaster ingredient volume calculations


10,000 romance novels and the big blow [job]


With the crappest job in the world under our belts, we moved on to insulating the walls.

The original plan was to insulate with light straw clay (LSC), as we did with our power shed, which by the way is featured on the cover of the hot-off-the-press Essential Light Straw Clay by Lydia Doleman.

LSC is an outstanding infill material, turning agricultural waste and clay slip into a carbon sequestering, fire resistant insulation that can last for centuries as evidenced by ancient half-timbered, straw-clay wall systems across the UK and northwestern Europe. The downside is the huge amount of work in the volumes we’d have needed and it dries at about 1” per week in summer conditions. So in the end, only being ready to insulate in Nov during the onset of wet winter gales, timing conspired against us.

So what to do?

Pulped fiction to the rescue.

We switched to dense pack blown-in cellulose insulation. ‘Cellulose’ insulation is basically recycled shredded novels, newspapers and office paper mixed with non-toxic borate as a fire, insect and mould deterrent. This stuff is hard to beat. At R 3.8 / RSI 0.67 per inch it’s more than twice as insulative as LCS or straw bale, which are also cellulose but with fewer air pockets and thus less insulative. Blown cellulose reuses a land-fill bound waste product and it sequesters carbon, which is vital to minimizing the embodied carbon and climate change contribution of our house. It’s also very fast to install and when dense packed it also slows air movement through walls while managing moisture very well.

We stapled and lightly glued agricultural floating row cover to the wall studs and then blew and blew and blew. In a couple of days we’d pump 247 bags into the walls – some 2790 kg of recycled paper. On the main floor with the 16” insulation cavity this gives us about R60 / RSI 10.57 and upstairs the 12” cavity provides about R45 / RSI 8.03. This [pun intended] blows the BC Building Code and its R24 / RSI 13.6 out of the water.

But did I mention that it was the dustiest job in the world?

Next up, we get plastered!

IMG_6485

Karen stapling on floating row cover

IMG_6474

Ready for the big blow

IMG_6477


IMG_6527

Feeding the machine

IMG_6528

Mid-blow

IMG_6521

IMG_6510

Warm and snuggly


Roof Insulation – the crappest job on any build

IMG_6097

Did you say it was 29C today? Lovely, I’ll slip into my swimmers.

By late August 2016, with the daytime highs pushing 30C, the crappest job on the build – insulating the roof – reared its foul head.

Roof insulation is the toque of a house and with the roof generally being the biggest potential source of home heat loss – like a bald man in a Winnipeg winter – it pays to go for a big Canuck toque not a wimpy Antipodean beanie.

The building code minimum for roof insulation here in BC, including up north where they ice fish, is R40 / RSI 7.04 / Metric U 0.14. Good but not amazing. However roof insulation in a cathedral ceiling design isn’t easily upgraded so I opted to go well above the code minimum. The steep bits of the roof are insulated to R58 / RSI 10.21 / Metric U 0.097, the dormer roof is R66 / RSI 11.62 / Metric U 0.086 and the entire midline of the roof at the high point is insulated to between R80 and R120 / RSI 14.09 to 21.13 / Metric U 0.071 to 0.047.

In all we stuffed about 400 batts of Roxul mineral wool insulation into the roof bays and took great pains to fill the gaps between each timber in the trusses. Clad in long sleeves, hats and facemasks it was a like rolling around in stinging nettles for five days and without a doubt it was the hottest, itchiest and generally most rubbish part of the build to date.

After insulating, drawing deep from the well of Karen’s Girl Guide folding skills, we installed a high spec Majpell vapour barrier from Siga in Switzerland, taping and sealing every joint, penetration and individual staple hole, leaving an airtight and vapour proof barrier.

It was a crap job but we somebodies had to do it. And the worst bit was I left my best tape measure somewhere in the insulation.

img_6177.jpgIMG_6096IMG_6107

IMG_6176

Five days with my head up there

IMG_6187

Recyling lumber straps into insulation straps

IMG_6181

Heat shield for the chimney flue

IMG_6188

400 batts later…

IMG_6185

Rolling out the Siga Majpell vapour barrier

IMG_6194IMG_6193

IMG_6196


The Earthen Floor Epic, Part I

In a catch-up post from 2016, I promised you’d get to see Mia laying the base layer for our upstairs earthen floor. Well here it is:


If you’re wondering what these nut bars are up to laying a mud floor in their new house [the building inspector certainly was], rest assured that we are only at the rough base layer stage right now but here’s what we are hoping for when we get to the final, tinted earthen floor layers later this summer:

http://www.claylin.com/photos/photo-gallery.php

These fine floors are the work of Sukita Reay Crimmel, author of New Society’s Earthen Floors. I had the pleasure of giving her a lift through the mountains and desert of New Mexico in 2015 and bending her ear about earthen floors. She tried to get out of the car but we were driving at 70 miles per hour.

However, I wish I’d have listen more closely to her words about testing as we had a few problems with our initial ground floor sub-floor mix that we later sorted out once I revisited her book. But rather than me blathering on about it in words, you can watch me blather on about it here and how it went oh so wrong and then oh so right.

When we get to the final floors this coming summer, I’ll give you much more detail about how they are laid, the huge benefits, the challenges and how they are finished.

Until then, here are some fun photos of playing in the mud [and really sore knees].

img_5735

Karen whacking straw for the cob

img_5738

Karen, Grandma and Mia mixing cob

img_5747

The mix that later cracked. Too thick, too much clay and not enough sand and fibre

img_5850

Concrete pad and make-up air intake for the wood stove

img_5872

Barley sprouting as the cob dries

img_5879

Prepping height sticks for the main room base layer

img_5883

Living room floor prepped and ready for the cob base layer

img_5885

Bubble material to reduce the probability of cracking around the posts

img_5890

Wood stove air in-take pipe goes under the floor and out through the wall.

img_5894

Mia being swallowed by a massive pile of cob

img_5900

Laying the base layer in the living room

img_5901

You can’t keep John away from this stuff

img_5903

Mia checking the elevation of her section of floor

img_5904

John and Mia in the kitchen

img_5905

The last bits of a seven hour continuous pour of the living room and kitchen cob sub-floor

img_5929

Karen mixing a 20 bucket load of cob with the rototiller

img_5936

Oh my

img_5943

Moving material with the venerable Ford

img_6021

Mia’s addition to her bedroom sub-floor

img_6034

Karen and John laying the sub-floor in our upstairs project room

img_6045

Oh yeah

img_6047

Floor eye’s view


Rise over Run

img_5088

Sitting on my first set of stairs

As the flowers bloomed in April, I was scratching a bald spot thinking through my first-ever set of stairs.

It’s all about rise and run and the permanence of up and down. So, to ensure the up and down didn’t move, I poured a small concrete pad as a support for a 6X12″ Douglas fir stair landing I dowelled together out of a spare ceiling joist. From this rock-solid base and a fixed first step height from what will be the final main level earthen floor, I had an unchangeable rise to the upstairs floor level.

After that it was relatively easy to calculate the rise and run of the steps and layout and cut doubled-up 2X12” stair stringers that support the sides of the stairs and hold the treads.

These I built out of 3” thick Douglas fir slabs from our mill pile, planed by our two WOOFERs, Ben and Ash, who hail from Devon in SW England. I glued and screwed the beefy treads to the stringers, which in turn are supported by notches I chainsawed into the roundwood posts. The stringers are also lag bolted to the 6X12″ floor joists above, just to be sure. It’s all about 5X stronger than required and I’m very happy about it as I don’t like squeaks. If this explanation made no sense whatsoever then just look at the pictures below.

Ash returned to England after a week but Ben, the son of an old friend from the edge of Dartmoor, stayed on for six weeks and helped me frame out much of the upstairs interior walls. I also gave him a chainsaw lesson and set him loose with our neighbour’s excavator. He moved rocks, bucked up a mountain of firewood and weed whacked in the garden. I think he had a blast.


img_4815

Pouring the landing pad


img_4817

Nice flat concrete with bolts for the landing

img_4916

The landing sub structure

img_4905

Drilling holes to dowel and bolt the landing slab together

img_4920

Ben lowering the landing

img_4921

Ash steading from above

img_4931

We have the rise and we have the run

img_4912

Planing the stair treads

img_4910

Starting to flatted

img_4914

Treads ready to cut

img_4933

The stringer layout tools

img_4932

The first 2X12″ stringer laid out and cut

img_4935

All four identical stringers

img_4940

Installing the first pair

img_4943

img_4942

Looking level

img_4953

Chainsawed rest for the stringers. I’m pretty happy with that cut done from a ladder

img_5009

Stringers resting on the ledge at the correct angle

img_4962

Gluing and screwing the stringers to double them up

img_4959

One double

img_5008

Lag bolted to the joist and resting on the ledge

img_5013

Risers

img_5082

Completed stair edge from the front entrance

img_5085

Nice Doug fir for the bare feet

img_5086

No more ladders to the upstairs!

img_5159

Framing out the upstairs interior walls

img_5174

Ben bucking up firewood for the winter of 2017-18

img_5180

Ben and John bucking wood from both ends


Right on Time

img_4220

Mia up for the challenge

In my last blog post, just the other day six months ago, I spilled some virtual ink catching up on the summer and autumn of 2015 in a post that was like an iPhone 6, instantly obsolete and contributing little of value to your life.

A half a year later and I’m a full twelve months behind on updates so I’m going to make a year at the high-performance house building coalface vanish in a [not so] tight 3,000 words spread over a few posts along with a raft of photos [which is all people really want anyway]. I’ll try to be witty but what can you do when so much of it is just about insulation,  and cross-bracing and high spec sealing tape?

So, casting back to 2015, after we got the metal roof on last October I took off to New Mexico for a Natural Building Colloquium, hanging out in the mountains west of the Trinity A-bomb blast site with people who eat plaster for breakfast and build entire houses from clay, straw and sweat.

img_3239

Mum cutting vapour barrier in posh shoes

While I was away my amazing 70-something parents spent three days on their hands and knees on fractured drain rock putting down the impermeable sub-floor vapour barrier in our house and meticulously sealing it around every concrete peer with $80 a roll tape. The barrier is twenty times less permeable than the building code requires and is so tough you can drive construction equipment over it. I can’t overstate how vital this job is to the performance and comfort of our house, how much this sort of job isn’t my cup of tea and how brilliant my parents did with the sealing and detailing. They asked for a ‘substantial and important job’ and so they got it. They still have sore knees.

By the end of the year I’d laid down 6 inches / 15 cm of expanded polystyrene (EPS) foam insulation over the barrier providing thermal resistance of Imperial R24 / RSI 4.23 / U0.23. I have deep ambivalence about using EPS ‘expanded foam’ – the stuff ‘disposable’ [as in last for 1,000 years] coffee cups in the bottom of landfill sites used to be made of. It’s substantially less bad than the rigid pink or blue extruded polystyrene (XPS) foam, which uses much more potent greenhouse gasses during manufacture. But at the end of the day all foam insulation is basically petroleum-based plastic soaked in fire retardant, as are so many commercial building products. This stuff pains me and buying a truck load of the stuff pained me even more.

img_3612

The sub-floor EPS cross to bear.

I contemplated using Rockboard, a firm mineral wool board from Roxul, but it is hard to  find and unaffordable at nearly six times the price of EPS, which also had the advantage of being manufactured locally near Vancouver. A better natural option I learned about too late in the game was hempcrete or ‘hemp lime’ [lime mixed with the inner part of hemp plants], which would have been worth considering for the sub-floor and the walls. It may well appear in the next project and I like it so much that I commissioned this book.

On the upside, despite the billions of foamy balls which plugged and burned out our borrowed vacuum, and the child sacrifice screeching sound when I cut it that had Karen in hysterics, substantial EPS sub-floor insulation over an impermeable barrier results in a bone-dry floor with a very slow rate of heat loss to the earth. This is the absolute inverse of the half-subterranean, damp, stone floor-over-bare earth deep freeze that Mia lived in as a baby in Crystal Palace, South London. When we moved from that flat, the carpet under the bed was covered in mould and we had to bin the almost new mattress. Of course that place was a virtual Atacama Desert compared to our Streatham flat. It’s so often these cold, damp blanket recollections of my UK housing experiences that drive my quest for very warm and very dry in our house.

Bizarrely, like Hyde, after I was done the sub-floor insulation I sort of wished I’d used even more EPS and laid down 12 inches / 30 cm of EPS to double the floor insulation, as if I lived in Flin Flon rather than the [imaginary] Canadian Riviera. When is enough, enough?

On top of the EPS, which has an impressive compression rating of about 2300 lbs/sf / 11,300 kg/m2, we framed the internal ground floor walls of the double wall system making 16-inch / 40 cm thick exterior walls downstairs and 12-inch / 30 cm thick walls upstairs.  During this time, my sister dropped in for a few days from Calgary and for an early 50th birthday present I showed her how to use the mitre saw without losing fingers. She chopped studs while I nailed and we managed to frame out the double walls of both the upstairs gable ends over a weekend.

This whole internal double wall framing business involved nearly six weeks of building custom top plates and air baffles and extensive air sealing detailing using roll after roll of [really, really, really expensive] Siga Wigluv sealing tape. The temptation to get lazy was always and ever present and the only antidote was lunch, coffee and judicious eyedroppers of my not-quite-buried childhood perfectionism.

As the foolish Europeans who arrived to colonized this place fewer than two centuries ago never knew, the BC coast is historically a brick-shitting deadly seismic zone. To mitigate [some of] the risk posed by a megathrust earthquake, which builds with every passing hour that the Juan de Fuca plate sticks to the North America plate in the Cascadia subduction zone, my engineer specified heaps and heaps of cross-bracing. So, I spent weeks and weeks cutting and nailing 2X4 ‘X’s into the double walls to a prescribed pattern until the entire house was thoroughly cross-braced.

There are a numerous seismic features in the house. The concrete foundation pinned into bedrock and large, frequently spaced anchor bolts and heavy steel post tie-downs should keep the house from doing the table cloth and dinner plates routine in a big shaker and sliding off the foundation. Hurricane ties between the roof and the walls, galvanized strapping between the gables and the rim joists and many, many dozens of foot long engineered GRK structural screws and heavy bolts should keep the layers of the house from flying apart. Lastly, the cross-bracing should in theory keep the whole thing from buckling. At least that’s what the calcs say, though the upward seismic limit isn’t known. With massive earthquakes it’s all about distance, depth and duration and unknown, unknowns.

About the same time we added the cross-bracing, in went the sub-floor plumbing for the toilet, bath, sinks and water delivery lines. Then we wheel-barrowed in and compacted 11 tonnes of road base [gravel, sand and clay] as a solid base for the eventual earthen floor. Much more on this later when you get to watch a video of Mia laying floor.

For now, here’s some more pics of insulation and cross-bracing and sealing tape.

See, now that contributed value to your life.


img_3238

Fiddling with the vapour barrier

img_3322

Pleased as punch

img_3329

Completion photo

img_3354

Pier detailing

img_3364

Water line and power line penetrations

img_3611

My ‘just in case’ radon gas mitigation pipe

img_3616

img_3713

Sub-floor waterlines for the loo and the toilet flange

img_3662

Laying out the downstairs loo walls

img_3788

img_3789

More subfloor plumbing

img_3799

Sealing the sub-floor vapour barrier to the exterior sill plate

img_3801

And nailing it for life

img_3985

Laying out the floor plates for internal walls

img_4084

X bracing at a window

img_4085

And more

img_4095

And more

img_4592

Shear wall X bracing

img_4593

and more

img_4679

Custom double wall top plates and Siga tape air sealing

img_4683

Gable end double wall

img_4694

More air sealing

img_4696

Collar ties I added to create the plane of the upstairs ceiling, and the future chimney location

img_4788

Dormer air sealing baffles

img_4796

Upstairs double wall with X bracing on the outside

img_4751

Pat chopping studs like a high schooler

img_4760

One sip and she’s blurry

img_4236

Karen moving road base

img_4208

And more

img_4227

And much, much more

img_4247

Mia spreading the road base

img_4256

Rob on the plate compactor

img_4767

And look what happened in the garden. The elderberry tree was blooming

img_4768

And some early flowers


Cirque du soleil Part Deux

IMG_3140

I’m back on that treadmill of pounding nails and publishing books by day and researching hot topics like the counter intuitive best way to air seal a window according to NRCan by night. [Really, no caulking under the window flange, for real, I’m not making this up, it’s all about the Delta P.]

While I luxuriating in my evening hours borrowed from the future, I realize that my blog is still living in the summer of 2015, while my house build lives in the winter of 2016 and my publishing brain lives in the spring of 2017.

So rather than subject you to eight or nine scintillating posts about humping 112 sheets of plywood up on the roof, the depths of my neck tan, the moments of despair as the rain broke through the tarps and saturated our T&G ceiling, or the mad dash to get the metal roof on before the heavens unleashed the autumn gales if it wasn’t for that bleeding Rothenburg 49 degree pitch, I’m going to give you the back-of-a-beer-mat version with a truckload of photos. When you emerge on the other side it will be the spring of 2016  and we’ll all be in a better place.

Then we can get on with talking about thermal mass and swoon to the viscidity of Swiss Siga sealing tapes. Oh, yeah. Be still my beating heart.

Here we go.


IMG_2666


IMG_2400

IMG_2824

The task list [took twice as long)

IMG_2845

Nice outriggers

IMG_2868

Strapped so the engineer can sleep at night

IMG_2883

IMG_2904

Chris Sauer volunteers to be monkey man

IMG_2924

Half of the sheathing on. Cursed dormers still to come.

IMG_2976

Clamps and string. That’s how you build it.

IMG_3022

IMG_3023

11mm of pain

IMG_3026

Definitely water

IMG_3037

Framing out a dormer wall

IMG_3046

Rolling the barge boards

IMG_3050

IMG_3054

Two days to hang those before the roofers arrive

IMG_3058

Dormer meets the roof peak

IMG_3077

All 112 sheets of plywood on the roof

IMG_3082

Tammy, Karen’s mum, lends a much needed hand

IMG_3092

Dad, remember this from the ’80s? Guess where I learned that trick?

IMG_3120

Almost there

IMG_3122IMG_3124

IMG_3130

Karen thought today was going to be about gardening

IMG_3140IMG_3141

IMG_3143

Still together after all those fascia boards.

IMG_3144

On the so-called ‘chicken strips’

IMG_3191

Get it on lads

IMG_3193

Metal for the ages

IMG_3195IMG_3196IMG_3334IMG_3336

Cirque du soleil Part I

IMG_2366

Hours after my last blog post, an email flittered out of the ether from a distant land:


‘I do enjoy you wasting 6 minutes of my comfortable office life with tales of sunshine and screwing.…’


Oh my, the rapture of 2x6s, insulation and plywood decking.


Speaking of which, about 12 hours after finishing the upper floor deck, a couple of lads from Hi-Tec Industries rocked up with our engineered roof trusses and plopped them on the deck with a crane. It took them 20 minutes to set me up with three month’s worth of work.


A few days later my bro Ed showed up with his family and despite a multi-decade interlude since we built anything together, we seamlessly slipped into work mode, anticipating each other’s every move and within two days we had the upper dormer walls framed with plenty of time for beer and the beach. There’s a reason modern houses are stick framed – it’s fast. Very, very fast. Especially with your well-seasoned brother on the chop saw. Sadly Ed had to leave after a couple days and missed the erection of the first roof trusses that catapulted the house from 10 to 27 feet high.


I scratched a spot bald on my head trying to figure out how to lift a 32 foot long truss that weighed in the ‘really heavy’ range onto the dormer wall by myself. In the end I nearly got one up but it was a precarious business best not spoken of. So I defaulted to Plan B: casually waiting for unsuspecting wife / neighbour / old friend to happen by, lure them up to the top deck with the siren call of ‘hey, want to see where the bedrooms will be’ and then pouncing before they could scramble for the ladder.


So within a few days the press-ganged labour had the dormer trusses up. I built Douglas fir posts to carry the double ridge girder for the steep east and west roof sections and Karen and John and me lifted the end trusses into place.


It was weeks and weeks of climbing, shinnying out on a girder and then inevitably dropping or forgetting my tape measure / drill / hammer / plumb bob / whatever-tool-I-needed at a key moment in a really awkward place, necessitating another laborious round trip to the ground.


Oh but it was fun too.


I do like a bit of high angle acrobatics and neck tanning in the relentless sun.


IMG_2127

$6000 worth of engineered trusses


IMG_2134

IMG_2136

IMG_2216

The beginning of three months of work

IMG_2214

South dormer wall almost framed before lunch

IMG_2219

Ed talking to John when he should be working

IMG_2222

Not bad for an older brother

IMG_2237

Mia gravely concerned that her room has no roof

IMG_2260

I got the first truss this far by myself and nobody died

IMG_2265

First truss being braced

IMG_2268

My confidence is overwhelming

IMG_2283

Hey Jen, nice to see you. Wanna put up a truss?

IMG_2307

Joe, haven’t seen you since 2002! Fancy putting up a few trusses?

IMG_2291

John, come say hello to Jen and help us put up this truss

IMG_2284

Mia, can you give me a hand with this truss?

IMG_2346

The girder slot in the middle

IMG_2641

West end built-up Douglas fir post

IMG_2654

Ratcheting the trusses for blocking

IMG_2358

East end temporary post and first 13.8 in 12 pitch truss

IMG_2359

IMG_2668

Installing the West gable ridge extension


IMG_2672

Scheisse, is that my nail gun down there?

IMG_2368

Nailing the east end ridge girder together

IMG_2767

South side lower rafter tails

IMG_2768

Hey Darren, I know you’re only here for 24 hours but  want to sand this beam and help me install it?