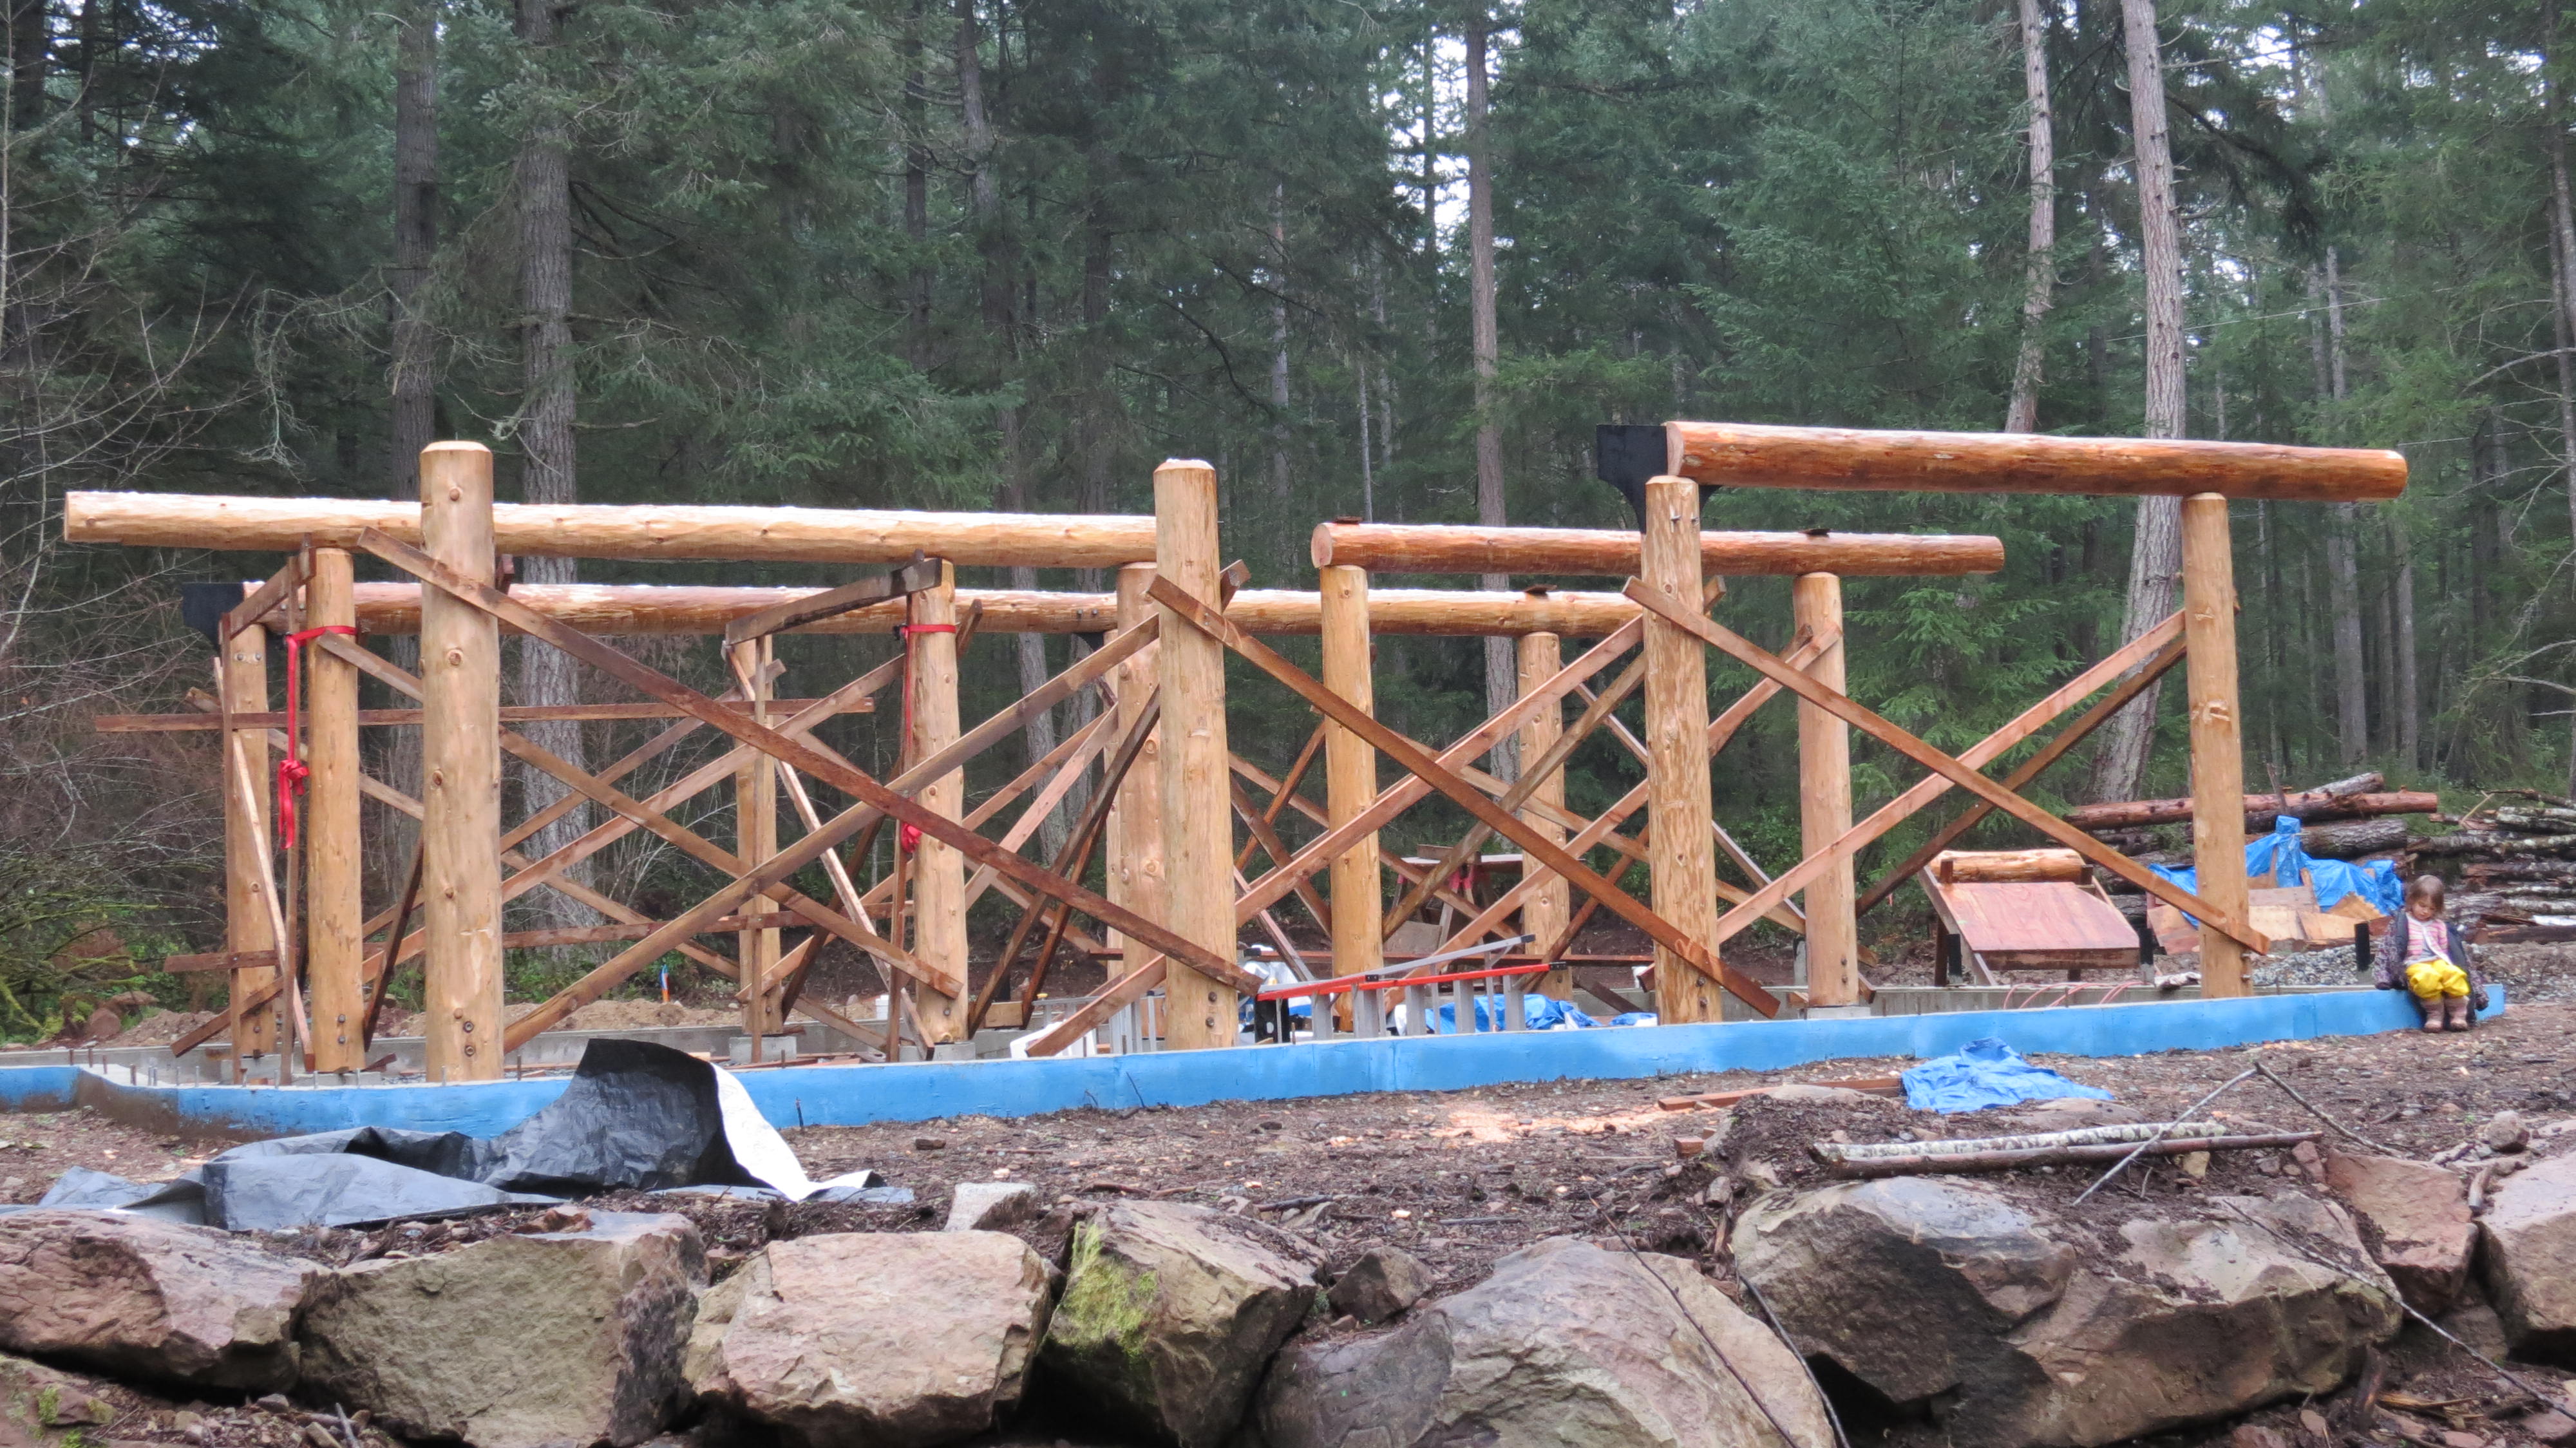
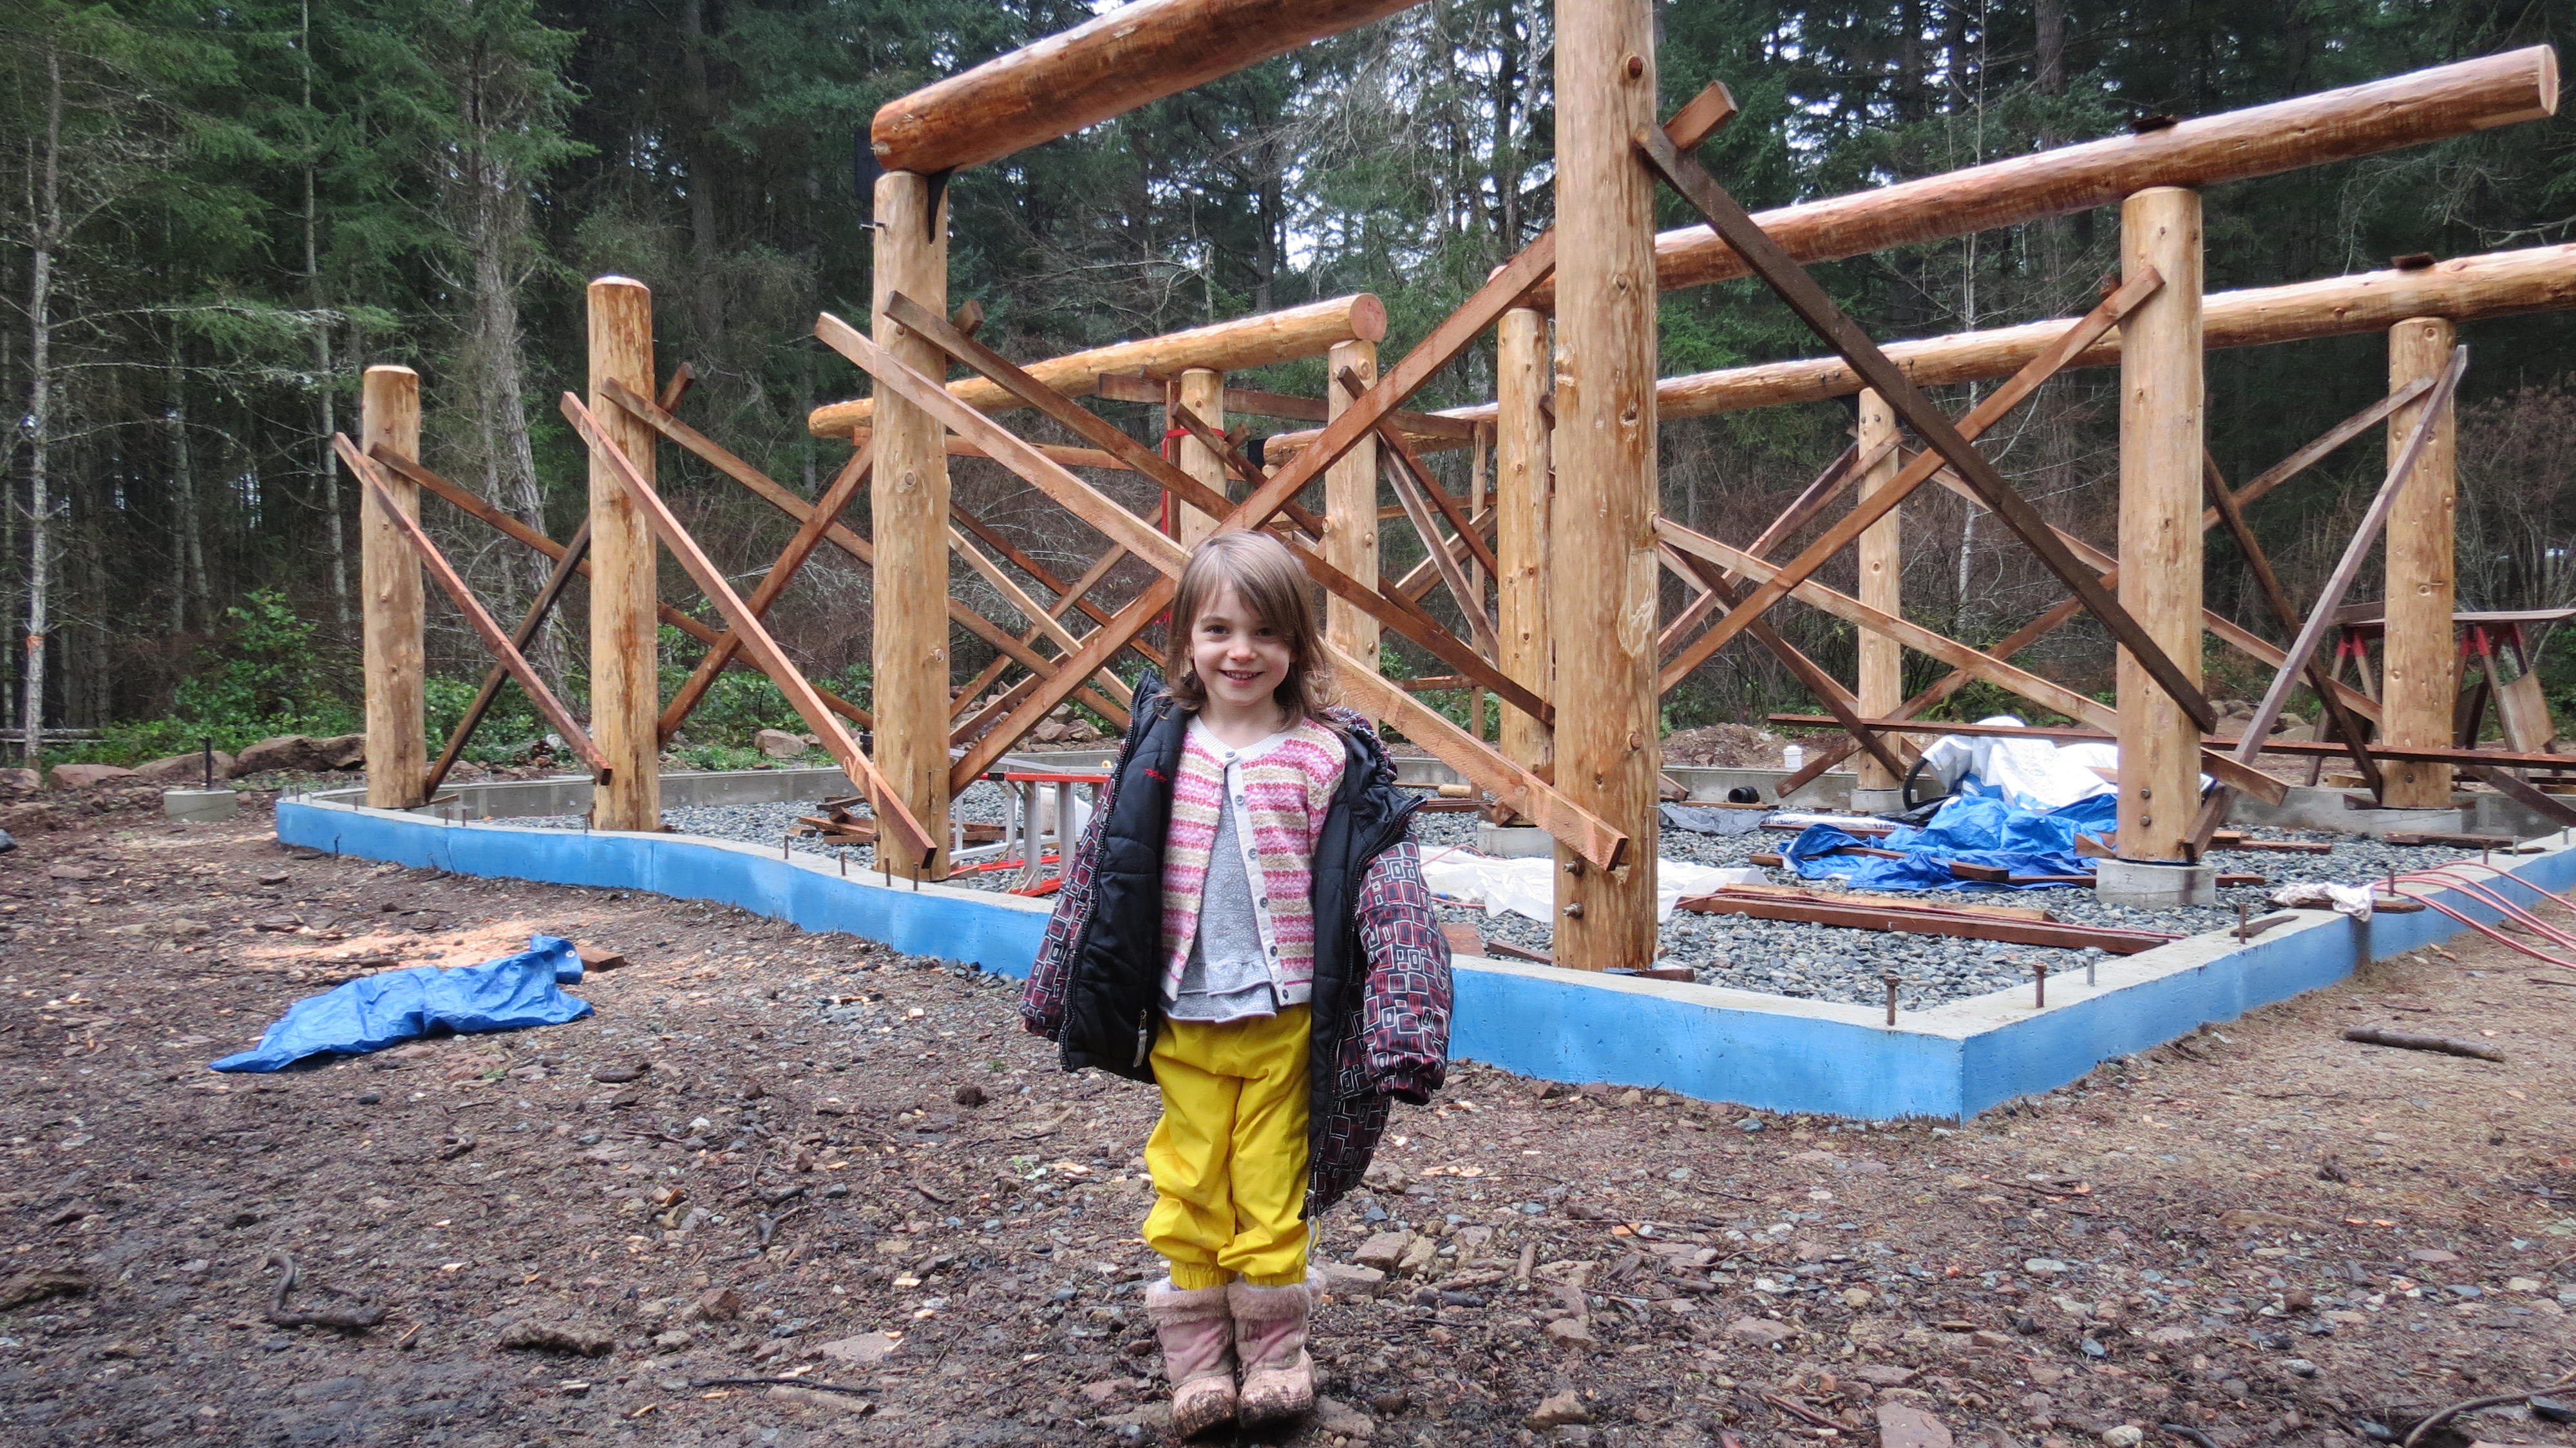
Beaming Part II

IMG_9901


There she be!

Earlier this week, my neighbour John worked his excavator magic and we slotted the last interior beam into the NW corner of the house.

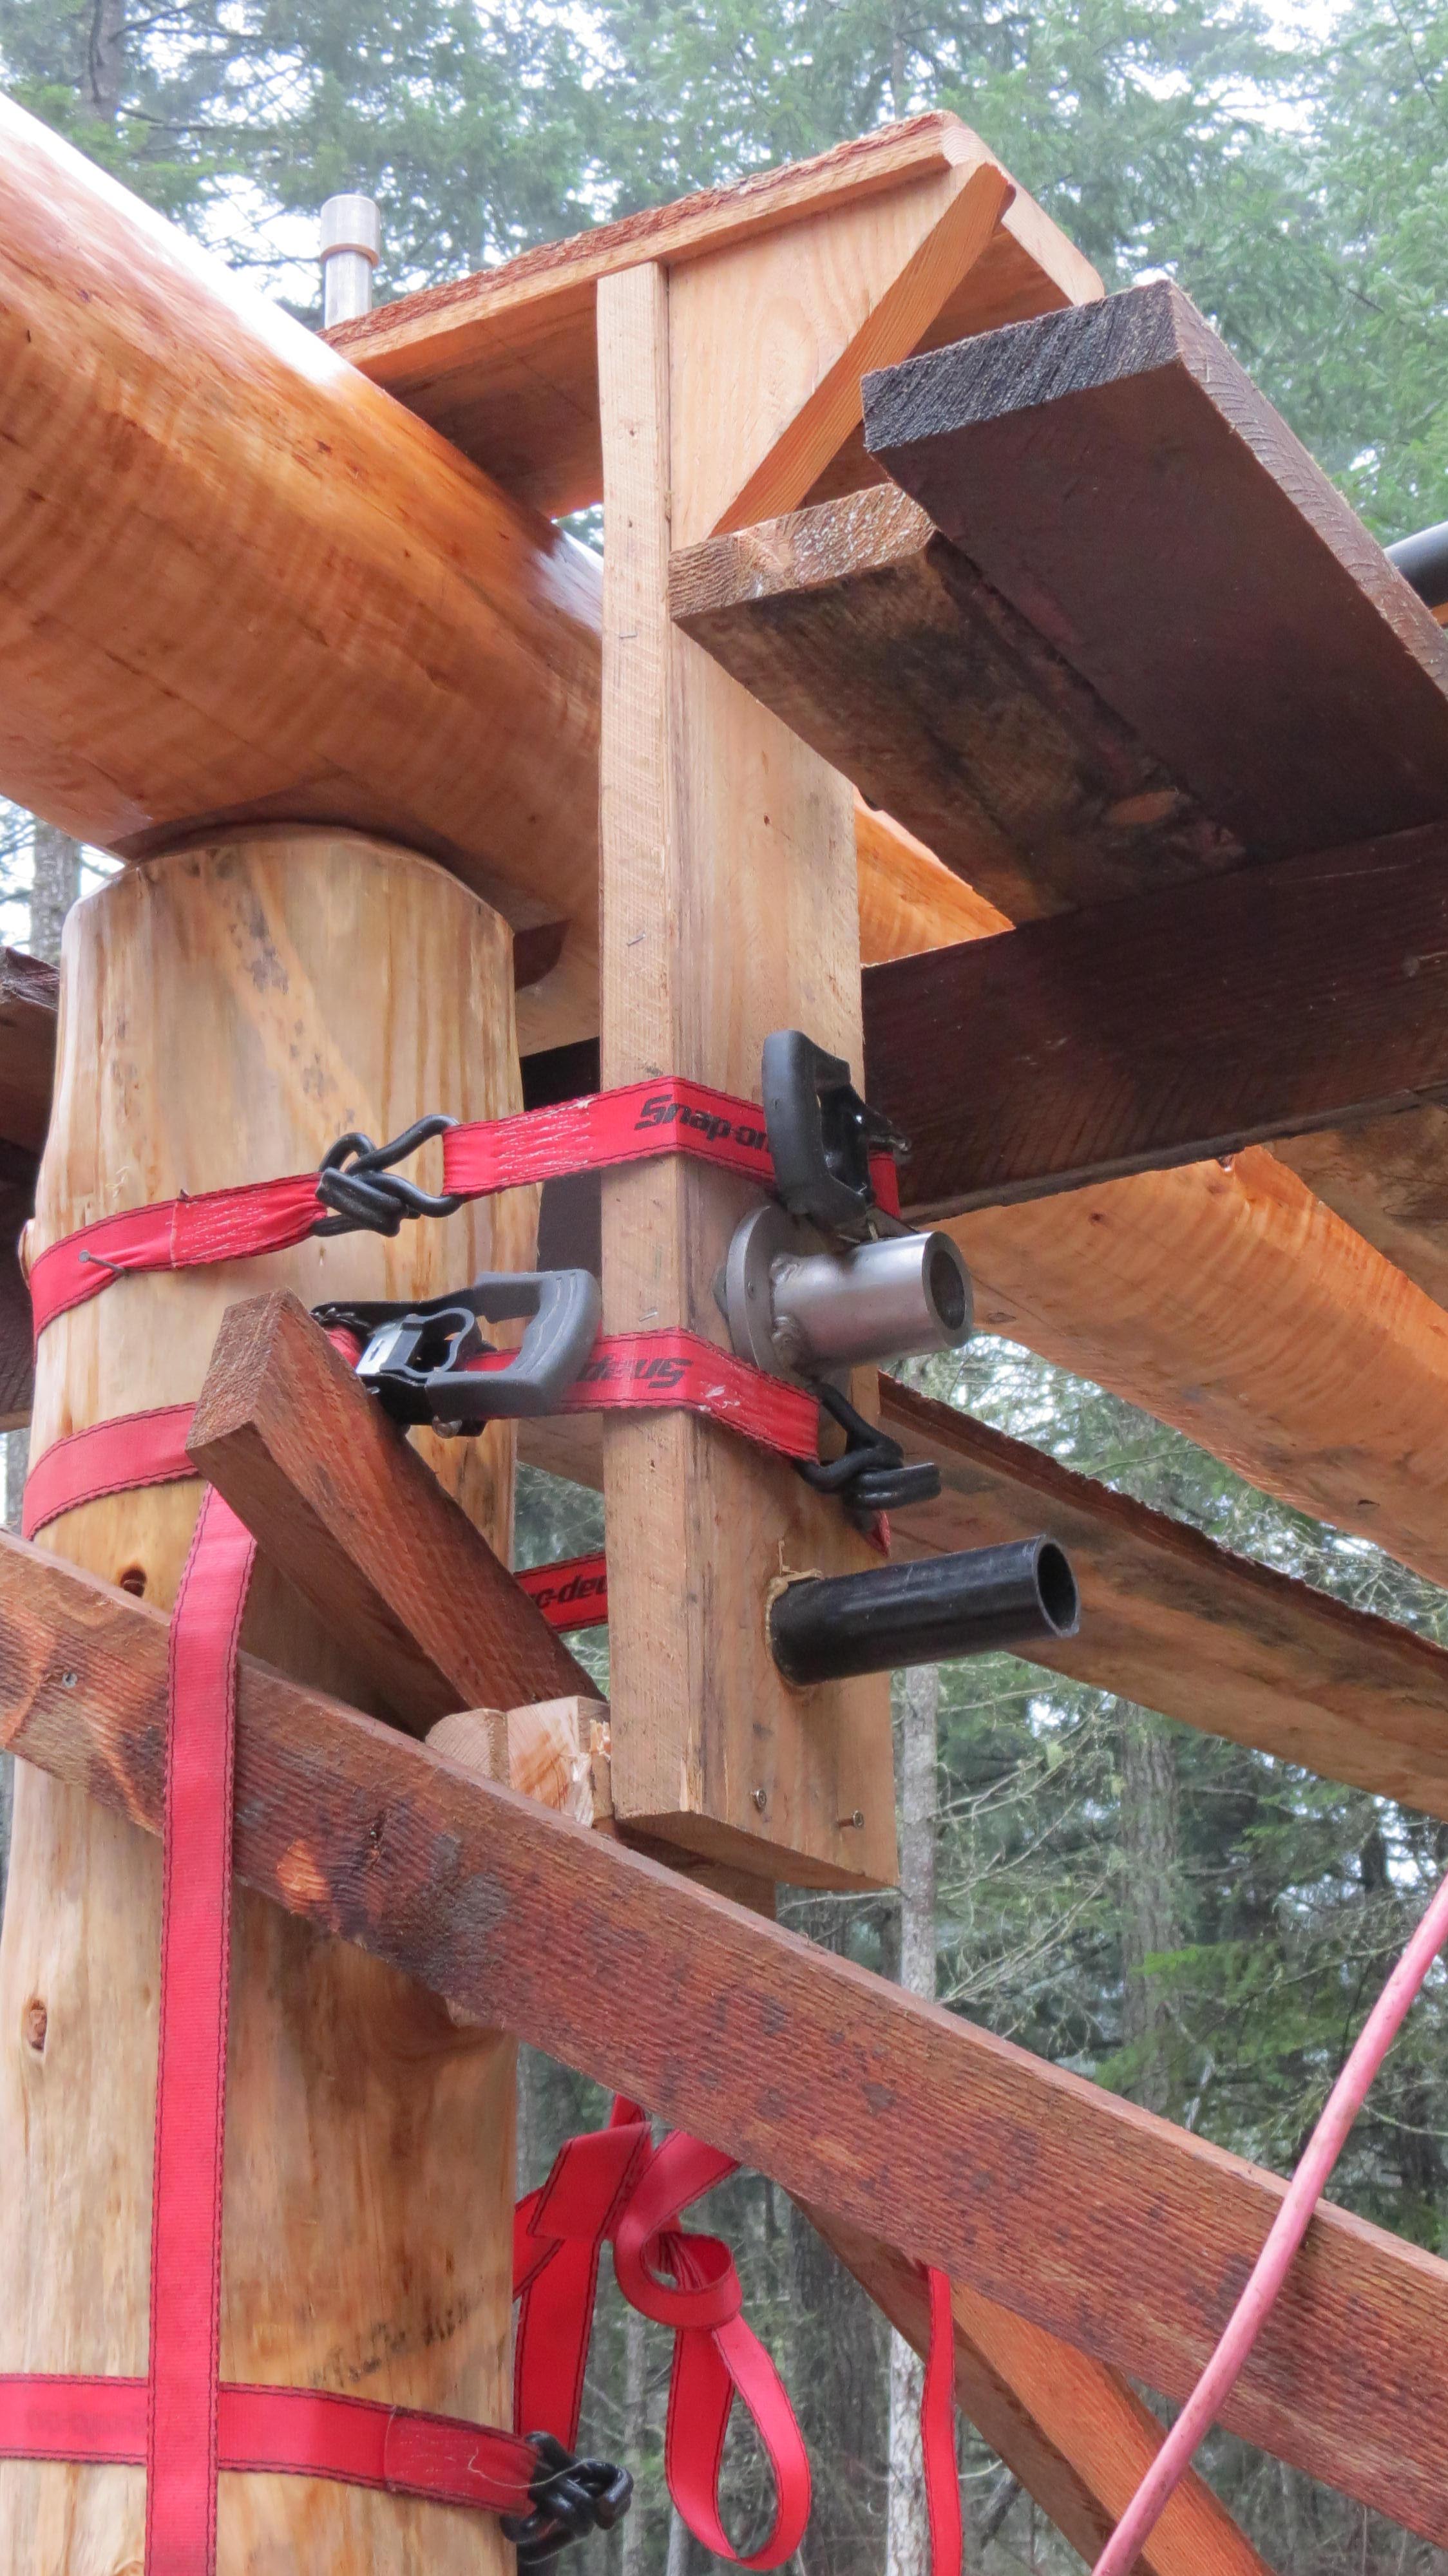
One end is bolted to a 3/8” thick flitch plate, cut on a water jet table in Nanaimo by Unlimited Fabrication. The other end rests on a ladder until this coming weekend when I’ll add a built-up post of four 2X6s that will ultimately be housed inside an 18-inch thick wall.

Over the past few weeks I’ve also had great success with the giant Ikea connector for the posts and beams. I’ve avoided being flung from a great height or having my wrist snapped by my massive drill and there’ve been only a few minor alignment issues with my drilling jig that were resolvable. I’m delighted given the tight tolerances of 0.05” and challenging materials and circumstances.

External east and west posts and long beams to support the upstairs overhangs will be added after I shape and install the 15 epic 6 X 12” joists I had milled last spring.

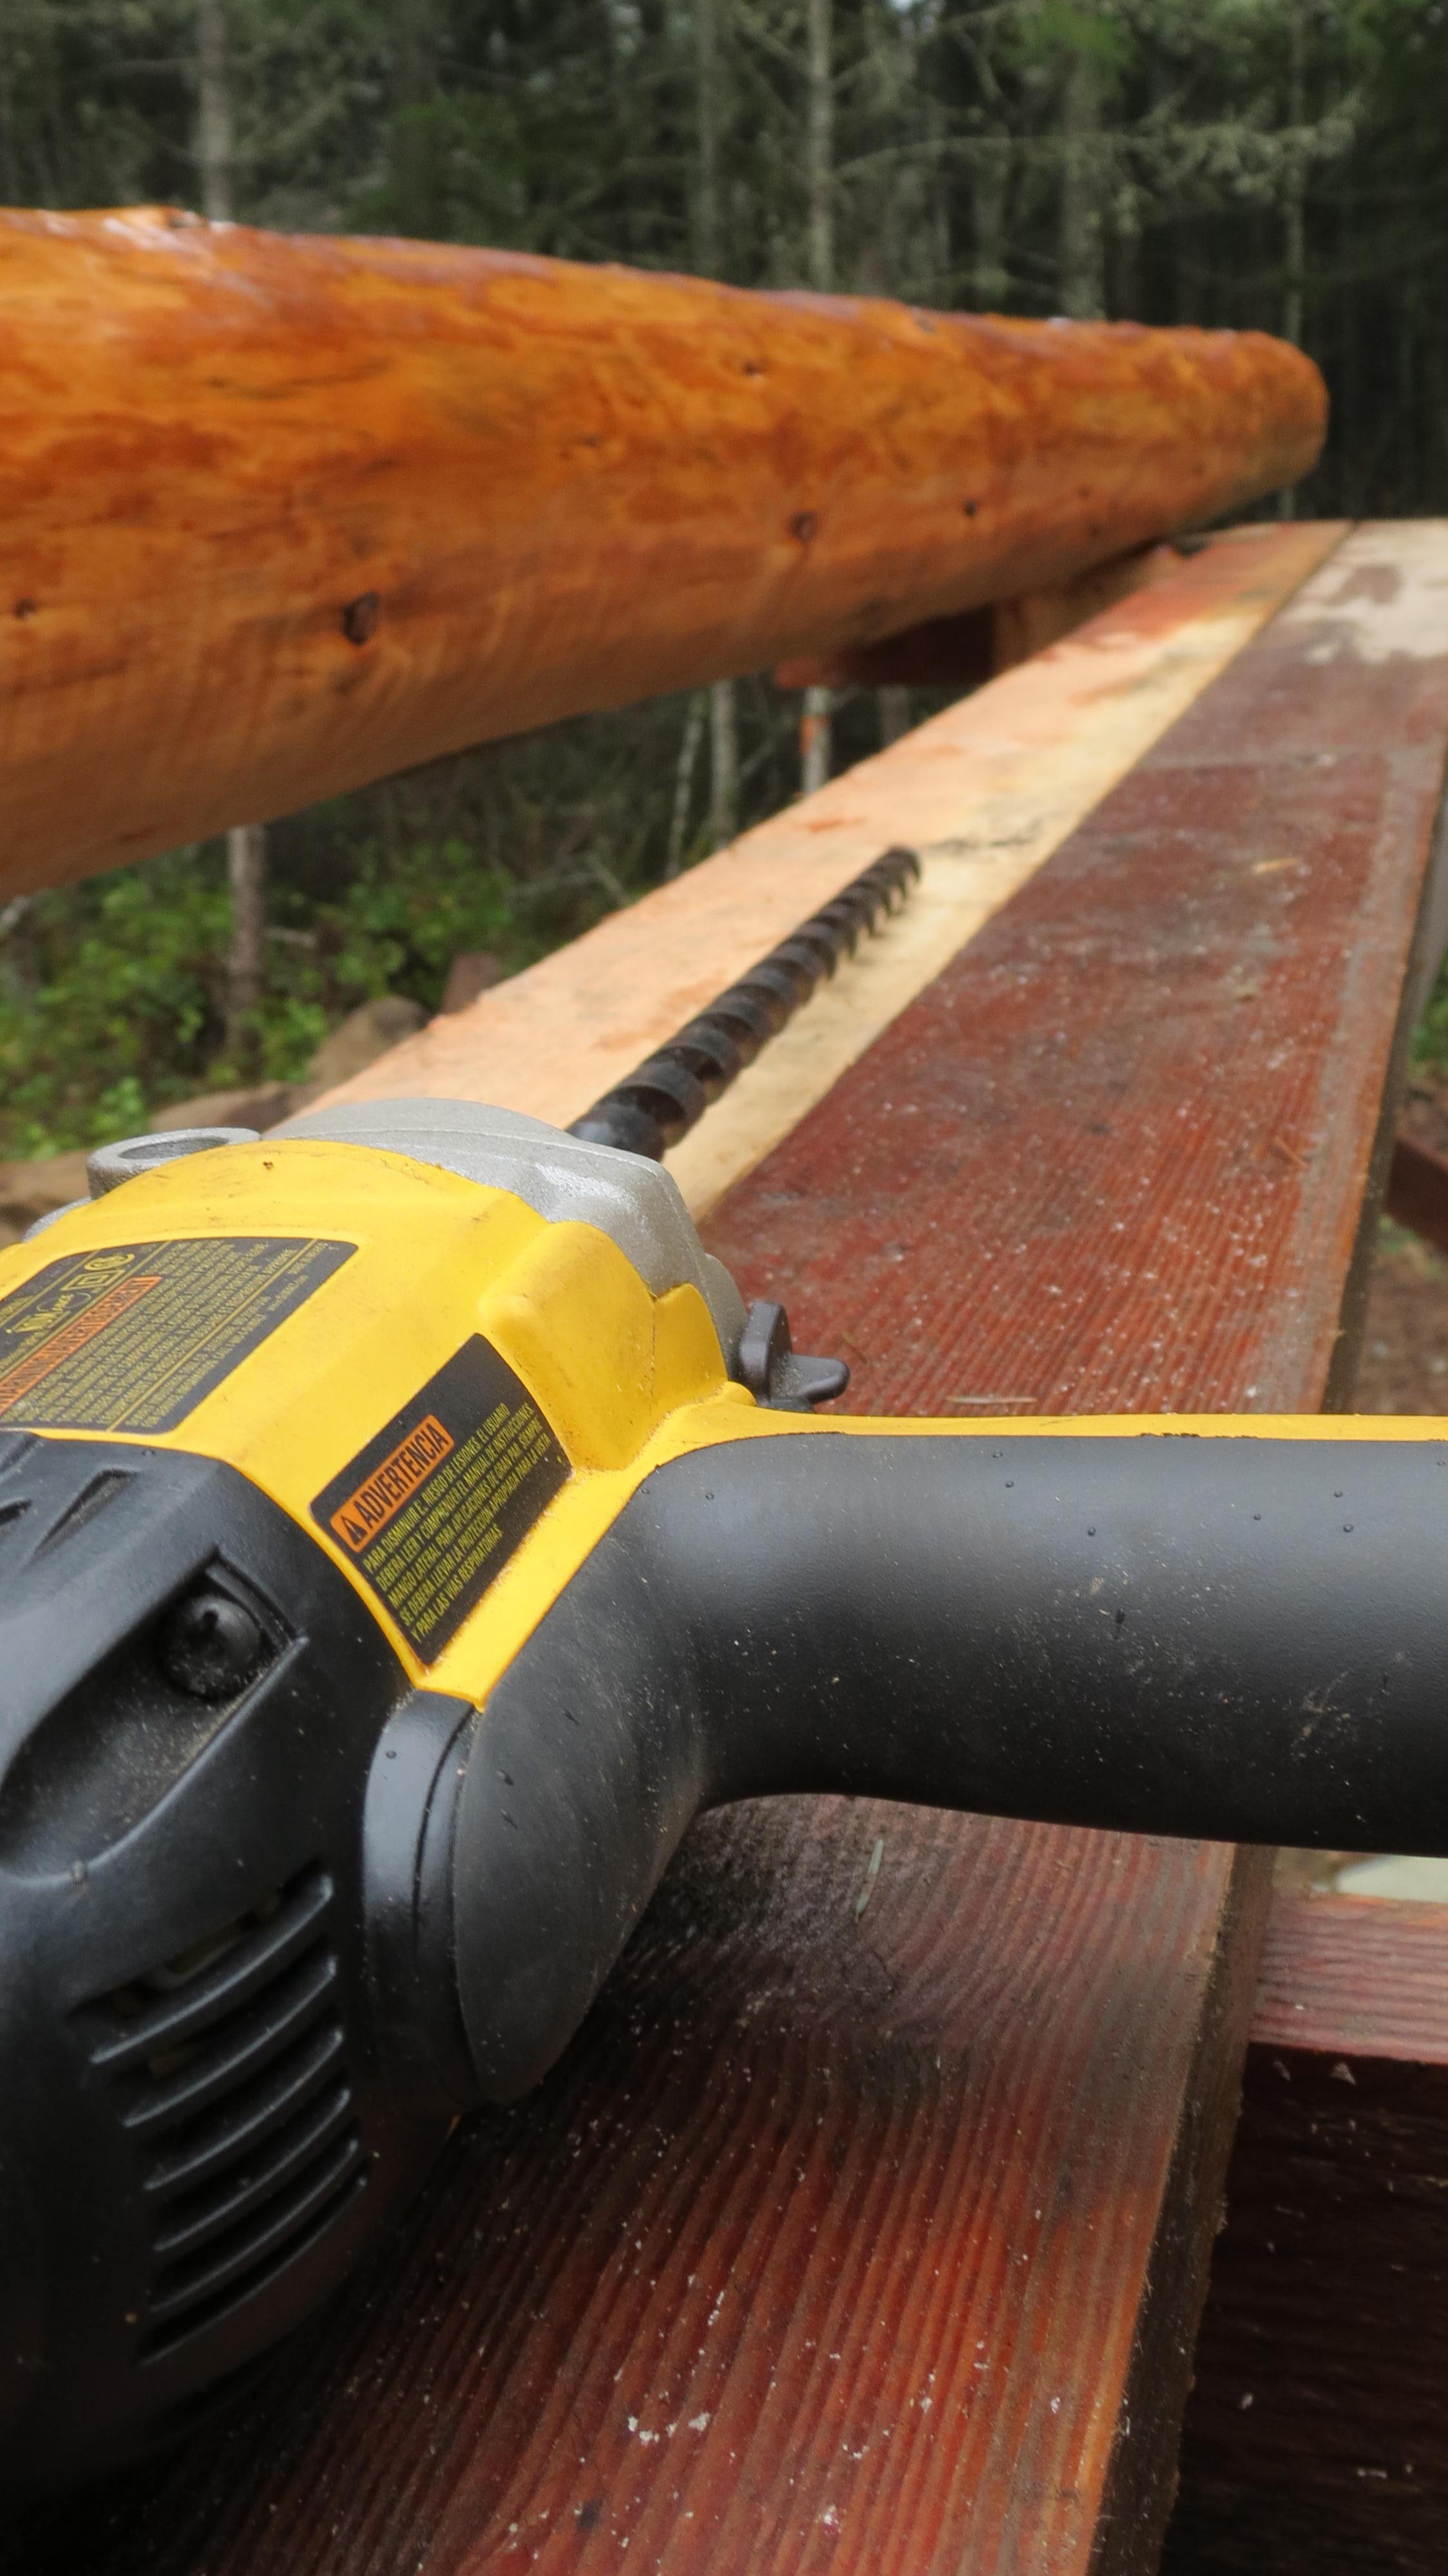
I also built a work bench for shaping and sanding the joists. The base is 2 X 4” cribbing with a beastly bench top of two spare joists. When the joist work is done I’ll pop my compound mitre saw on the bench for chopping framing sticks.

Last Saturday I moved three of these 120 kg / 270 lb joists with my mate Archimedes and a few pieces of log as rollers. Nearly 10 months of air drying and the moisture level is at 21% near the surface and they look stunning.

Next job is to set-up string lines for levelling the joists where they meet the beams and to start notching and sculpting them to fit.


The last internal beam

The last internal beams


Post-beam flat connection layout

Post-beam flat connection layout

Paring

Paring

South beams going up

South beams going up

The Helper

The Helper


Completed south beams

Completed south beams

IMG_9894

South beam flitch plate connection

South beam flitch plate connection

Nice beam connections!

Nice beam connections!

Rob monkeying around with a post-beam connection as dusk falls

Rob monkeying around with a post-beam connection as dusk falls

The drilling jig in action

The drilling jig in action

IMG_9840

IMG_9868

IMG_9864

It looks so wee from down here

IMG_9859

Our house in the winter sun

Our house in the winter sun

The joist work bench

The joist work bench

6X12s awaiting their destiny

6 X 12s awaiting their destiny

Brewing up summer

IMG_9666

Whoosh!

An epic flame and the Tall Boy kettle rattled towards a boil, 28 litres of Pilsner in the making.

The graduation of my all-grain brewing from the kindergarten of an 18 litre pot and homemade double bucket lauter tun to a post-secondary 60 litre kettle and 40 litre converted Igloo cooler mash tun complete with false floor and ball valve for easy sparging.

Let’s not forget the Barley Crusher roller mill for crushing the malt now arriving on my doorstep in 25 kg bags. All part of the Mother of All Brewing Equipment Orders I placed in November from Ontario Beer Kegs and Hop Dawgs that included 60 kg of malt, a dozen different hop varieties and two dozen yeast strains.

Lest all of this sound like the hopped-up pub banter of beer-anoraks [which it is], simply know this: when it rains on Gabriola and the house building stalls, the beer [wine or cider] making commences.

I see it as time well spent on the house build.

Instead of chiselling or hoisting beams I’m laying down hectolitres of crisp Czech Pilsners, malty Munich-style lagers, heady porters, enduring session ales and fresh milds to bend the rubber arms of volunteers who will be press-ganged into cob floor building and light clay straw mixing this coming summer.

Absolutely nothing says natural building like free beer.

Bring on the rain or the sun. We are happy either way.

Beer anoraks read on, everyone else skip to the photos


Pilsner recipe (28 litres)

Adapted and modified RU Kidding Me? Pils from Papazian, The Complete Joy of Homebrewing, pp. 301-303

5.75 Pilsner malt, crushed
332 g aromatic malt
62 g Saaz hops (60 min boil)
31 g Hersbrucker-Hallertauer hops (30 min boil)
6 g Saaz and 16 g Hersbrucker-Hallertauer (1 minute boil)
Whirlfloc (Irish moss) 10 min boil
21g Saaz hops for dry hopping while lagering for 4 weeks
White Labs Pilsner lager yeast WLP800 (two vials)
OG 1.046-50
FG 1.010-12
35 IBU

Mash all grains in 12.5 litres of 68C water for 45 minutes at 68C, raise to 70C for 15 minutes, heat to 75C, drain and sparge with 11 litres of 76C water.

60 minute boil with hops and Whirlfloc added as above. Cool wort to 23C, sieve and sparge into fermenter. Aerate well and cast two vials of yeast. Ferment at 13C until fermentation visibly stops, rack and add dry hops and lager for 3-4 weeks at 2-13C. Clarify with gelatin if necessary a week before bottling. Prime bottles with 175 ml of brewer’s sugar dissolved in 300 ml of boiling water.

Drink immediately or age for up to 6 months.


It's all about scale

It’s all about scale

Little arms, big grinding energy

Little arms, big grinding energy

IMG_9648

Pilsner malt enroute to a higher purpose

Pilsner malt enroute to a higher purpose

IMG_9665

Aromatic malt ready for the mash tun

Aromatic malt ready for the mash tun

The orange beast of a mash tun. Nice ball valve.

The orange beast of a mash tun. Nice ball valve.

The clever false floor of the mash tun for straining out the spent malt

The clever false floor of the mash tun for straining out the spent malt

Like a Renaissance fountain of wort

Like a Renaissance fountain of wort

The false floor in action

The false floor in action

The brewer's secret weapon: detailed notes

The brewer’s secret weapon: detailed notes

Czech Saaz pellets

Czech Saaz pellets

Out of the kettle and into the fermenter. 40 days from Pilsner.

Out of the kettle and into the fermenter. 40 days from Pilsner