In April 2013, a few days before we ended our decade long sojourn in the UK, bound for Western Canada, I took a straw bale building course hosted by Brighton Permaculture.
Course leader and master natural builder Ian Brown kept banging on about a good pair of boots for any house, natural build or not. By this he meant a solid, dry foundation with excellent drainage. With house integrity contingent upon the foundation and eye popping costs associated with fixing a poorly built one, it pays to put in some serious effort.
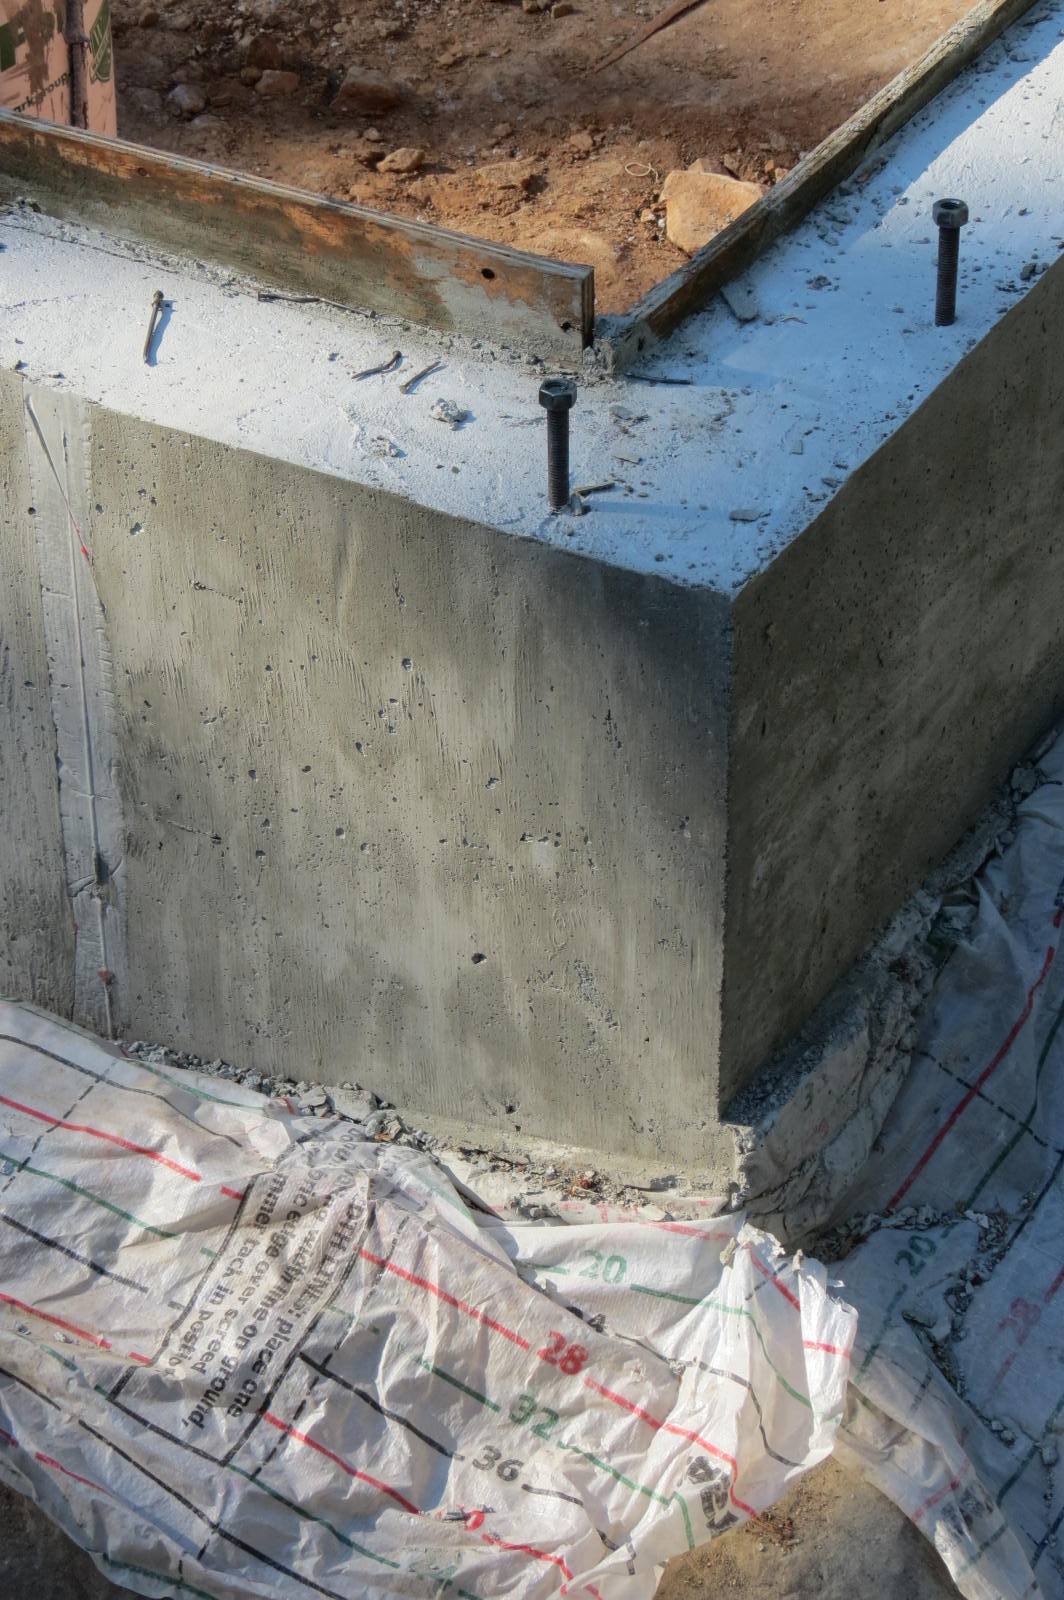
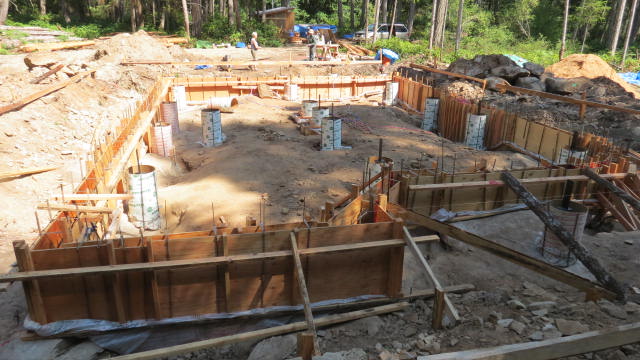
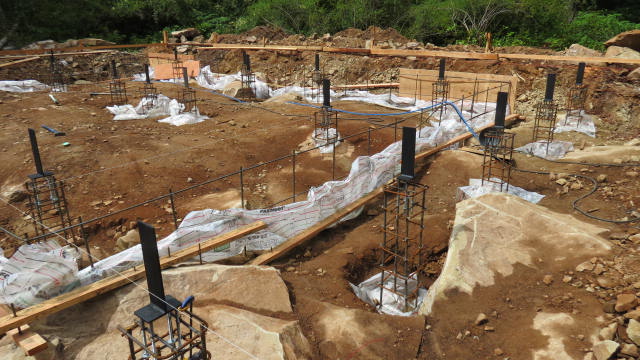
As already chronicled, our house stem/frost wall foundation is pinned to Gabriola bedrock with 150 pieces of 15 mm rebar. Building directly on rock means no need for a footing, which means a huge savings in money, concrete and carbon emissions.
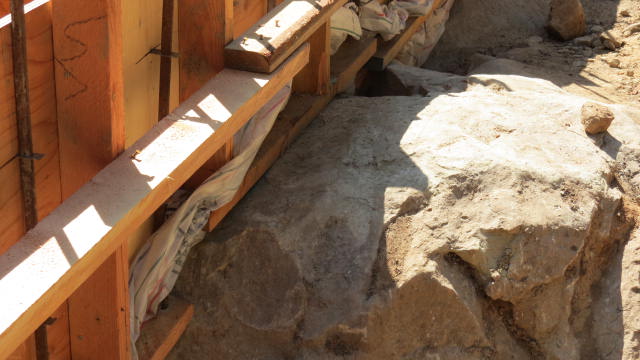
On the downside, without a footing there’s no easy level surface on which to layout, form and pour the concrete stem wall. Our sub-surface rock is so uneven that over a metre or two the elevation can vary by the height of my knee.
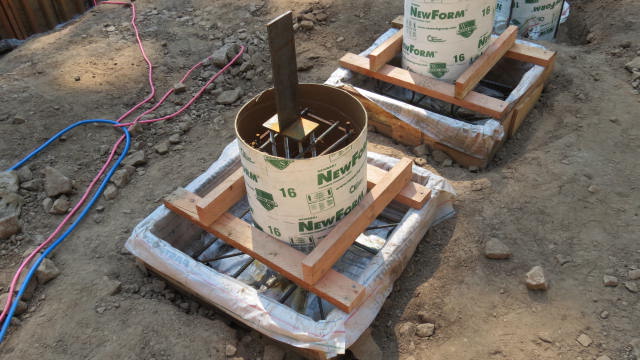
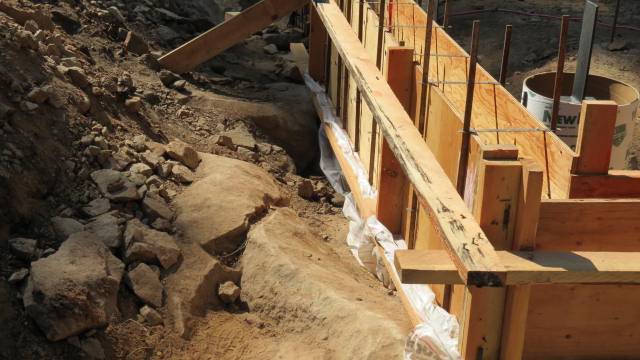
My solution to the vexing issue of how to build concrete forms for our stem/frost wall was to incorporate an engineered fabric footing bag into the bottom of the forms. My supposition was that it would fill up the gap where the form meets the rock and account for the wildly uneven ground and not blow out under the pressure of 24 tonnes of concrete. Being impervious to water, the material also eliminates the future potential for rising damp, a common housing affliction of moisture wicking up through the foundation and into the dwelling that was ubiquitous in our UK flats.
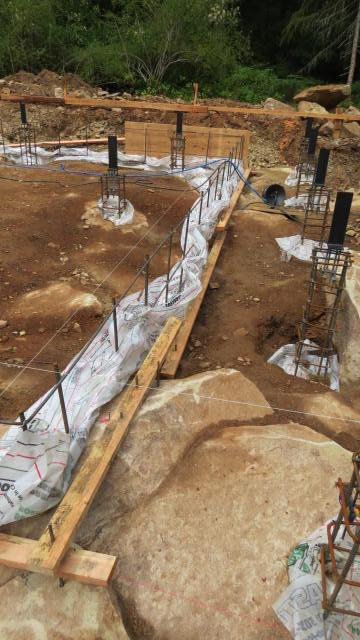
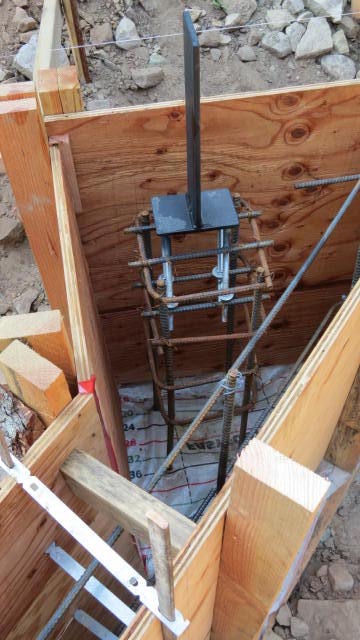
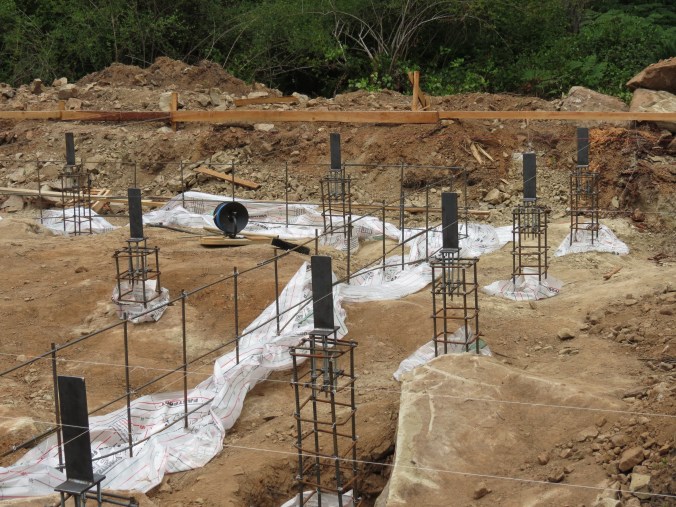
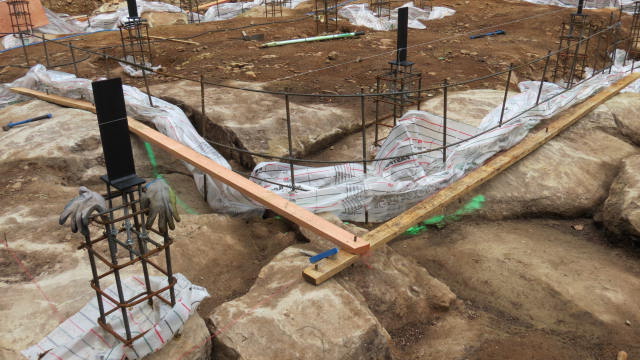
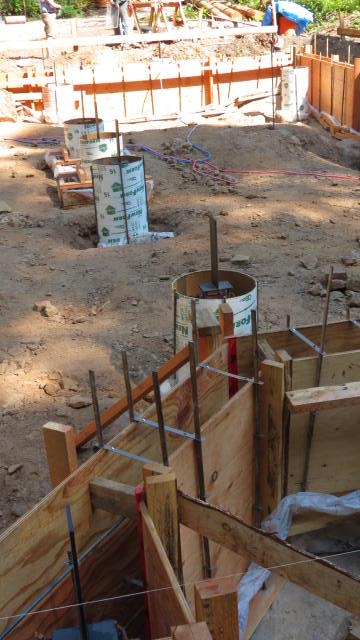
After installing all of the vertical and horizontal rebar and aligning and levelling 22 custom made knife-blade tie-downs (made by these blokes) for our round wood posts, I started laying out the foundation walls on the rock. This task involved a dozen string lines levelled within a few millimetres, a plumb bob, a tripod, balls of string, three days and plenty of tedium and head-pounding-against-rock.
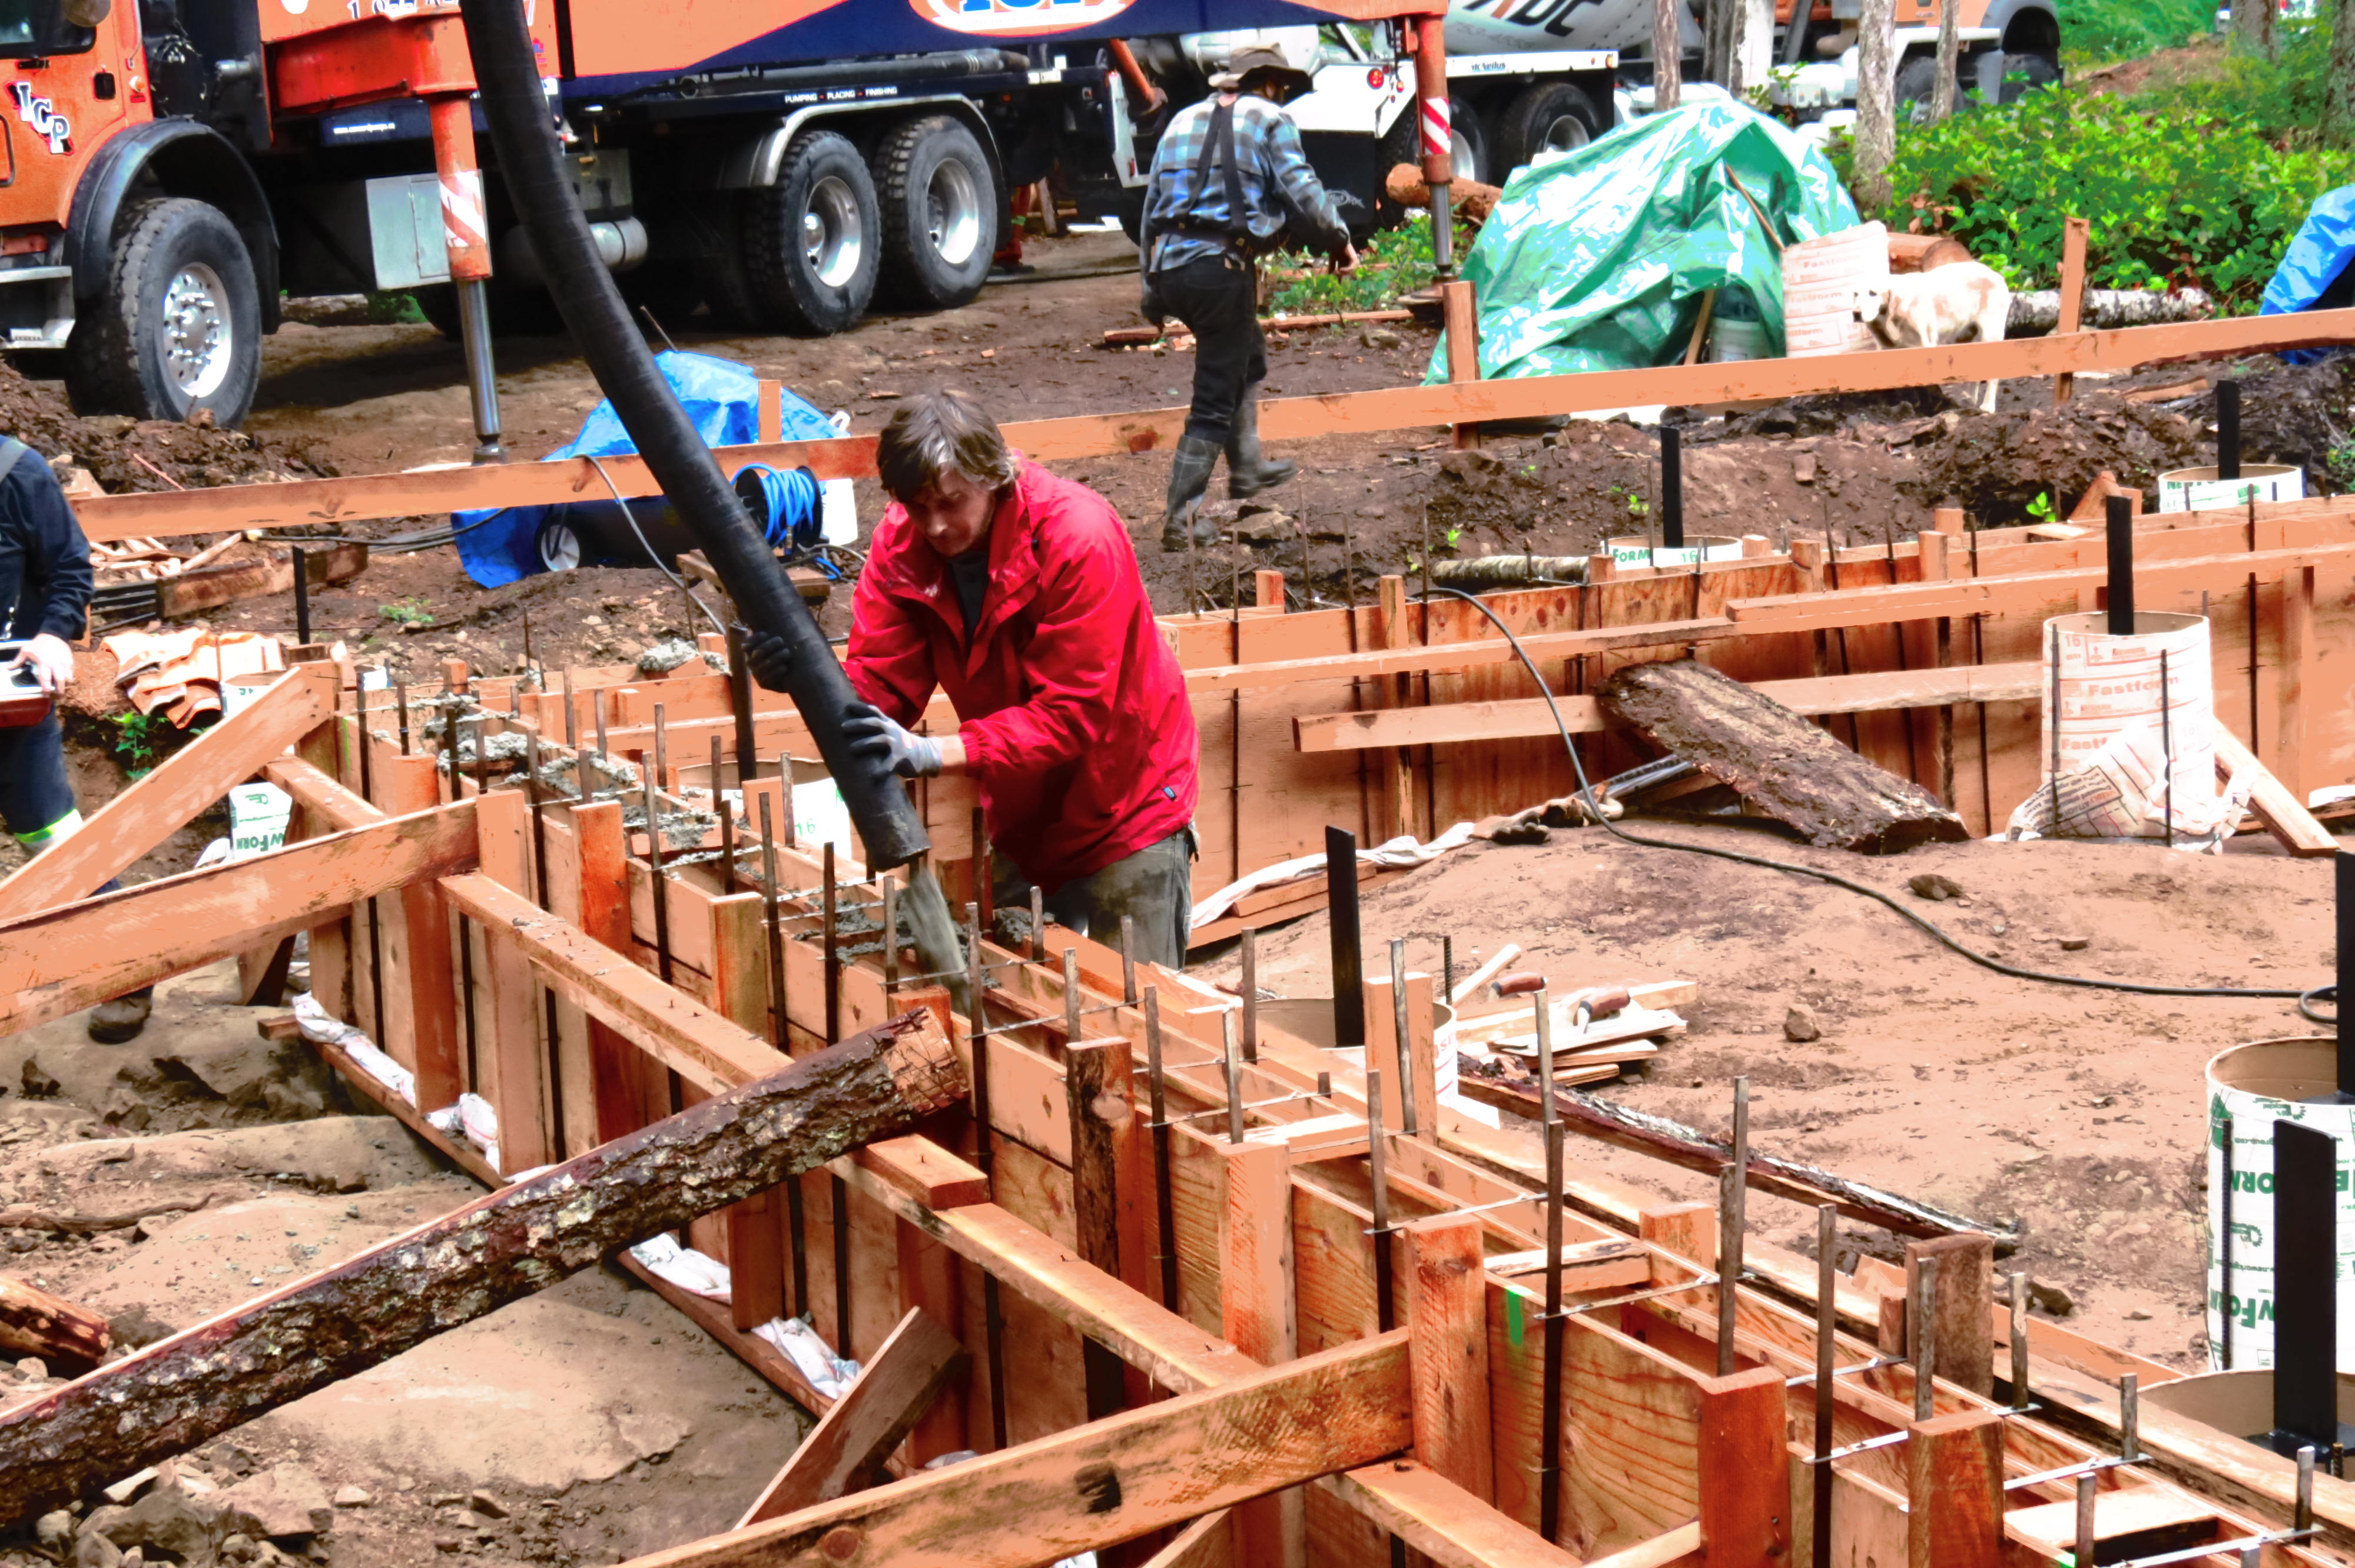
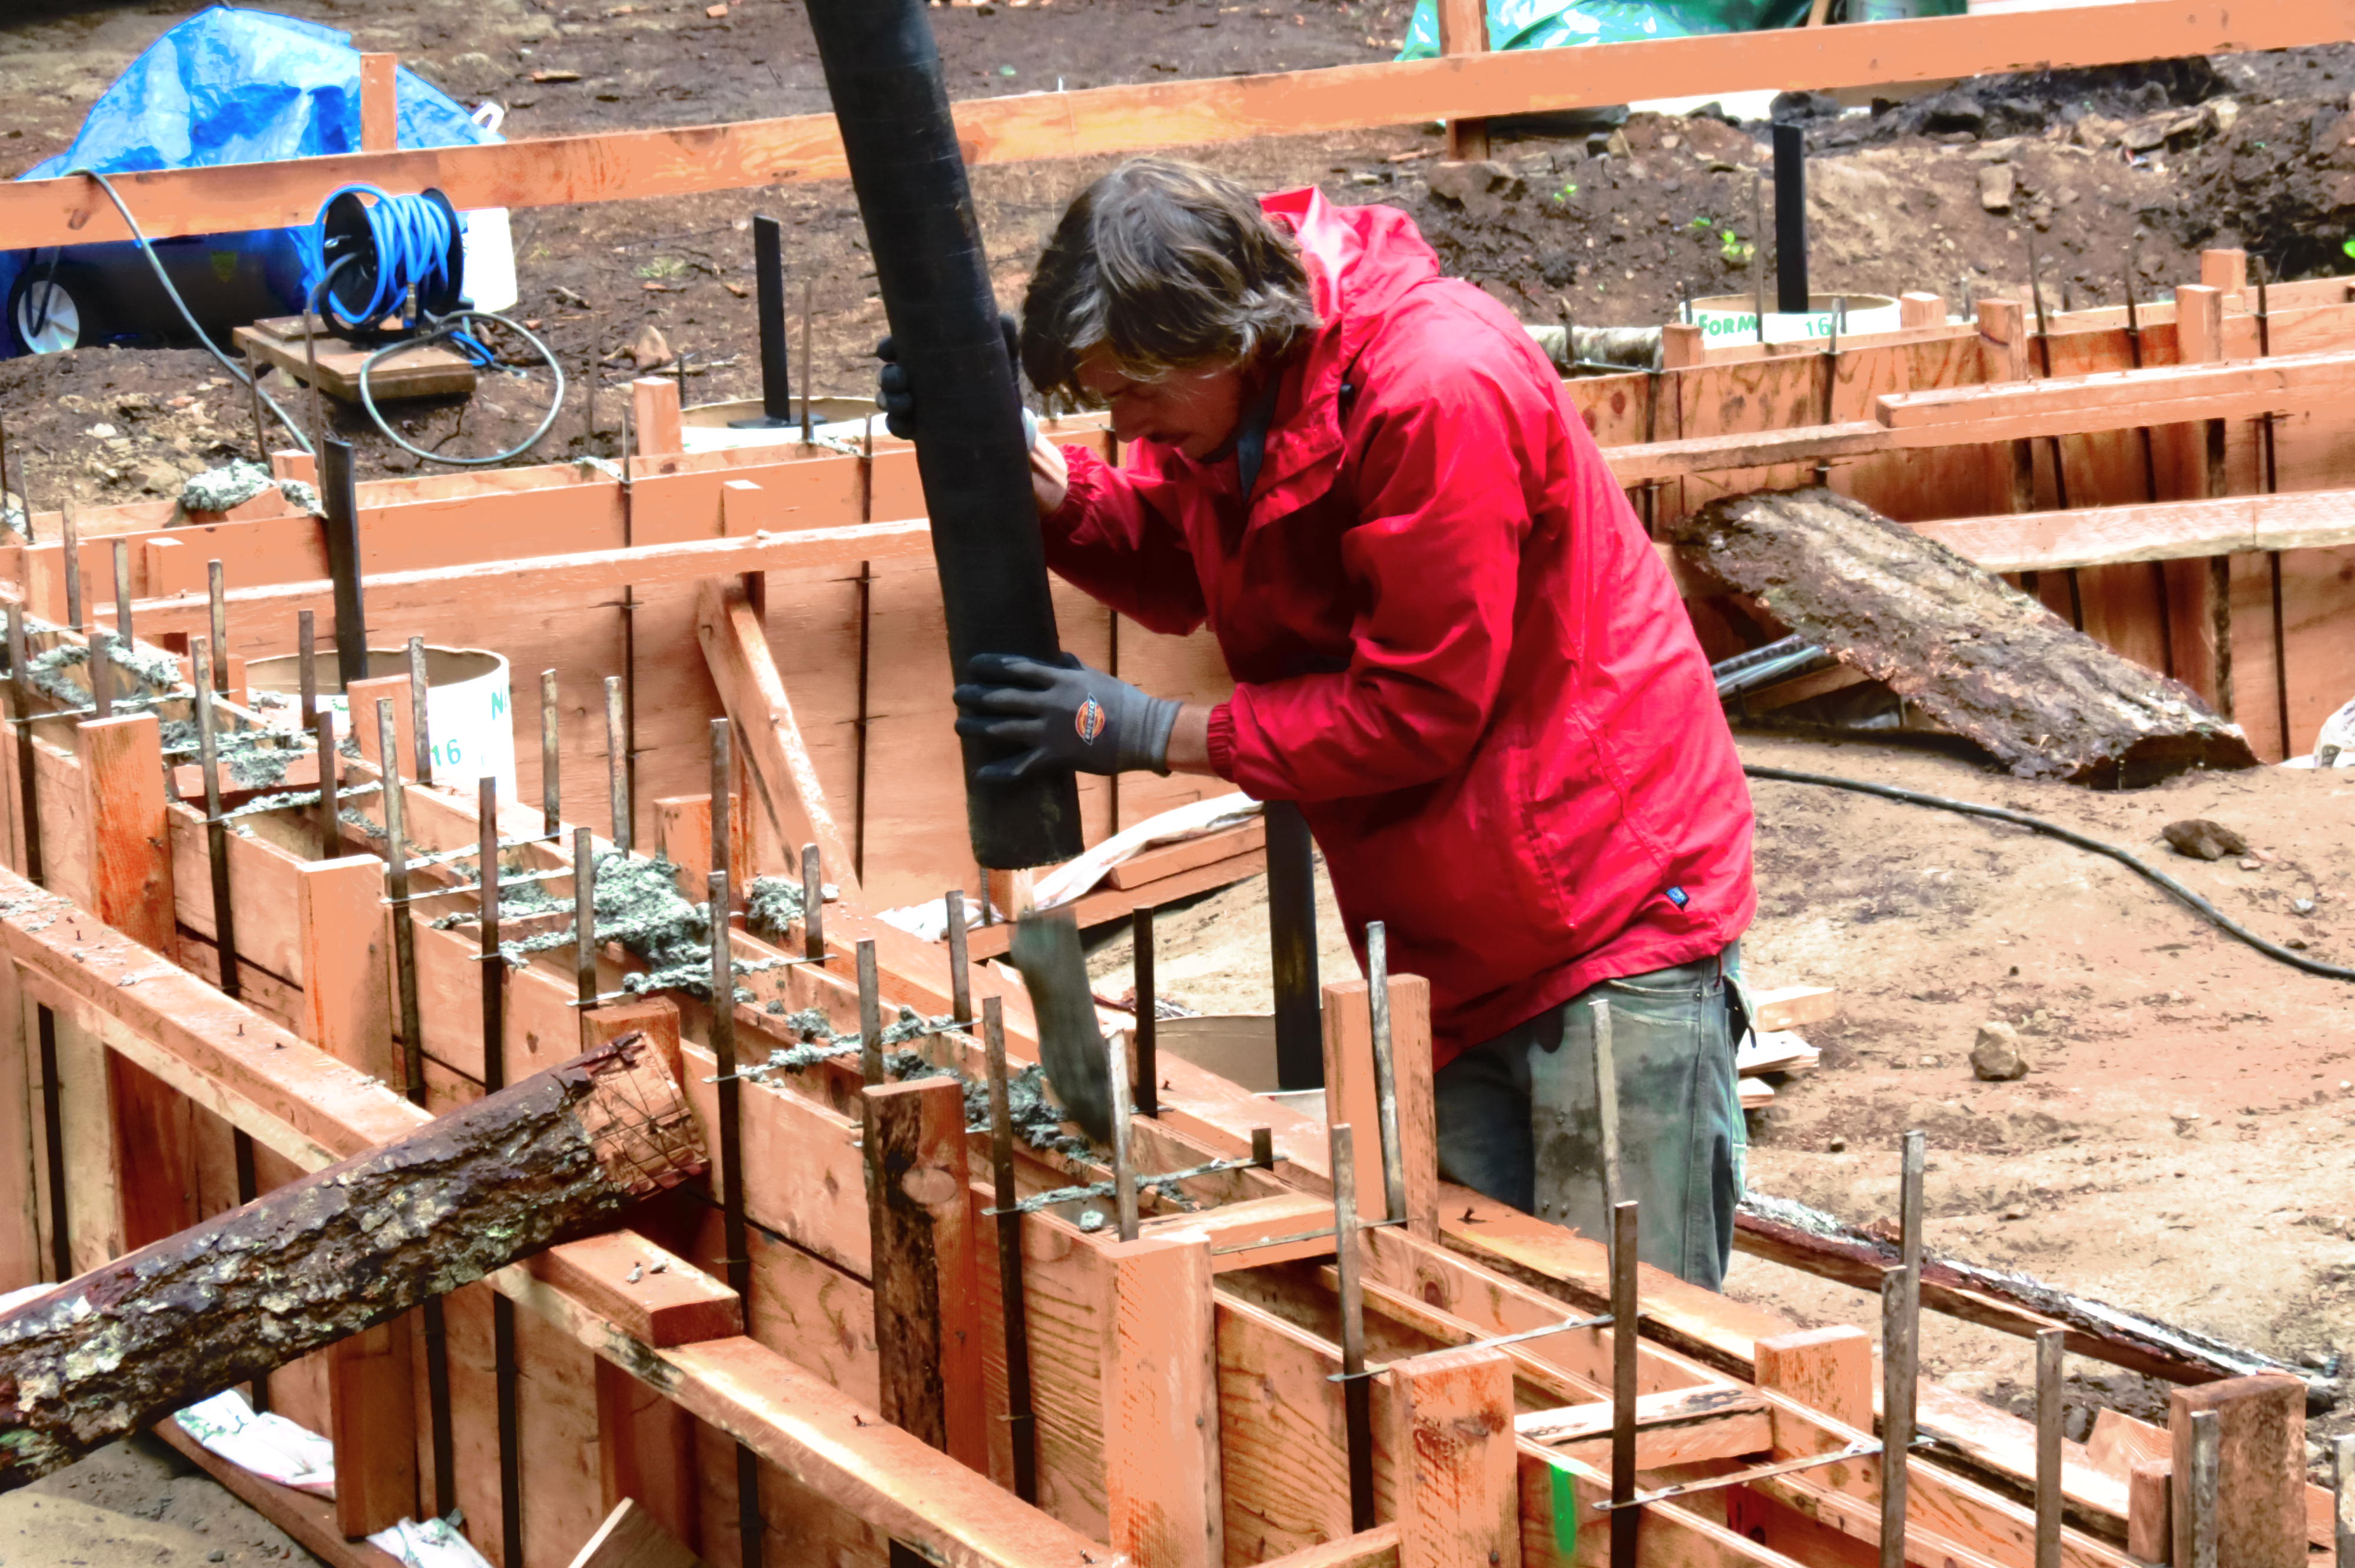
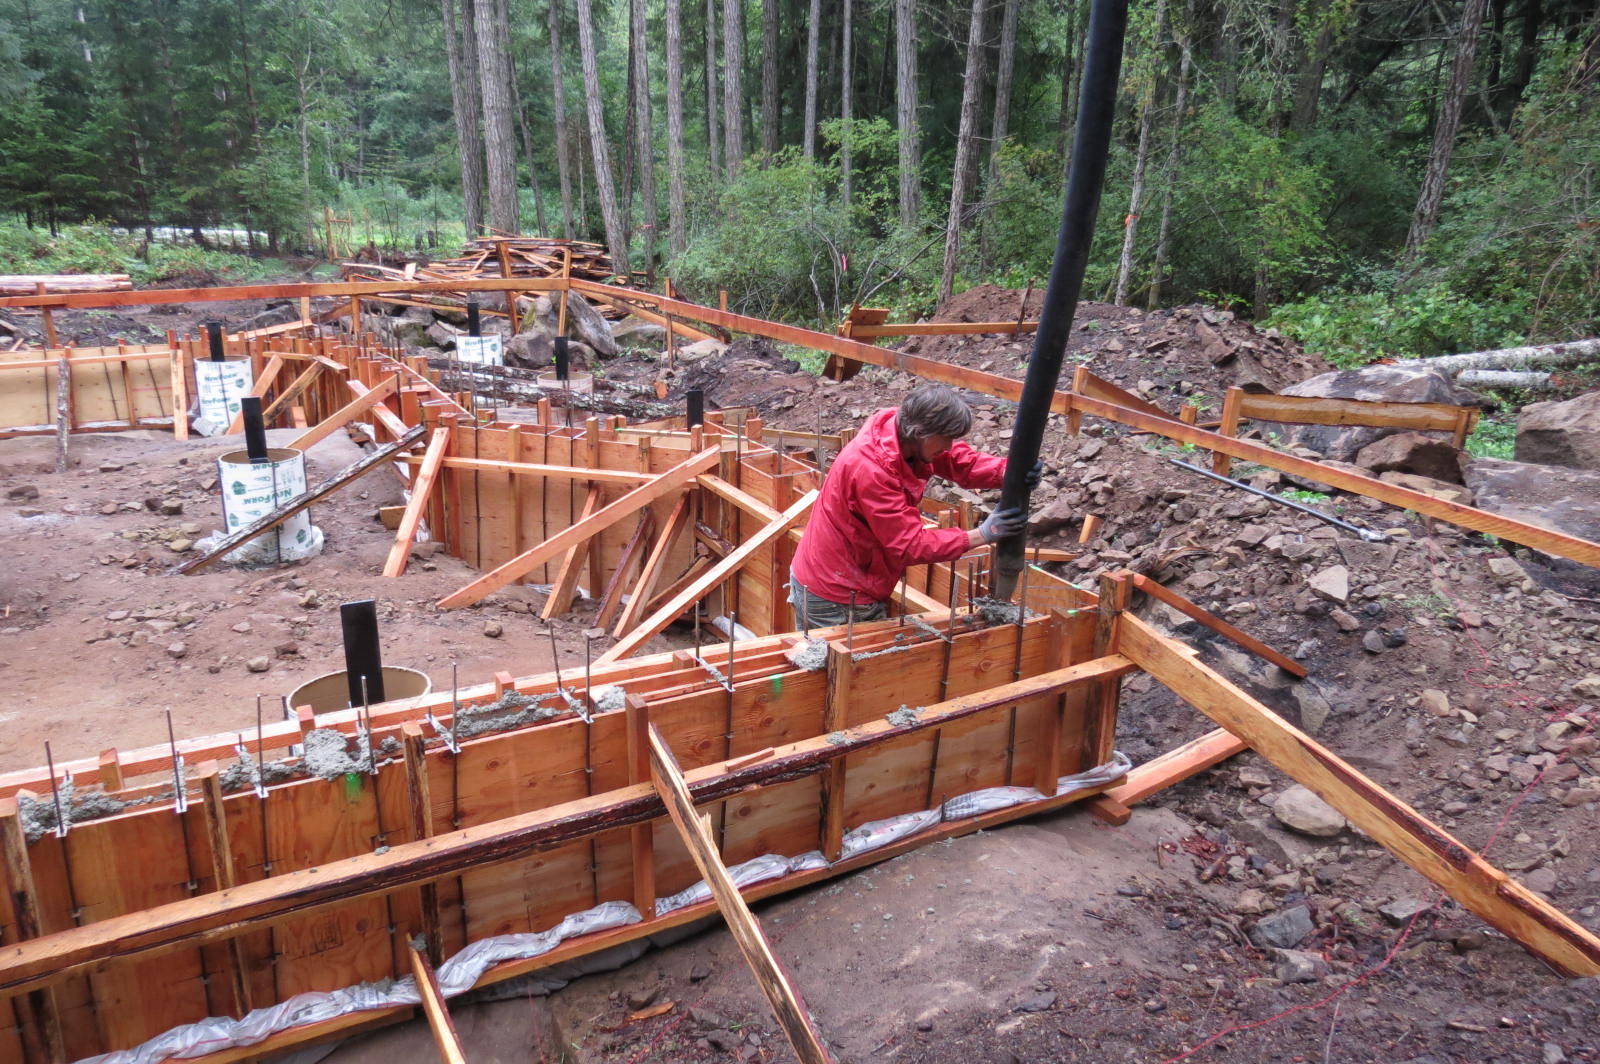
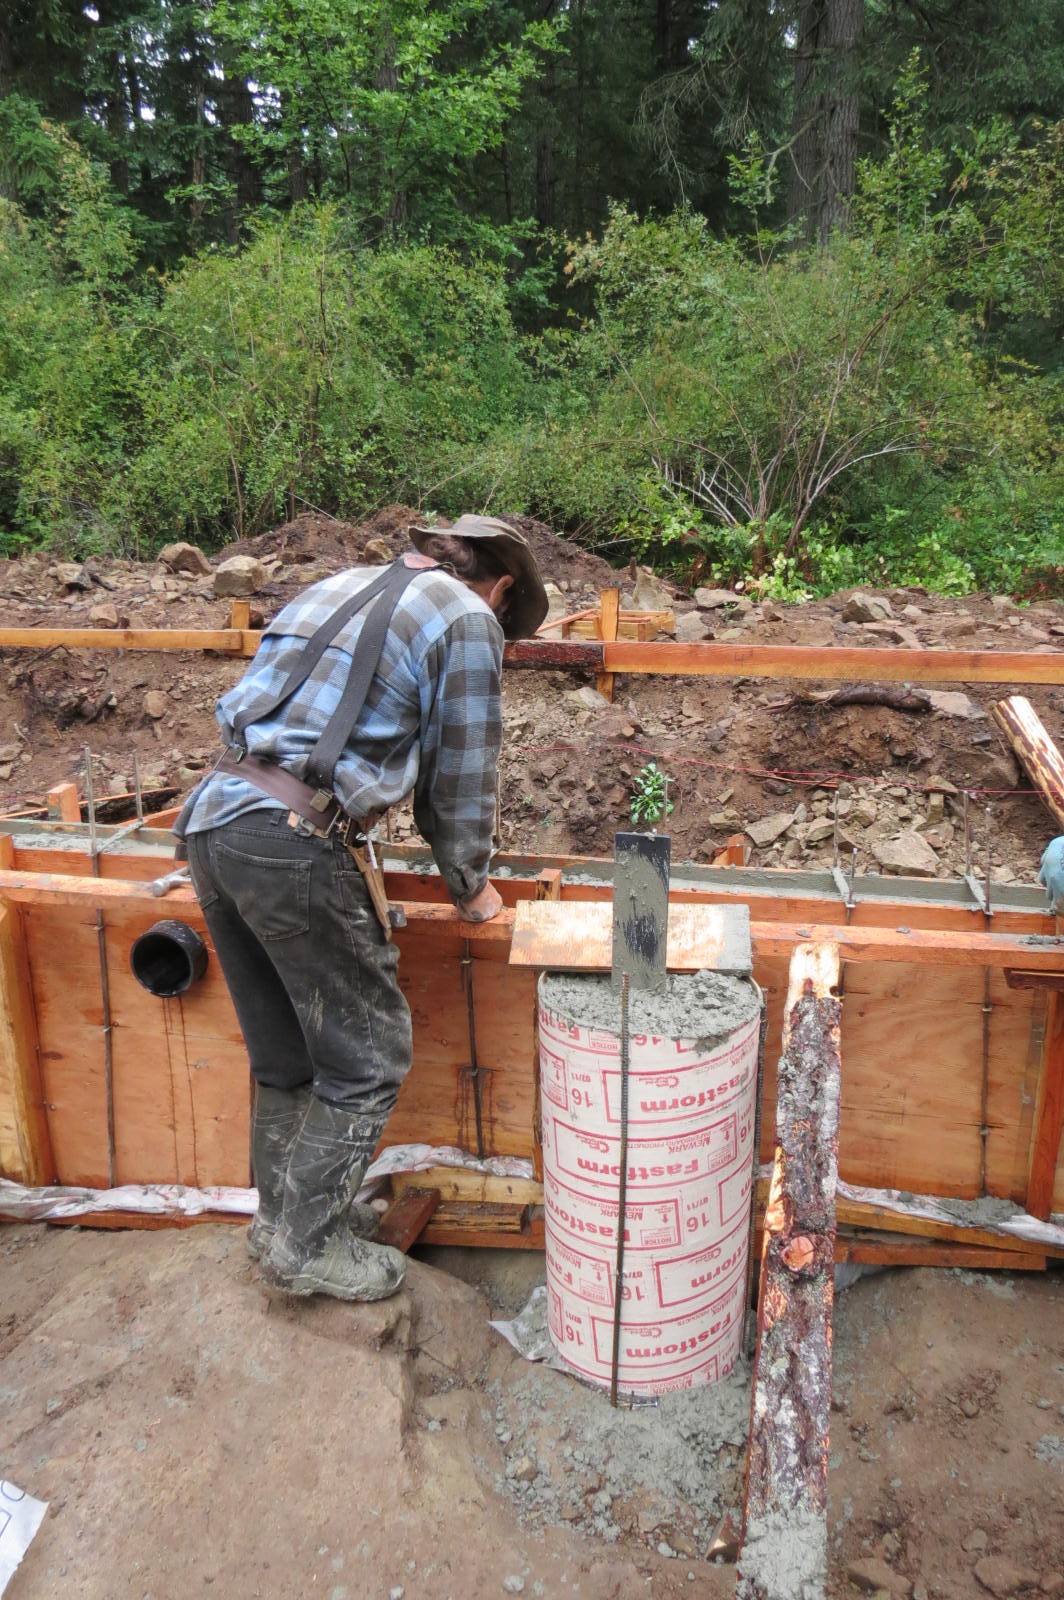
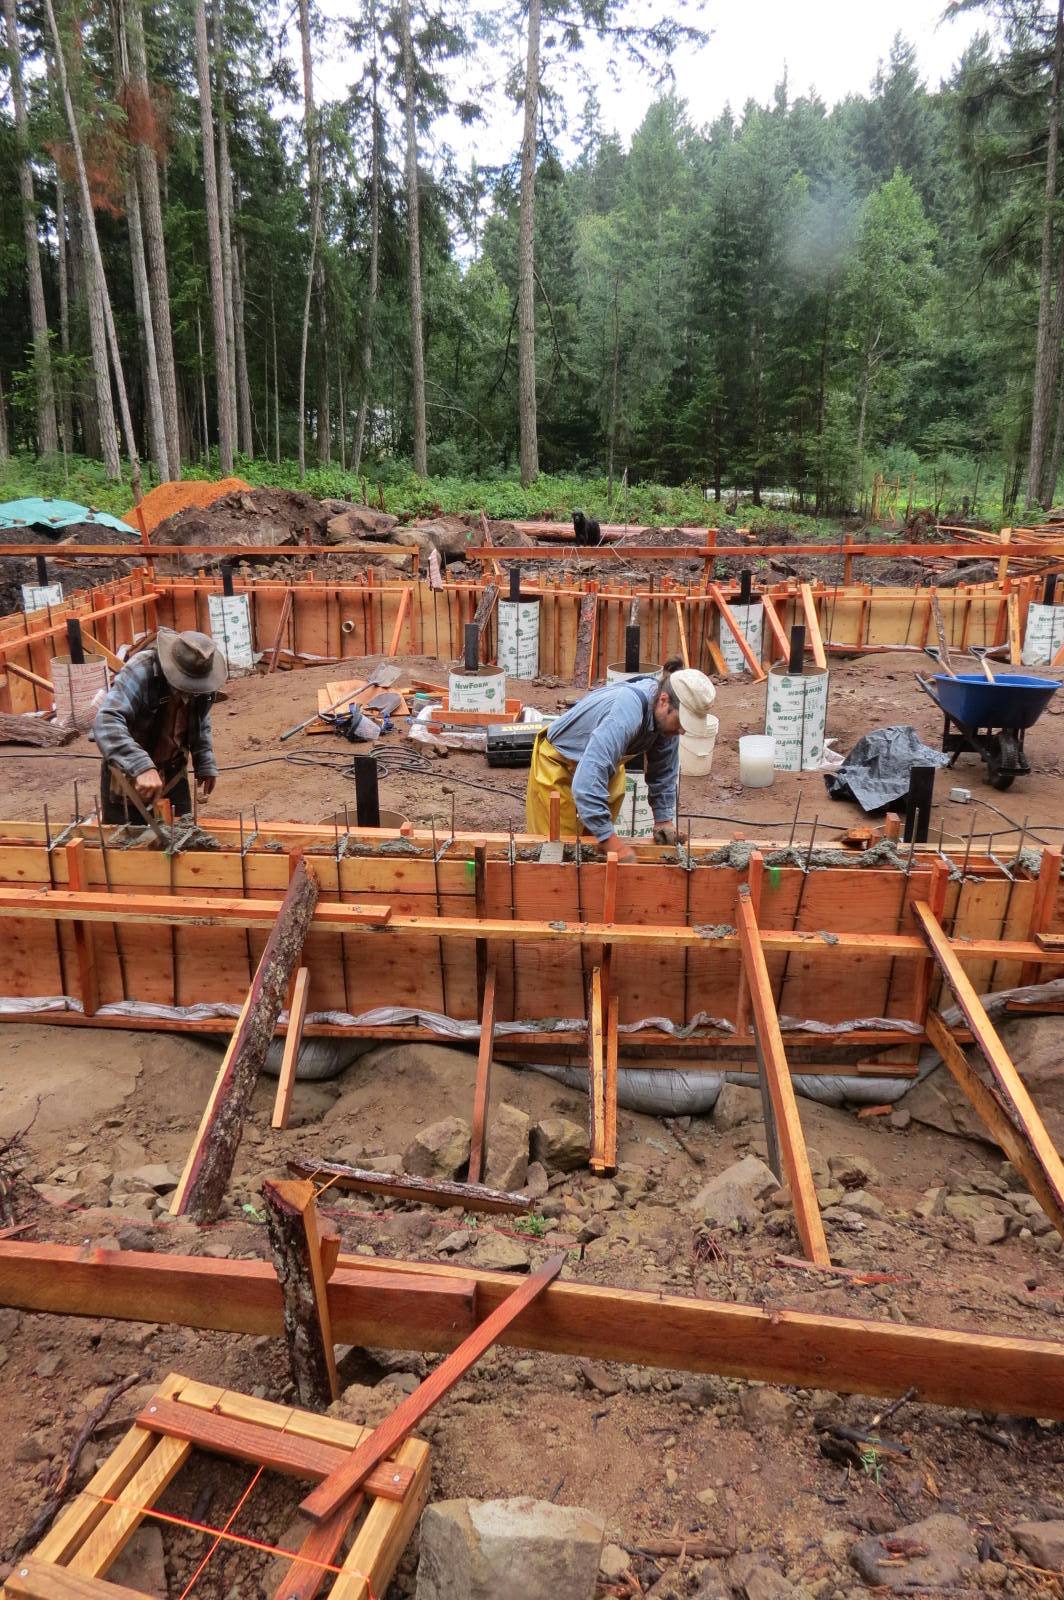
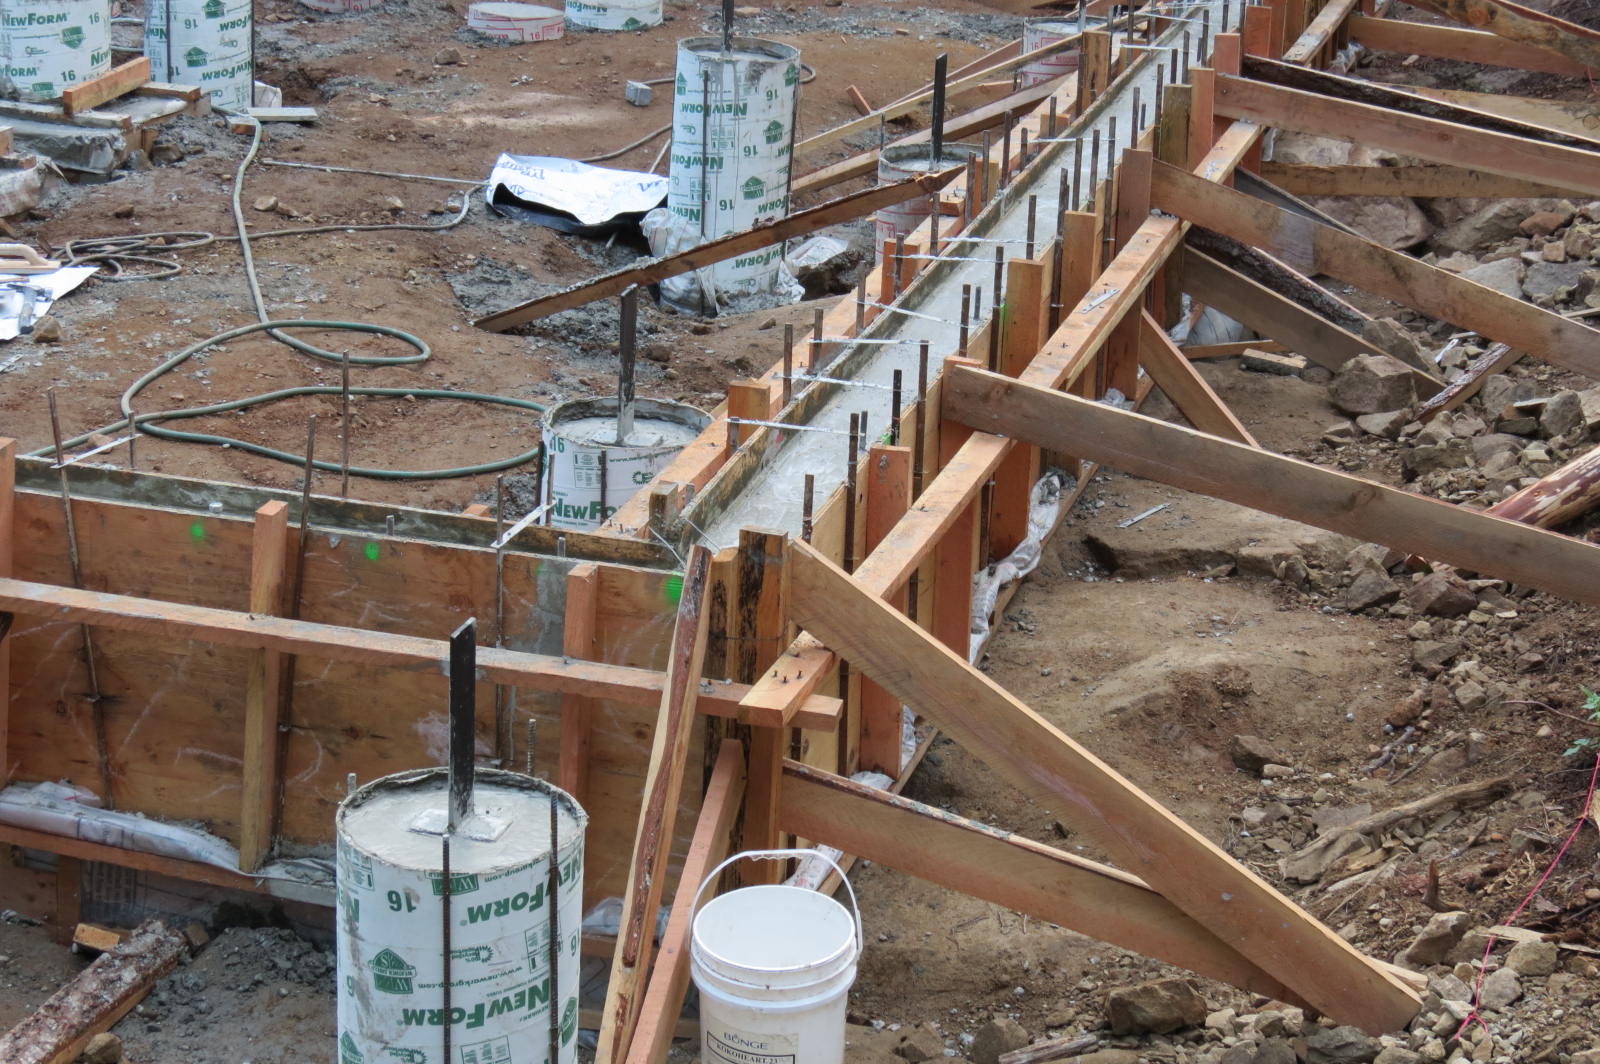
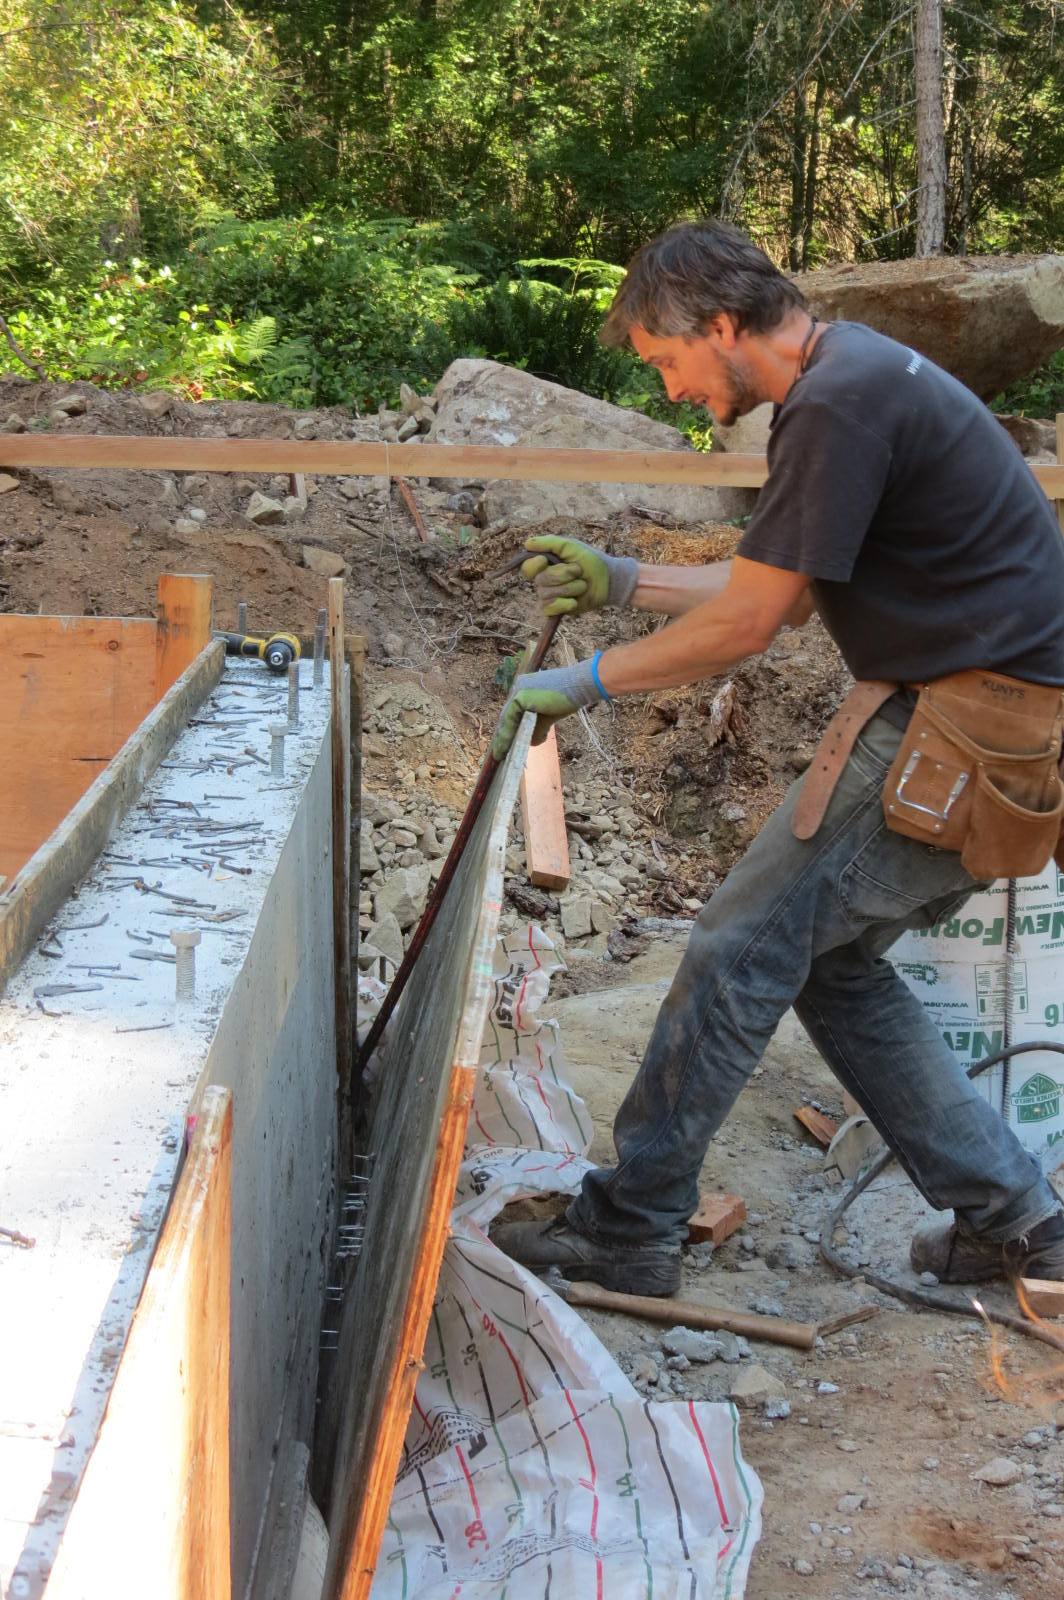
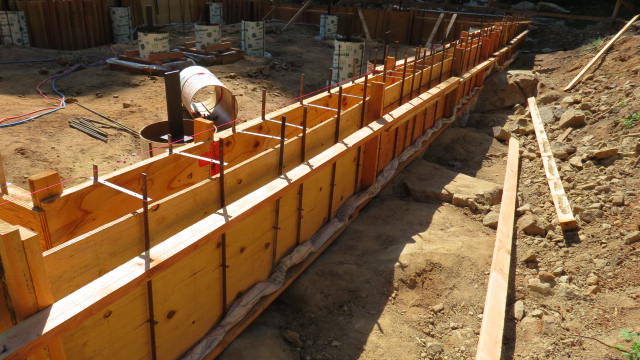
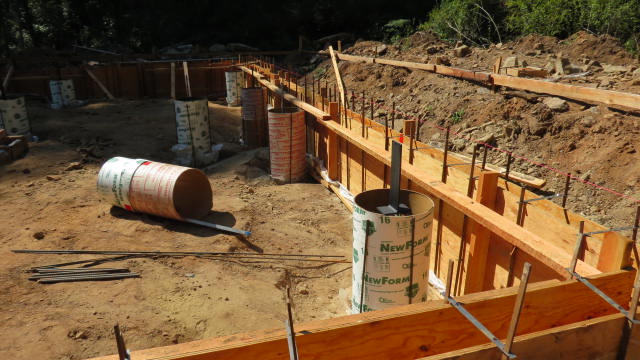
I pinned 80 metres (300 feet or so) of 2X4s to the rock with 10mm rebar to create footers for the forms and cut 33 sheets of 3/4 inch plywood to fit the contours of the broken ground as closely as possible. The form bag filled the bottom and was sandwiched to the outside of the forms by the 2X4 footers. The form walls were then locked together to handle the massive pressure of the concrete with tie-rod and snap ties through hundreds of slots I plunge cut with a circular saw.
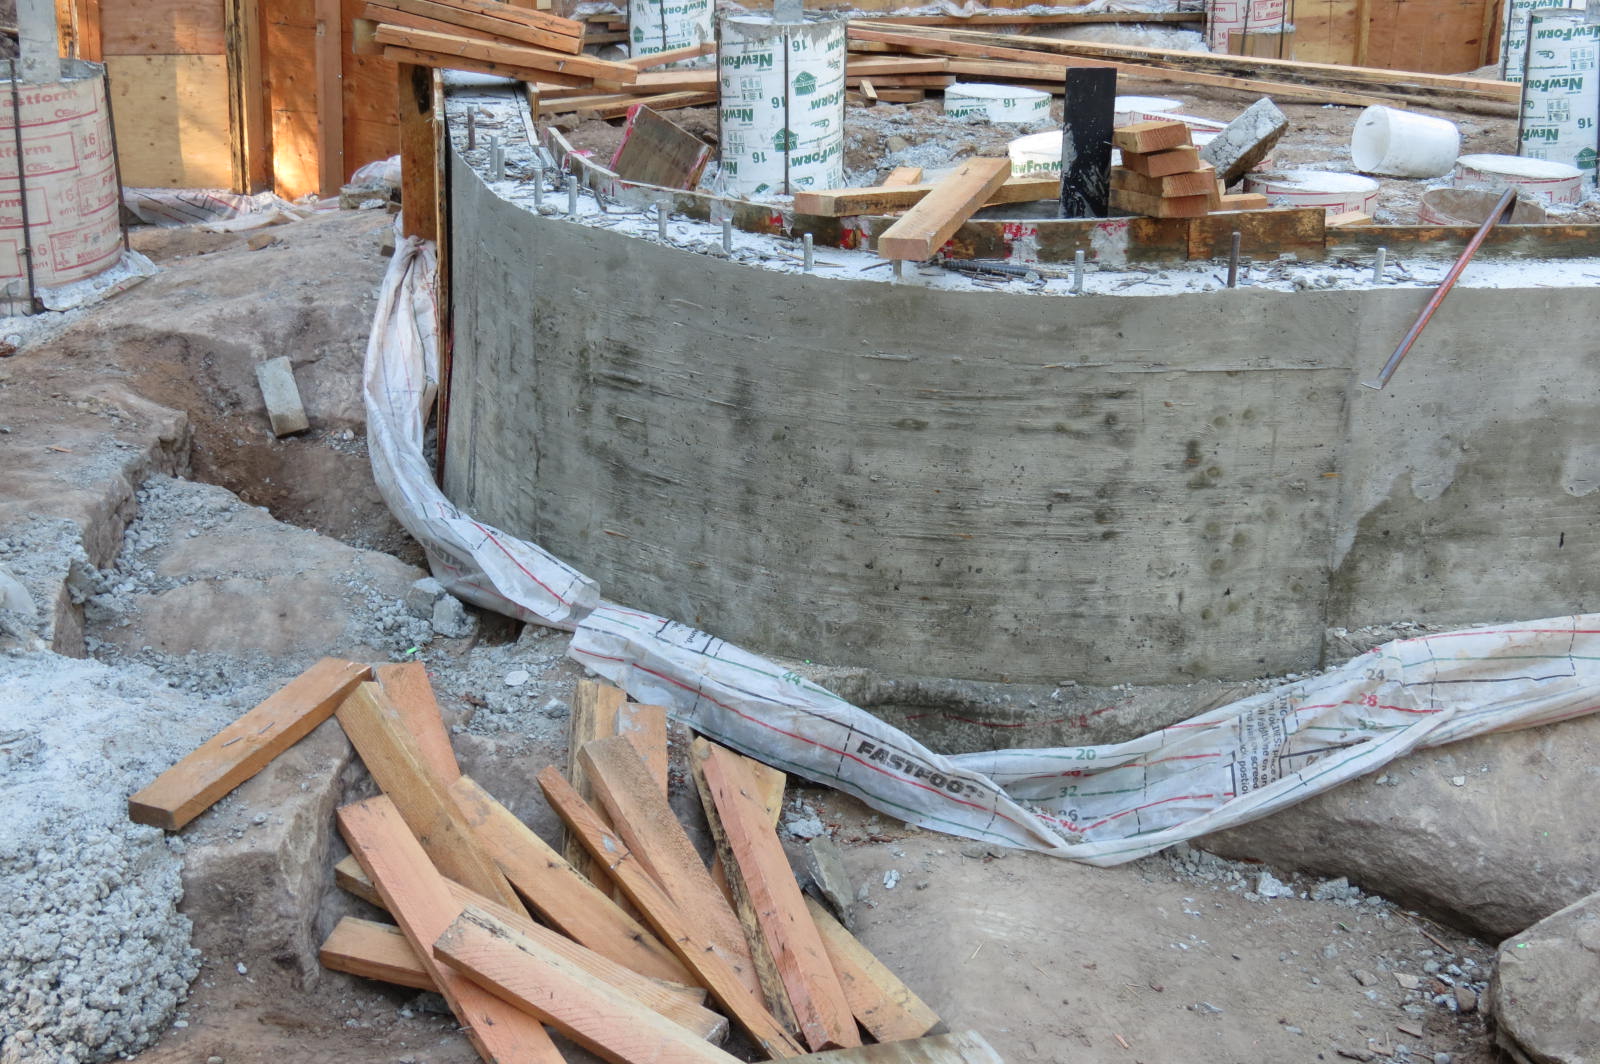
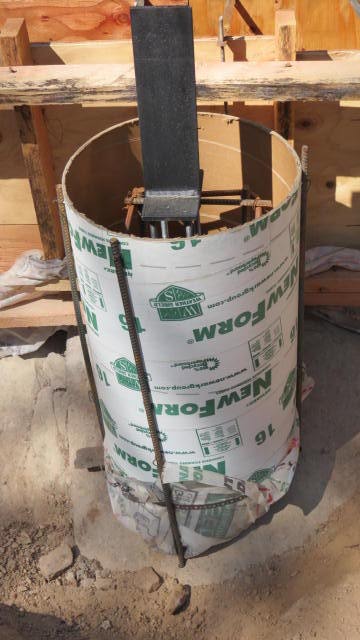
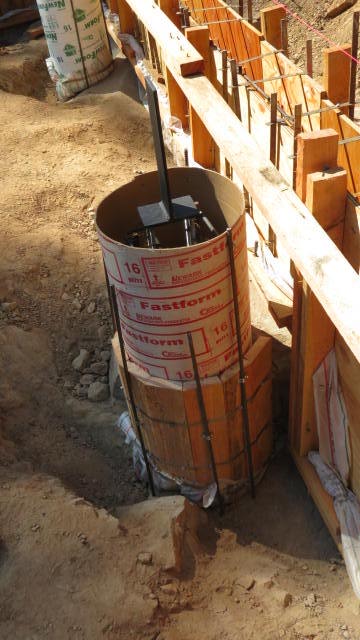
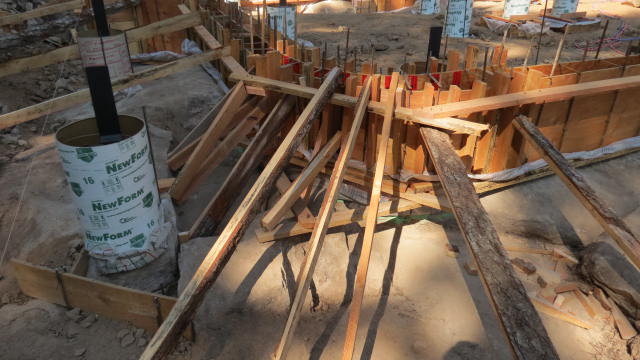
Two curved ‘Hippie’ walls – self-imposed millstones around my neck – were achieved, at my dad’s suggestion, by making vertical slices not quite through the plywood with a circular saw and plenty of heaving, bending and swearing. I formed twenty one piers with paper sonotubes cut to fit and fixed at the base to form bag material with giant homemade hose clamps and plumbed and secured with rebar embedded in the rock.
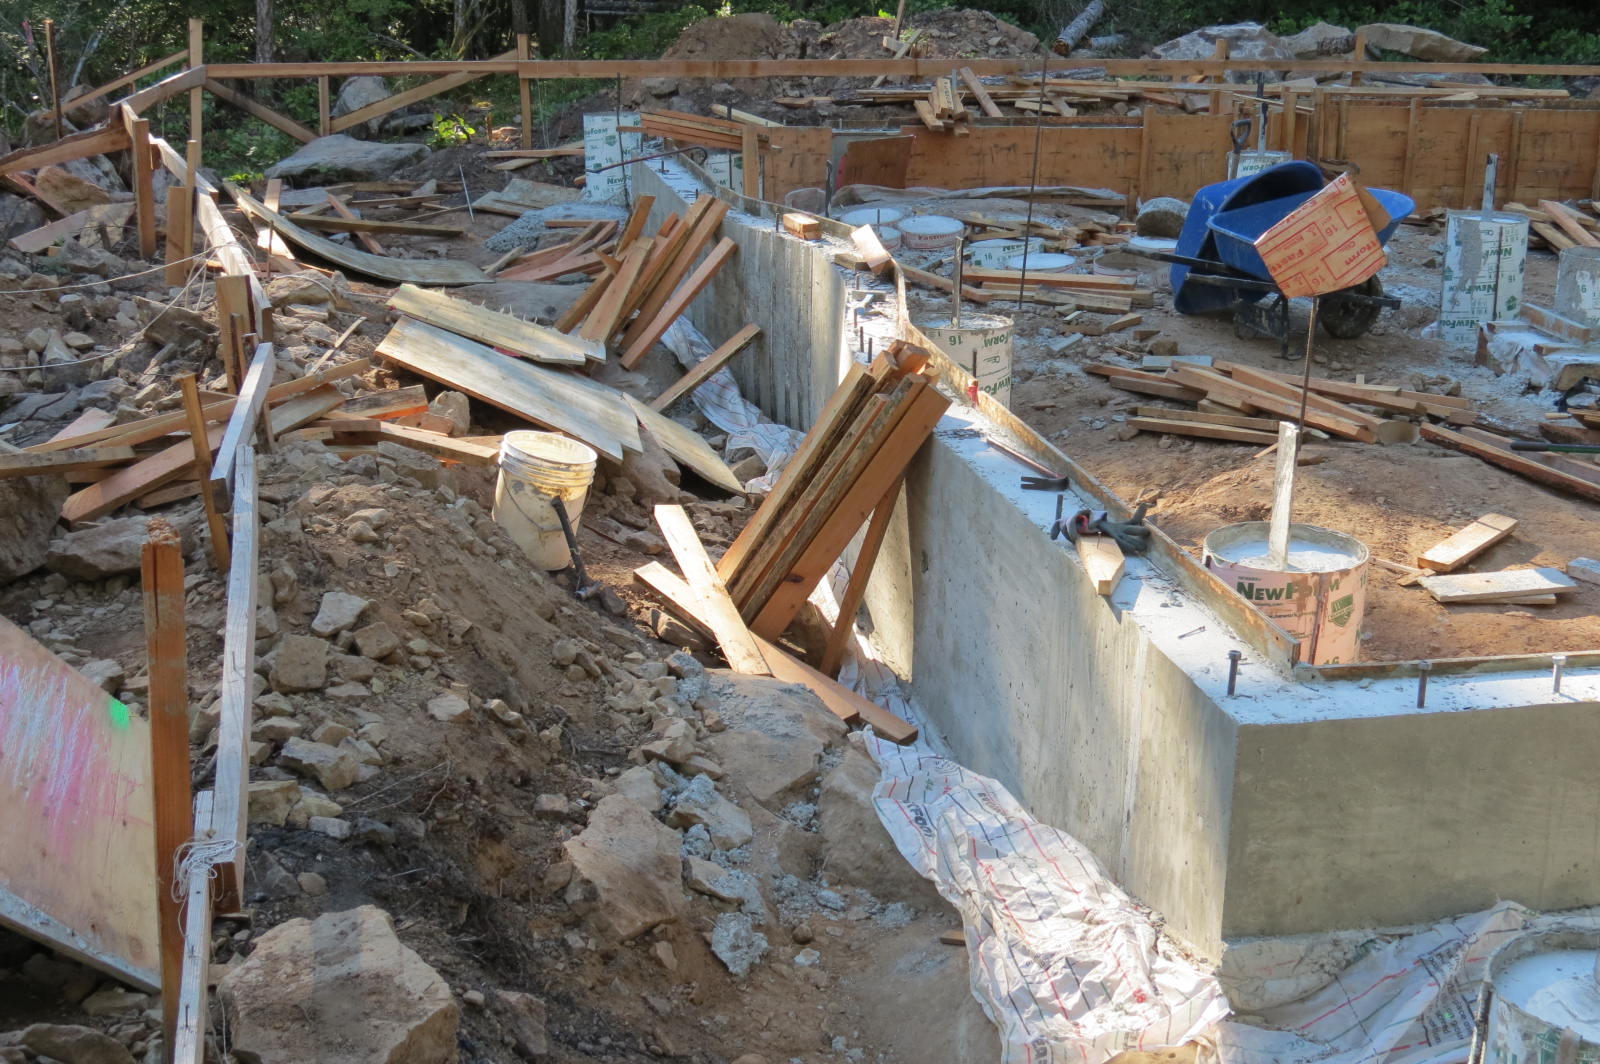
A mere seven weeks later we were ready for the building inspector and final bracing. With a green light from my structural engineer, the building inspector waved it through and I placed an order for 11.5 cubic metres of concrete and a pump truck.
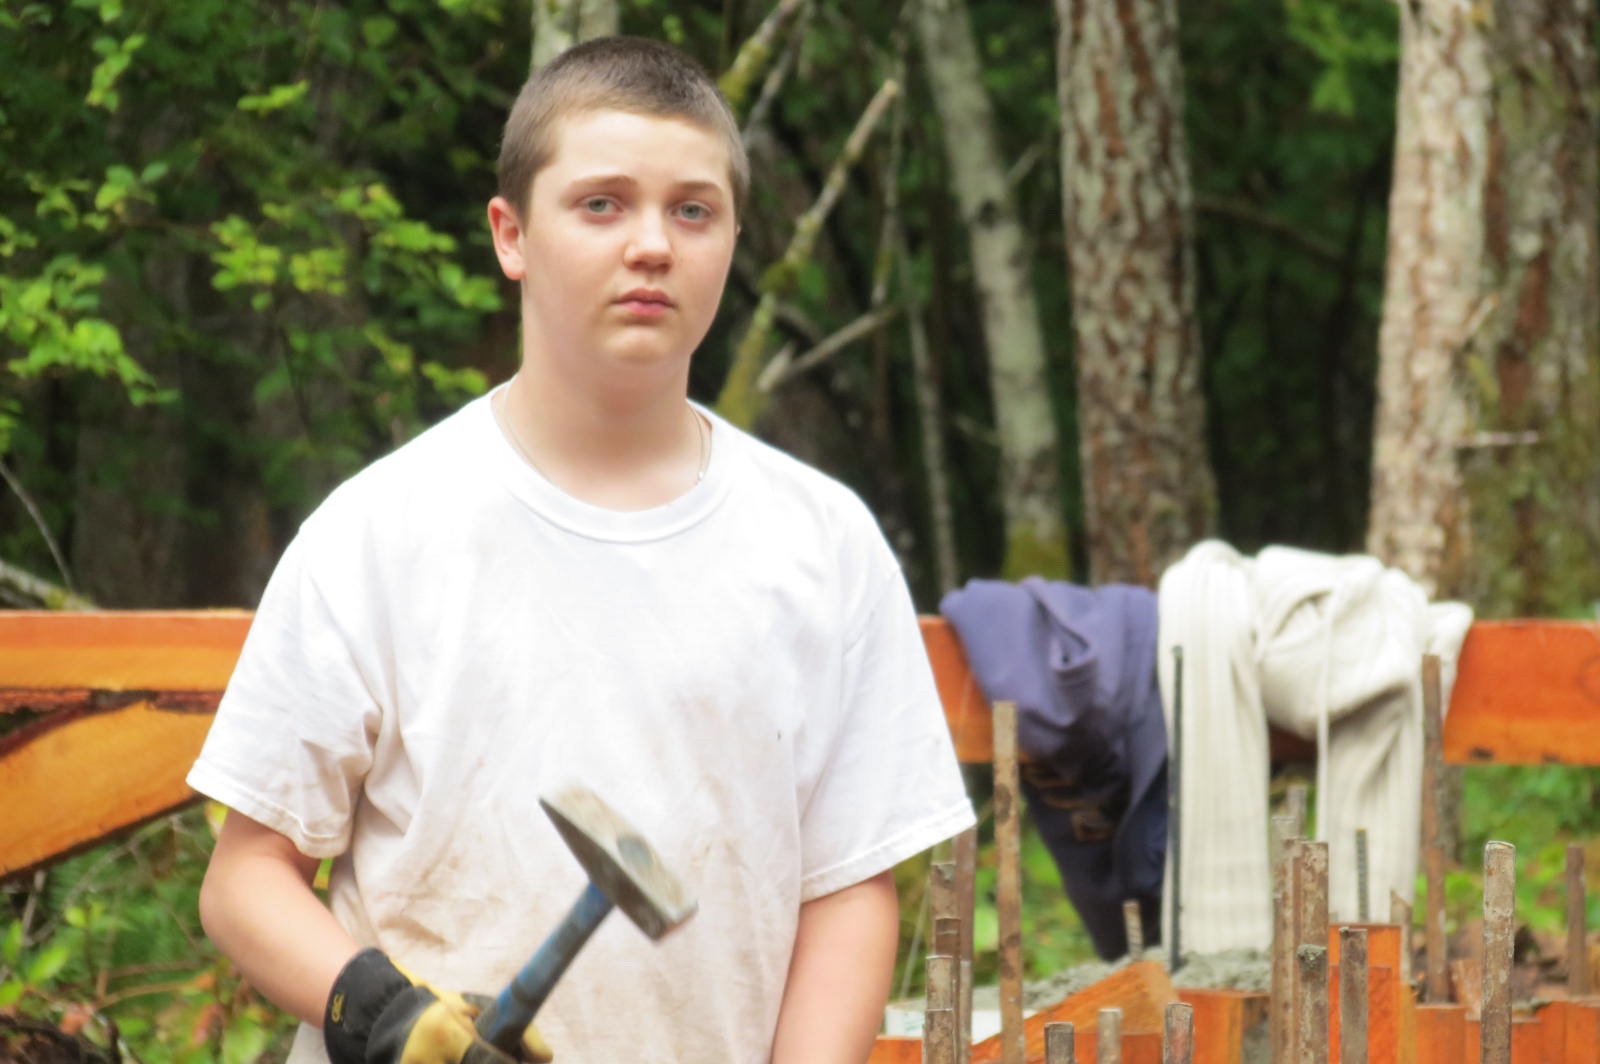
With three days to go it was all hands on deck. My mum, who was visiting, moved 2x4s, hauled bracing, installed the pour strip, stickhandled Mia and baked cinnamon buns. I showed my nephew Andrew how to use a circular saw and he hauled and cut 2X4s like a demon. Like a Trojan, Karen tackled the inaccessible and tedious task of methodically air nailing plywood strips over the joint between the forms and fabric to reduce splodge and the chances of a blow-out. Our neighbour John appeared out of the woods with a framing hammer on his tool belt and spent three days putting in bracing.
On July 24 at 8pm in a steady rain, our first in a month or more, I put in the last brace and called it quits with 21 items crossed off my ‘to-do’ list. Eleven hours to spare before the concrete trucks arrived on the 7:05 am ferry.
Next up, ‘The Big Pour’.
But first, a load of photos for my dad (and you other anoraks like my brother) who are into this foundation stuff.

Rebar and form bag awaiting forms
Pier rebar and custom post tie-downs wired in place
The uneven rock and the footer 2X4s for our curved wall


I braced the hell out of the curved wall, an inherent weak point in the forms